Quick Start Guide
General View
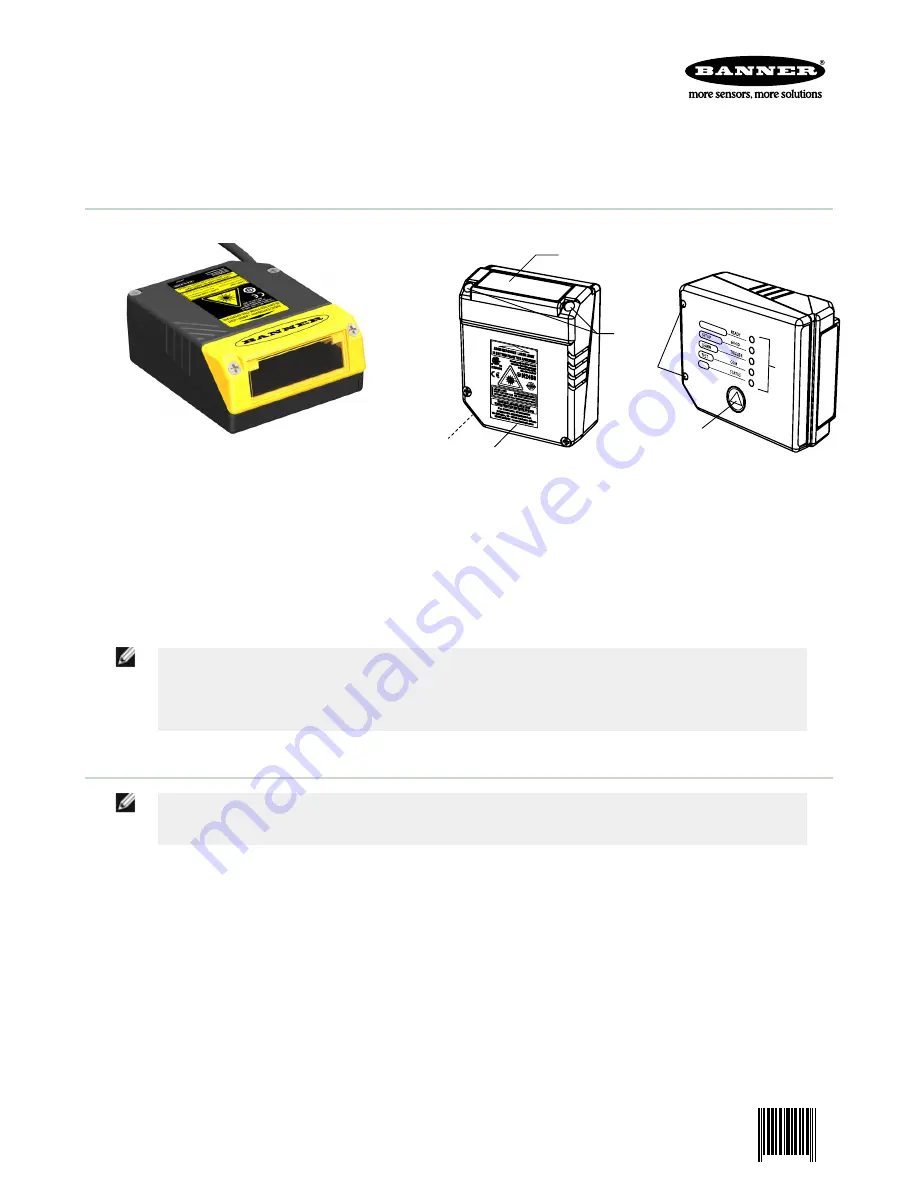
1
2
5
6
7
4
3
1 = Laser Beam Output Window
2 = POWER ON LED
3 = Warning and Device Class Labels
4 = Accessory Mounting Holes
5 = Mounting Holes
6 = LEDs
7 = Push Button
NOTE:
The Quick Start Guide describes stand-alone application. For other types of installations, such as ID-
NET
™
, Pass-Through, Multiplexer Layout, etc. and for a complete scanner configuration using
GeniusPlus configuration program, refer to the TCNM-AD/EX Manual.
STEP 1 – Connect the System
NOTE: This section illustrates a standalone application. For a pass-through installation, refer to the
appropriate section. For complete scanner configuration using the GeniusPlus configuration program,
refer to the Context-Sensitive Help On-Line.
To connect the system in a standalone configuration, you need the hardware indicated below. In this layout, the data is
transmitted to the Host on the main serial interface.
•
In Local Echo communication mode, data is transmitted on the RS-232 auxiliary interface independently from the
main interface selection.
•
When On Line Operating mode is used, the scanner is activated by an External Trigger (photoelectric sensor) when
the object enters its reading zone.
TCNM-AD Barcode Scanner
P/N 175718 Rev. A
29 January 2014
0 175718
7