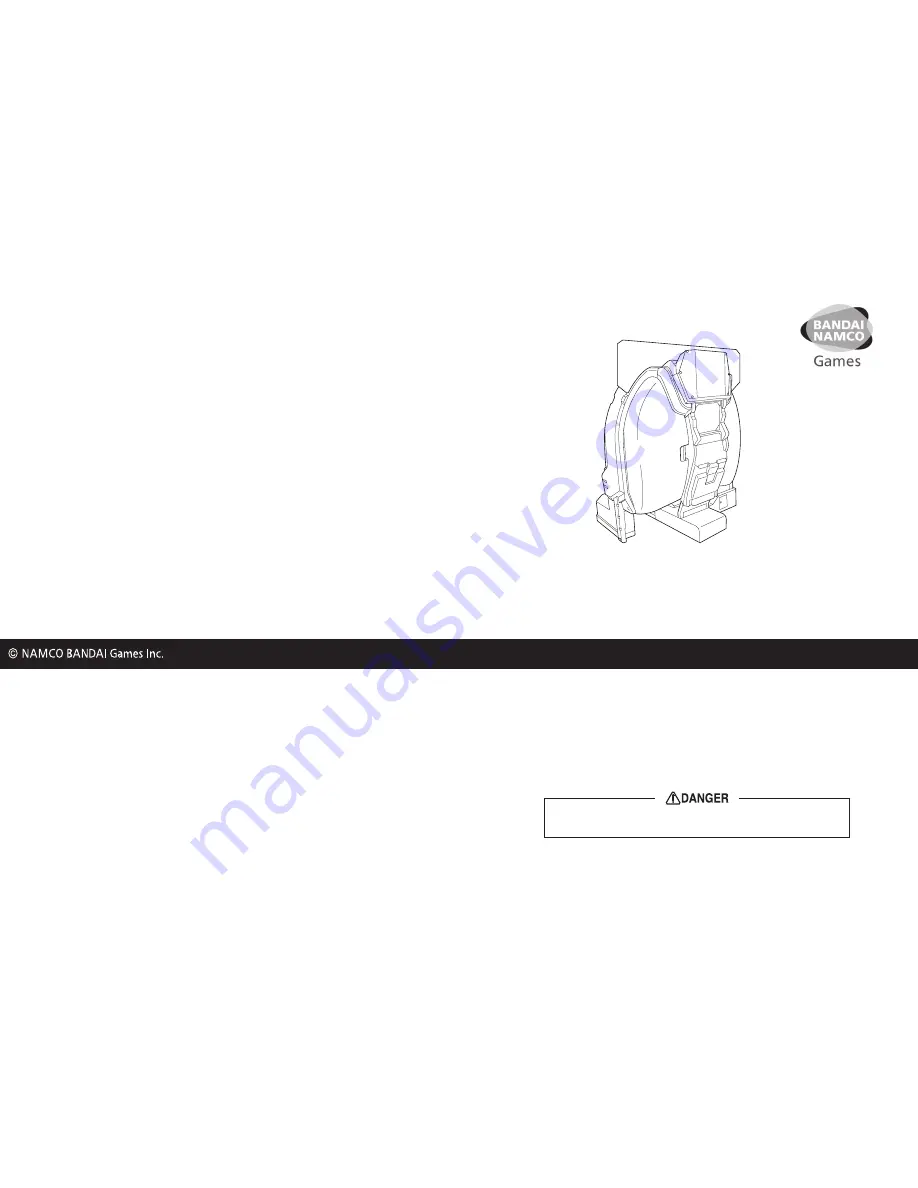
background image

MACH STORM

MACH ST

ORM

Operation Manual

z

z

To ensure safe operation of the machine, be sure to read this Operation Manual before use.

z

z

Keep this Operation Manual in a safe place for quick access whenever needed.

The actual product may differ slightly from the illustrations in this manual.

The specifications of the machine and the contents of this operation manual are subject to change without prior notice due to product improvements.

Operation Manual (Second Edition)

2716001301

NAMCO BANDAI Games Inc.

Part No: 

735-101

Second Edition Published in April 2014

NAMCO BANDAI Games Inc.

Summary of Contents for MACH STORM

Page 1: ...access whenever needed The actual product may differ slightly from the illustrations in this manual The specifications of the machine and the contents of this operation manual are subject to change without prior notice due to product improvements Operation Manual Second Edition 2716001301 NAMCO BANDAI Games Inc Part No 735 101 Second Edition Published in April 2014 NAMCO BANDAI Games Inc ...

Page 2: ...ntain and dispose of the machine How to make full use of the machine s functions and operate it correctly How to ensure the safety of players and bystanders Contact for Machine and Machine Repair Inquiries For inquiries regarding the machine or machine repairs contact your distributor The copyrights trademarks and other rights used by the machine are noted at the end of this Operation Manual ...

Page 3: ...Failure to avoid these risks may result in light injury or damage to other property Notes about functionality that are not linked to safety are indicated with the following symbol Information about product functions or protection 1 2 Definition of Technician This Operation Manual is designed for arcade personnel However the sections marked Must be performed by a technician in the Table of Contents...

Page 4: ... other devices or the wall Do not do anything else that might damage the power cord z z Do not expose the power cord and power cord plug to water Doing so may result in electric shock or electrical leakage z z Do not touch the power cord plug with wet hands Doing so may result in electric shock z z The power capacity of the machine is maximum current consumption 3 2 A in case of AC 230 V specifica...

Page 5: ...gh the ventilation holes or other openings If the lamp bursts the tiny amount of mercury gas sealed inside the lamp may be discharged together with glass particles from the ventilation holes of the projector unit or other openings z z Check the lamp operating time occasionally with the Test mode and prepare a new lamp when the replacement time approaches See 7 4 4 4 PROJECTOR TEST If the lamp brea...

Page 6: ...sure that the warning labels attached to the machine are always clearly visible install the machine in an appropriate location with ample illumination and keep the labels clean at all times Also make sure that the labels are not hidden by other machines or objects Do not remove or alter the warning labels If a warning label becomes excessively dirty or damaged replace it with a new one To order wa...

Page 7: ... Test Mode Troubleshooting Caution sticker Projector EXP Part No 461 621 Danger sticker Watch your head POD EXP Part No 461 539 Warning sticker Service B EXP Part No 461 539 Caution sticker Finger pinching POD EXP Part No 461 627 Caution sticker Capacity limit POD EXP Part No 461 620 ...

Page 8: ...6 1 Safety Precautions Be sure to read to ensure safe operation Projector unit LVP FD630 V1 ...

Page 9: ... 20 6 2 2 Loading to and Unloading from a Vehicle 22 6 2 3 Transportation Using a Vehicle 23 7 Operation 24 7 1 Pre operation Inspection 25 7 1 1 Safety Inspection 25 7 1 2 Function Inspection After Power On 26 7 2 Playing the Game 27 7 2 1 Game Flow 27 7 3 Adjustment 29 7 3 1 Turning the Power Switch On 29 7 3 2 Adjustment Switches 30 7 4 Test Mode 31 7 4 1 Description of the Main Menu Screen MEN...

Page 10: ...rmed by a technician 86 8B 2 3 Throttle and Control Lever Assemblies Must be performed by a technician 87 8B 2 4 Seat Assembly Must be performed by a technician 88 8B 3 Error Displays Must be performed by a technician 89 8B 4 Network Trouble 91 8B 5 Removing and Installing Assemblies and Parts 92 8B 5 1 Machine Must be performed by a technician 92 8B 6 Replacing and Adjusting the Projector Unit 14...

Page 11: ...0 V specifications 3 2 A AC 120 V specifications 6 3 A 4 Display unit 180 dome screen projector with special lens 5 Dimensions 1 When installed Main unit Width W 1 880 x Depth D 1 620 x Height H 2 060 mm Installation size Asian specifications Width W 1 880 x Depth D 1 620 x Height H 2 300 mm U S and European specifications Width W 1 880 x Depth D 1 620 x Height H 2 540 mm 1 620 1 880 2 300 Asian s...

Page 12: ...10 2 Specifications 2 When disassembled Front assembly Width W 1 780 x Depth D 900 x Height H 1 940 mm 1780 1940 900 Rear assembly Width W 1 810 x Depth D 985 x Height H 2 060 mm 1810 2060 985 ...

Page 13: ...ions Test Mode Troubleshooting Projector unit Width W 520 x Depth D 480 x Height H 160 mm LVP FD630 V1 480 160 520 7 Weight 1 When installed 365 kg 2 When disassembled Front assembly 175 kg Rear assembly 180 kg Projector unit 10 kg ...

Page 14: ...es If any items are missing contact your distributor The packing boxes are reused when transporting the machine so store them in a safe place and do not dispose of them Projector packing box 6 7 Packed inside the cashbox 8 to 13 25 29 30 32 to 35 Packed inside the box 20 21 4 5 14 to 19 23 26 27 28 Cardboard behind seat back 22 1 2 3 25 31 Rear assembly Front assembly ...

Page 15: ...es for remote controller Size AAA 2 8 Torx bolt silver M5 x 12 10 bolts used on page 62 2 bolts used on page 70 4 bolts used on page 72 16 9 Torx bolt silver M5 x 8 Used on page 69 4 10 Torx bolt black M5 x 12 Used on pages 61 and 62 8 11 Flange socket bolt M8 x 16 Used on pages 59 and 60 16 12 Flange socket bolt M6 x 14 Used on page 67 2 13 Flat washer large ø25 x ø5 5 Used on page 69 4 14 Side j...

Page 16: ... used for U S and European specifications 1 28 Hole cover U S specifications only 1 29 Phillips pan head screw with flat and spring washers M4 x 14 U S specifications only 4 30 Countersunk nut with washer M8 U S specifications only 6 31 Coin door key U S and European specifications only 2 32 Flat washer large ø16 x ø5 Used on page 62 4 33 Padlock supplied with a key One for European specifications...

Page 17: ...Fan Game PC board Front assembly Coin door Coin assembly Control lever assembly Projector assembly Seat assembly Throttle lever assembly Door Camera POP Power cord Not required for U S and European specifications Main power switch Fuse LAN cable Service panel Service door Fan outlet System power switch Top cover Back lamp ...

Page 18: ...Adjuster Adjustment on page 63 5 1 Installation Conditions 5 1 1 Safety Inspection z z Do not block the ventilation holes of the machine with any objects or a wall etc If the ventilation holes are blocked the inside of the machine may become hot which may result in fire or malfunction z z The machine is designed for indoor use Never install the machine outdoors or in the following locations A loca...

Page 19: ... z When installing the machine create a play zone approximately as shown in the figure below Be sure to secure this play zone as it is also needed for service work z z A ceiling height of 2 m 35 cm or more is required for Asian specifications and 2 m 60 cm or more for U S and European specifications 1 Play zone example 1 m or more 1 m or more 1 m or more 1 m or more 1 m or more 50cm or more 3 m 55...

Page 20: ... Corridors Entryways and corridors must be larger than the dimensions noted below Front assembly Width W 1 780 x Depth D 900 x Height H 1 940 mm Weight 175 kg Rear assembly Width W 1 810 x Depth D 985 x Height H 2 060 mm Weight 180 kg The delivery route must be sufficiently larger than the above dimensions ...

Page 21: ... moving it up or down a step z z Even when moving the machine only a short distance be sure to raise the level adjusters to their highest level See 8A 1 1 4 Level Adjuster Adjustment on page 63 z z Be careful not to apply force to the rear window door and other acrylic molded parts when moving the machine z z When disassembling the machine into the front and rear assemblies for movement attach the...

Page 22: ... rear assemblies See 8A 1 1 Assembling the Machine on page 56 z z Transporting the fully assembled machine may result in an accident z z When transporting the machine manually be sure to use the following number of people Overburdening yourself may result in accident or injury Front assembly 175 kg 7 people or more Rear assembly 180 kg 9 people or more Projector unit 10 kg 1 person or more Front a...

Page 23: ... from the rear assembly After transporting the machine manually reassemble the machine z z Be careful not to apply force to the screen when transporting the front assembly manually z z The front assembly has a height of 1 940 mm Be careful not to bump the ceiling z z Be careful not to apply force to the rear window door and other acrylic molded parts when transporting the rear assembly manually z ...

Page 24: ...wing number of people Overburdening yourself may result in accident or injury Front assembly 175 kg 7 people or more Rear assembly 180 kg 9 people or more Projector unit 10 kg 1 person or more z z When using a forklift to transport the machine observe the following Failure to observe the following may result in an accident such as the machine falling over Make sure that the machine is disassembled...

Page 25: ...n in the figure below Place blankets or other shock absorbing material between the machine and the ropes or belts to protect the machine surfaces z z Be sure to pack the projector unit in the dedicated packing box for transportation z z Place Styrofoam or other shock absorbing material between the machine and the truck bed and any other equipment or items to protect the machine surfaces z z When t...

Page 26: ...distributor z z In order to ensure safe use of the machine be sure to perform the pre operation inspection 7 1 Pre operation Inspection on page 25 and service 8B Service on page 83 described in this Operation Manual z z Omitting these inspections or service may result in an accident z z If players start feeling ill because of the game images or light stimulation they must stop playing and take a b...

Page 27: ...the machine check the following locations This is required to prevent accident or injury Are all warning labels legible See 1 4 Machine Warning Labels on page 4 Are all level adjusters adjusted properly so that the machine is stable See 8A 1 1 4 Level Adjuster Adjustment on page 63 Is the specified play zone provided See 5 1 2 Play Zone on page 17 Are the power cord and LAN cable laid out safely s...

Page 28: ...rface is the input range normal and other input devices See 7 4 4 2 SWITCH TEST on page 37 Check the audio Is sound produced by each speaker See 7 4 6 SOUND TEST on page 42 Set the cabinet volume within the range that allows the player to hear alarms and warning announcements within the operating facility Check that the various lights light up See 7 4 4 3 OUTPUT TEST on page 38 Check the displayed...

Page 29: ...ne gun button to start game play 2 Selecting the mission When the aircraft reaches the takeoff position tilt the throttle lever to select the sortie mission and press the missile button or squeeze the machine gun button to enter the selection There are five missions and a difficulty is set for each mission 3 Taking off from the aircraft carrier Tilt the throttle lever forward to take off from the ...

Page 30: ...time limit when shot down 2 Quick kill and multi lock on missiles When the player shoots down an enemy craft within a certain time quick kill the multi lock on gauge at the bottom of the screen increases When the multi lock on gauge becomes full multi lock on missiles can be fired enabling to shoot down multiple enemy craft at once Set the number of credits required for retry and extra mission gam...

Page 31: ...itch may not be set to ON Check the system power switch by referring to 7 3 2 Adjustment Switches on page 30 Main power switch ON OFF z z When turning the power off and then on again do not turn the power back on immediately and be sure to observe the following condition When using the main power switch It takes time to restart the projector so wait 10 minutes or more after turning off the main po...

Page 32: ...1 c Select switch In Test mode flip this switch up or down to select an item or setting numerical value d Enter switch green After selecting an item or setting numerical value with the Select switch press this switch to enter or execute the selection e System power switch This switch is used to forcibly reboot the game PC board when an abnormality occurs in the system To reboot the game PC board s...

Page 33: ... 2 I O TEST MONITOR TEST SOUND TEST BOOKKEEPING OTHERS NETWORK STATUS NBLINE POINTS LAST GAME STATUS LEFT CREDIT 1 USE CREDIT 3 MENU screen c d e f g h i j k a b When an error occurs in Test mode the error code and error name are displayed at the upper right of the MENU screen Item Description Reference section a COIN OPTIONS Game cost settings Page 33 b GAME OPTIONS Game contents and other settin...

Page 34: ...scription Reference section j LEFT CREDIT Number of unused credits immediately before switching to Test mode k USE CREDIT Number of credits being used by the player during game play immediately before switching to Test mode ...

Page 35: ...ay The setting range is 1 to 20 Default 2 8 for U S and European specifications b RETRY COST Sets the number of credits required for retry game play The setting range is 1 to 20 Default 1 4 for U S and European specifications c EXTRA COST Sets the number of credits required for extra mission game play The setting range is 1 to 20 Default 2 8 for U S and European specifications d FREE PLAY Free pla...

Page 36: ... making it easier to get shot down The setting range is from A VERY EASY to E VERY HARD Default C NORMAL b NO DEAD MODE Sets the mode where the player s aircraft is not shot down even if it receives damage during game play Default OFF c RETRY Sets the function to play the same mission again from the start when a mission is failed Default ON d EXTRA MISSION Sets the time limit mission function to a...

Page 37: ...XIT I O PCB CONNECT OK FIRMWARE VERSION NBGI WinArc Ver2 03 JPN a b c d e f g Item Description a I F CALIBRATION Initializes the controls levers b SWITCH TEST Tests each switch and control c OUTPUT TEST Tests the fan etc d PROJECTOR TEST Checks the projector operation status e CAMERA TEST Tests the camera f I O PCB Displays CONNECT OK when the I O PCB connection status is normal g FIRMWARE VERSION...

Page 38: ...lete the initialization process The screen will automatically switch to the SWITCH TEST display STEP 4 Confirm the status of the levers in the SWITCH TEST screen EXIT ENTER SW ENTER Move the levers all the way forward back right and left then release your hands from the levers and press the Service switch to initialize the levers After initialize the controls levers the screen will automatically s...

Page 39: ...s set to ON This screen is accessed in Test mode so this is naturally ON e UP SELECT Indicates UP while the Select switch is flipped up f DOWN SELECT Indicates DOWN while the Select switch is flipped down g ENTER Indicates ON while the Enter switch is pressed h MACHINE GUN Indicates ON while the trigger switch on the control lever is squeezed i MISSILE Indicates ON while the button switch on the c...

Page 40: ...ion motor strength d LED REAR COVER When this is set to ON the back lamp is lit with the color set by the COLOR item e COLOR Sets the back lamp color The setting value can be selected from WHITE RED BLUE GREEN or CUSTOM Default WHITE When set to CUSTOM the color corresponding to the R G and B setting values is set f R This can be selected when CUSTOM is selected by the COLOR item Sets the red colo...

Page 41: ...ctor c LAMP TIME Indicates the current lamp operation time The color and message contents change according to the time 0h to 3749h Displayed in white The time remaining until 5000 hours is also displayed at the bottom of the screen 3750h to 4749h Displayed in orange This indicates that the lamp replacement time is approaching The time remaining until 5000 hours and a notice are also displayed at t...

Page 42: ...witch up or down to select the item to be changed The selected item blinks CAMERA TEST screen CAMERA TEST SELECT SW CHOOSE ENTER SW ENTER TAKE EXIT a Item Description a TAKE Takes a still image with the camera The still image is displayed in the finder Press the Enter switch again while the still image is displayed to return to the streaming video display Select EXIT and press the Enter switch to ...

Page 43: ...DATION PATTERN EXIT SELECT SW CHOOSE ENTER SW ENTER MONITOR TEST screen a b c d e f g Item Description a GRADATION PATTERN Displays a 16 gradation pattern b VIEW ANGLE ADJUST PATTERN Displays an viewing angle adjustment pattern See 8B 6 2 Adjusting the Projector Position on page 155 c FOCUS ADJUST PATTERN Displays a focus adjustment pattern d FULL WHITE Displays an all white pattern e FACTORY LENS...

Page 44: ...ume Default 10 Setting range 0 to 15 ATTRACT Adjusts the volume in Attract demo mode Default 10 Setting range 0 to 15 b SEPARATE CHECK GAME VOLUME SEAT L R Plays the test sound from the speakers installed on the seat c SEPARATE CHECK GAME VOLUME SIDE L R Plays the test sound from the speakers installed on the right and left of the cabinet d SEPARATE CHECK GAME VOLUME CENTER AND WOOFER Plays the te...

Page 45: ...NG screen a b c d e f g h i j k l m Item Description a POWER ON TIME Cumulative total power on time displayed in real time b TOTAL PLAY TIME Cumulative total play time c AVE PLAY TIME Average play time d PLAY ON RATIO Utilization ratio Cumulative total play time Cumulative total power on time e PLAY COUNT Total normal mission count f RETRY COUNT Total retry count g EXTRA COUNT Total extra mission ...

Page 46: ...FRI 14 12 43 UTC 3 1 1 COIN ERROR 1 04 Oct 2013 FRI 14 12 42 UTC 4 1 1 COIN ERROR 1 04 Oct 2013 FRI 14 12 33 UTC 5 1 2 COIN ERROR 2 04 Oct 2013 FRI 13 22 49 UTC 6 1 1 COIN ERROR 1 04 Oct 2013 FRI 13 22 40 UTC 7 1 1 COIN ERROR 1 04 Oct 2013 FRI 13 22 28 UTC 8 3 1 I O ERROR 1 01 Oct 2013 TUE 15 21 28 UTC 9 1 1 COIN ERROR 1 01 Oct 2013 TUE 11 46 08 UTC 10 19 22 USB DONGLE ERROR 01 Oct 2013 TUE 10 32 ...

Page 47: ...MEMORY INITIALIZE EXIT SELECT SW CHOOSE ENTER SW ENTER OTHERS screen a b c d e f g Item Description a ROM Displays the version of the program on the hard disc b CLOCK Displays the clock c S N Displays the serial number of the software d LANGUAGE Used to select the language e MAINTENANCE TIME SETTING Sets the maintenance time for automatically restarting the game PC board f CLOCK SETTING Used to se...

Page 48: ... the item The selected item blinks CLOCK SETTING CLOCK 04 Oct 2013 FRI 11 24 45 YEAR 13 2000 MONTH 10 Oct DAY 04 HOUR 11 MINUTE 24 SET EXIT SELECT SW CHOOSE ENTER SW ENTER CLOCK SETTING screen a b c d e Item Description a YEAR Sets the year b MONTH Sets the month c DAY Sets the day d HOUR Sets the hour e MINUTE Sets the minute f SET Sets the time Applies the values of YEAR to MINUTE above to the c...

Page 49: ...OCK 04 Oct 2013 FRI 11 10 00 UTC MAINTENANCE TIME 07 00 UTC HOUR 07 MINUTE 00 SET EXIT SELECT SW CHOOSE ENTER SW ENTER MAINTENANCE TIME SETTING screen a b c d Item Description a MAINTENANCE TIME Displays the maintenance time Default 07 00 In the online version of the software the time is displayed as the coordinated universal time UTC b HOUR Hour setting c MINUTE Minute setting d SET Sets the main...

Page 50: ... items are displayed PCB ID Serial ID for NBLINE authentication GAME ID Game ID for NBLINE authentication IP ADDRESS IP address of this cabinet BROADCAST IP address of default gateway SUBNETMASK Subnet mask setting value PRIMARY DNS IP address of primary DNS NBLINE ROUTER Connection status with router NBLINE AUTH NBLINE authentication results BNG SERVER Connection status with game server b Offline...

Page 51: ...49 7 Operation Operation Test Mode Troubleshooting Test Mode Troubleshooting Press the Enter switch to enter the selected item Select EXIT and press the Enter switch to return to the MENU screen ...

Page 52: ...BLINE authentication b NBLINE AUTH Displays the NBLINE authentication results c POINT REMAIN Displays the remaining number of NBLINE points held by the machine d Alert and error message When the number of NBLINE points becomes low or runs out the following messages are displayed When the remaining number of NBLINE points is 400 points or less LOW NBLINE POINTS Playable NBLINE point is low Please c...

Page 53: ...cannot be played In this case 22 1 ERROR is displayed on the screen When the limit of 240 hours 10 days is exceeded during game play game play can continue until the game is over To enable game play again resolve the network trouble and connect to NBLINE 3 1 The network connection status can be checked in Test mode See 7 4 9 NETWORK STATUS on page 48 2 The remaining offline operation time can be c...

Page 54: ...st on the screen surface using a soft cloth moistened with a small amount of water then wipe dry using a dry soft cloth Oval dome 2 Door and Rear Window Wipe away any dirt or dust using a dry soft cloth When the door and rear window become extremely dirty wipe away the dirt using a cloth moistened with a small amount of water then wipe dry using a dry soft cloth Door Rear window ...

Page 55: ... new one After cleaning install the filters by reversing the procedure 4 Cleaning the Lens Cover Open the projector cover and front lid of the projector assembly see 8A 1 1 5 Installing the Projector Unit on page 64 and wipe away any dirt or dust on both sides of the lens cover with a dry cloth When the door and rear window become extremely dirty wipe away the dirt using a cloth moistened with a s...

Page 56: ...oted in the table below When the lamp reaches the end of its life the machine stops even if a customer is currently playing a game Behavior when the power switch is turned on Status Lamp operation time Screen display after the game PC board is started up Caution urged 3 750 to 4 750 hours The projector lamp is due for replacement soon Replacement time 4 750 to 5 000 hours Please replace the projec...

Page 57: ... hour operation refer to 2 Setting the Maintenance Time MAINTENANCE TIME SETTING on page 47 and set the maintenance time The game PC board automatically restarts approximately 3 minutes when Attract mode is entered next after the maintenance time is reached so set the time to a time period during which there is usually little game play z z There is no need to use this function when the power is tu...

Page 58: ...mbly and Rear Assembly z z Be sure to secure sufficient work space z z If the door was secured using a cord or rope to restrain it from opening during transport remove the restraint beforehand so that the door can open and close Bring the front assembly and rear assembly close to each other Remove the two Torx bolts M5 x 12 and remove the side flange guard R Use the service key to unlock the PCB r...

Page 59: ... Connect the four connectors from the front assembly side to the connectors of the rear assembly and lead the two connectors from the rear assembly side into the front assembly Rear assembly Front assembly Two connectors to be led into the front assembly Lead these two connectors into the front assembly Connect these four connectors to the panel mount of the rear assembly Rear assembly Four connec...

Page 60: ...t the USB dongle into the USB 3 slot Rear assembly Front assembly Connector Connector Game PC board USB dongle USB dongle Connect to SERIAL1 Projector communication Serial 1 Projector video Connect to DVI1 VIDEO 1 Bundle the rear side cables together using the clamps bundling the front side cables Clamp Install the PCB duct and PCB roof by reversing the procedure in steps and ...

Page 61: ...nt and rear assemblies together the cover bracket protrusions of the rear assembly may contact the front assembly depending on the floor condition or other factors so push strongly while being careful not to pinch your hands or other items Align the base joint on the front assembly side and the bolt holes on the rear assembly side and use two supplied flange socket bolts M8 x 16 to temporarily sec...

Page 62: ...ons and fold shapes to identify L and R Be careful not to mistake L and R The slots are located on the front assembly Temporarily secure using flange socket bolts M8 x 16 Side joint L The opposite side is the side joint R Hold the front and rear assemblies together so that there is no gap between the joining surfaces in the location shown in the figure and fully tighten the twelve flange socket bo...

Page 63: ...e rear joint frame z z The rear joint frame is a required part during disassembly and transportation so be sure to keep it together with the bolts in a safe place Flange socket bolt M8 x 16 Rear joint frame Rear assembly 3 Installing the Molded Covers Use four supplied Torx bolts black M5 x 12 to install the supplied lower side cover L Door Torx bolt black M5 x 12 Torx bolt black M5 x 12 Lower sid...

Page 64: ...r L onto the hook then install the side cover L and secure it using five supplied Torx bolts silver M5 x 12 and two flat washers ø5 x 16 Perform the same procedure to also install the side cover R Side cover L Side cover R Hook Torx bolt silver M5 x 12 Front assembly Flat washer ø16 x ø5 Flat washer ø16 x ø5 Front assembly Torx bolt silver M5 x 12 Slot in side cover R Top cover When installing the...

Page 65: ... Test Mode Troubleshooting 4 Level Adjuster Adjustment After the machine has been installed in accordance with 5 1 Installation Conditions on page 16 lower the seven level adjusters until the casters are at a height of approximately 5 mm from the floor Level adjuster Caster Approximately 5 mm ...

Page 66: ...ials are used when moving and transporting the projector unit so do not dispose of these materials Remove the two flange button bolts M4 x 10 from both sides of the projector cover Use the service key to unlock and open the projector cover Projector cover Flange button bolt M4 x 10 Service key Open the front lid upward and lock it in place When the front lid is opened up all the way it automatical...

Page 67: ...s on both sides of the projector case z z Be very careful not to bump the lens part z z Install the projector unit with the same serial number as the rear assembly If a projector unit with a different serial number is installed the video position on the dome screen may be offset The position of the serial number sticker differs for each model as shown in the figure LVP FD630 V1 Handle Fixture Proj...

Page 68: ...r unit Connector Insert the connectors aligned as shown in the figure below Front side Front side Lift up the projector unit and push it back into the projector case being careful not to pinch the cables Then hook the front side of the handles onto the fixtures to secure the projector unit Projector unit Handle Hook here ...

Page 69: ...r unit Cables Use two supplied flange socket bolts M6 x 14 to secure the projector unit to the fixtures on both sides of the projector case Projector unit Projector case Flange socket bolt M6 x 14 Remove the lens cap and secure it in the position shown in the figure to avoid losing it A hook and loop fastener is attached to the lens cap Lens cap Secure the lens cap with the hook and loop fastener ...

Page 70: ... by reversing the procedure Support the front lid with your right hand and press the lock with the finger of your left hand to release the lock Lock Push to release z z Be careful not to touch the projector lens with your bare hands Fingerprints or other dirt may prevent images from being projected properly ...

Page 71: ...age Remove the POP display from the packing box The POP display is folded in half so very carefully unfold the POP display and place it so that the POP surface is facing upward z z Spread out a sheet or take other measures to prevent the POP display from becoming dirty before unfolding the POP display POP surface Sheet Secure the POP display to the POP bracket with four Torx bolts silver M5 x 8 an...

Page 72: ... performed by a technician 70 8A Installation and Assembly Secure the POP bracket to the rear assembly with two Torx bolts silver M5 x 12 Torx bolt silver M5 x 12 POP bracket Illustration surface Rear assembly ...

Page 73: ...rking Working in an unnatural body posture may result in injury or machine damage Remove the POP light assembly from the packing box then remove the three Torx bolts silver M5 x 12 and remove the POP light cover POP light cover Torx bolt silver M5 x 12 Remove the three LED lights from the packing box and install them LED light z z When installing the LED lights be sure to carefully align the socke...

Page 74: ...bly to the top of the rear assembly and connect the connector z z When lifting up the POP light assembly to the top of the rear assembly hold the POP light assembly with the LED lights facing upward and do not subject it to strong impact Otherwise the LED lights may fall out Connector POP light assembly Top of the rear assembly Secure the POP light assembly with four Torx bolts silver M5 x 12 Torx...

Page 75: ...Lay out the LAN cable and power cord safely so that they will not cause players bystanders or passersby to trip over them z z Use the supplied power cord When there is no supplied power cord use a power cord that matches the region where the machine is used z z When laying the power cord on the floor it is recommended to use commercially available cable molding to protect the power cord z z When l...

Page 76: ... secure it with the clamp as shown in the figure below to prevent accidental disconnection Cord box assembly Clamp Insert the power cord plug into the power supply inlet Power cord Power cord Connector holder Secure the connector holder to the base of the power cord plug Lift up the lever and slide the connector holder to the base of the power cord plug AC cord clamp Insert the AC cord clamp into ...

Page 77: ... LAN cable See 8A 2 3 Turning the Power Switch On on page 77 z z When laying the LAN cable on the floor it is recommended to use commercially available cable molding to protect the cable z z Failure to observe the following instructions may result in communication trouble and prevent proper game play Be sure to connect the LAN cable correctly according to the instructions A disconnected LAN cable ...

Page 78: ...rk communication differs according to the conditions of the installation location Therefore this Operation Manual only describes an outline of the connections For inquiries regarding individual support at each installation location contact your distributor z z Be careful not to let the machine s sheet metal or other objects damage the cables extending from the machine z z Careless network system i...

Page 79: ...n using the main power switch It takes time to restart the projector so wait 10 minutes or more after turning off the main power switch before turning it back on z z When the main power switch is turned off it takes time to restart the projector Therefore when possible use the system power switch to turn off the power Turn on the main power switch Use the service key to unlock and open the service...

Page 80: ...erating the machine continuously for long times At the default this maintenance time is set to AM7 00 UTC coordinated universal time so refer to 2 Setting the Maintenance Time MAINTENANCE TIME SETTING on page 47 and change the setting to a time that will have little effect even if the game PC board is restarted during the shop operating hours It is recommended to set this maintenance time to a tim...

Page 81: ...h the installation conditions See 5 1 Installation Conditions on page 16 Are the power capacity conditions met Has the ground wire been installed Has the power cord been installed using cable molding or other means so that players and other customers do not trip over it Are images projected over the entire dome screen all the way to the edges See 8B 6 2 Adjusting the Projector Position on page 155...

Page 82: ...damage to the electronic circuits be sure to turn off the main power switch before starting this task z z Removing and installing the top cover requires standing at an elevated height Prepare an appropriate footstool and be careful when working Working in an unnatural body posture may result in injury or machine damage Remove the four Torx bolts M5 x 12 disconnect the connector and remove the POP ...

Page 83: ...ing Remove the six Torx bolts silver M5 x 8 and six flat washers ø16 x ø5 and remove the acrylic panel Flat washers ø16 x ø5 Torx bolt silver M5 x 8 Acrylic panel Remove the ten Torx bolts M5 x 12 and the flat washer ø16 x ø5 and remove the top cover Torx bolt M5 x 12 Top cover Torx bolt M5 x 12 Flat washer ø16 x ø5 ...

Page 84: ... remove the lower two hexagon socket head bolts with flat and spring washers M6 x 16 Remove the two Torx bolts silver M5 x 12 and remove the top cover Loosen these two hexagon socket head bolt with flat and spring washers M6 x 16 Remove these two hexagon socket head bolt with flat and spring washers M6 x 16 Torx bolt silver M5 x 12 Top cover Lift up slightly and remove To install perform the proce...

Page 85: ...ster Inspection Check that the level adjusters are fixed securely See 8A 1 1 4 Level Adjuster Adjustment on page 63 2 Projector Inspection Check that images are projected properly from the projector Check that the projection range of the projector matches the screen position See 8B 6 2 Adjusting the Projector Position on page 155 Check the projector installation and adjustment screws for loose scr...

Page 86: ...licon grease Shin Etsu Chemical Co Ltd G 40M or equivalent product to the stainless steel part spring stopper and shaft Also reapply grease when the lever operation becomes stiff See 8B 5 1 12 Replacing the Spring or Spring Stopper on page 113 Stainless steel part Shaft Spring stopper Stainless steel part Shaft Spring stopper Control lever Throttle lever Grease up locations ...

Page 87: ...age is not within the range of 10 V Disconnect any high capacity devices such as an air conditioner or large machine from the same line to secure the specified power supply voltage The power turns off during operation The fuse has burned out Replace with a new fuse of the specified capacity If the fuse burns out frequently there is a mechanical abnormality Page 137 Contact your distributor There i...

Page 88: ...ime is not yet complete Wait until the projector starts up The projector unit connector or adapter is disconnected Insert the connector and adapter securely Page 66 The image is out of focus The projector unit lens or lens cover is dirty Clean the projector unit lens and lens cover Page 52 The image is dark The brightness and contrast are not adjusted properly Adjust the brightness and contrast Pa...

Page 89: ...d by a technician Symptom Main cause Solution Reference page The lever does not function The analog interface has not been initialized Initialize the analog interface Page 36 A connector is disconnected Insert the connector securely Page 103 An analog interface malfunction Replace the analog interface Page 104 A button switch does not function A connector is disconnected Insert the connector secur...

Page 90: ...re is no sound coming from the seat speakers or the bottom speakers The volume setting is low Set the appropriate volume Page 42 The connector or Faston terminal is disconnected Insert the connector and Faston terminals securely Page 94 Page 99 Refer to 8B 3 Error Displays on page 89 for coin errors 2 Projector Errors on page 90 for projector errors ...

Page 91: ...ion is disconnected The USB cable is not connected correctly Page 94 5 1 ERROR Network connection failed Check the network cable connection Page 91 8 1 CAMERA ERROR The camera unit is not inserted correctly into the game PC board Check that the camera unit USB is inserted into the game PC board correctly Page 94 A camera unit malfunction Contact your distributor 19 21 USB DONGLE ERROR INVALID DONG...

Page 92: ...s not lit up red The lamp has become hot making it difficult to light Turn off the projector power wait a bit then turn on the power again If allowing the lamp to cool does not resolve the problem replace the lamp Page 143 The inside of the projector has become hot Turn off the power and clean the projector filters then turn on the power again Page 53 150 The projector lamp outer cover is open Tur...

Page 93: ... in the offline condition to enable game play even when network trouble occurs However when this time limit is exceeded new games cannot be played In this case 22 1 ERROR is displayed on the screen When the limit of 240 hours 10 days is exceeded during game play game play can continue until the game is over To enable game play again resolve the network trouble and connect to NBLINE 3 1 The network...

Page 94: ... injury to yourself or others as well as damage to the electronic circuits be sure to turn off the power switch before starting this task Turn off the main power switch See 8A 2 3 Turning the Power Switch On on page 77 Remove the two Torx bolts M5 x 12 and remove the side flange guard R Use the service key to unlock the PCB roof of the front assembly Remove the five Torx bolts M5 x 12 and remove t...

Page 95: ... PCB duct Game PC board Flange socket bolt M3 x 10 Phillips pan head screws with flat and spring washers M3 x 6 Attach the two Phillips pan head screws with flat and spring washers M3 x 6 removed from the PCB duct to the holes from where the flange socket bolts M3 x 10 were removed Disconnect the power cord Faston terminal USB dongle and 14 connectors connected to the game PC board and open the tw...

Page 96: ...p with the USB sound amplifier SERIAL 1 JV I O USB 4 AUDIO 1 AUDIO 2 AUDIO 3 VIDEO 1 Power supply power supply convertor cable No connection JV I O milky white USB cable Projector video Connect to VIDEO 1 Projector communication Camera module black USB cable Communication LAN cable Connect to AC inlet of the power supply USB dongle Audio ø3 5 stereo cable Connect to USB port No 3 Connect to SERIAL...

Page 97: ...oard When installing orient the game PC board with the ES3 X base B in the back and install it to the ES3 X base C ES3 X base C 5 1CH AMP PC board Hook the ES3 X base B here ES3 X base B ES3 X base A ES3 X base C Heat sink edge Be very careful of the sheet metal and heat sink edges and other sharp locations z z Be careful not to injure yourself on the electronic parts or sheet metal inside the Sta...

Page 98: ...lips pan head screws with flat and spring washers M4 x 10 Install the new game PC board by reversing the procedure z z When installing check the connector orientations and insert the connectors firmly until they lock securely z z When installing be careful not to pinch the connectors and harness z z After replacing the game PC board be sure to perform initialization See 7 4 4 1 I F CALIBRATION on ...

Page 99: ...ctricity If a person handles a PC board while charged with static electricity the parts on the PC board may be damaged Before handling a PC board discharge the static electricity from your body Example touching the surface of grounded metal Turn off the main power switch See 8A 2 3 Turning the Power Switch On on page 77 Remove the two Torx bolts M5 x 12 and remove the side flange guard R Use the s...

Page 100: ... Phillips pan head screws with flat and spring washers M3 x 8 and remove the NA JV S PC board Phillips pan head screws with flat and spring washer M3 x 8 NA JV S PC board Game PC board To install perform the procedure in reverse z z When installing check the connector orientations and insert the connectors firmly until they lock securely z z When installing be careful not to pinch the connectors a...

Page 101: ...ectricity If a person handles a PC board while charged with static electricity the parts on the PC board may be damaged Before handling a PC board discharge the static electricity from your body Example touching the surface of grounded metal Turn off the main power switch See 8A 2 3 Turning the Power Switch On on page 77 Remove the two Torx bolts M5 x 12 and remove the side flange guard R Use the ...

Page 102: ...P PC board Orange Black IN3 IN2 IN1 Connector Connector IN1 IN2 IN3 To install perform the procedure in reverse z z When installing check the connector orientations and insert the connectors firmly until they lock securely z z When installing connect the cables so that the harness tag indications match the PCB connector indications IN1 IN2 IN3 z z When installing be careful not to pinch the connec...

Page 103: ...y to unlock the PCB roof of the front assembly Remove the five Torx bolts M5 x 12 and remove the PCB roof See steps of 8B 5 1 1 Removing and Installing the Game PC Board on page 92 PCB roof case Side flange guard R Torx bolt black M5 x 12 Torx bolt M5 x 12 Torx bolt black M5 x 12 Bottom part of the control lever inside the front assembly Pull forward and remove Loosen the two nuts with washers M5 ...

Page 104: ...x 12 remove the upper two Torx bolts black M5 x 12 and remove the fan bracket Torx bolt black M5 x 12 Torx bolt black M5 x 12 Fan bracket Disconnect the connector and Faston tab remove the two nuts with washers M4 and remove the fan Nut with washer M4 Fan Faston tab Connector To install perform the procedure in reverse z z When installing the fan orient it so that it blows air from the outside to ...

Page 105: ...tch See 8A 2 3 Turning the Power Switch On on page 77 Remove the four Torx bolts black M5 x 12 and lift up the control lever assembly Disconnect the connector and replace the control lever assembly Torx bolt M5 x 12 Control lever assembly Connector Control lever assembly Throttle lever assembly To install perform the procedure in reverse z z When installing check the connector orientations and ins...

Page 106: ...x 20 Control lever assembly Analog interface terminal 1 wiring color White and red Analog interface terminal 2 wiring color White and green Analog interface terminal 3 wiring color White and black Analog interface terminal 1 wiring color White and black Analog interface terminal 2 wiring color White and blue Analog interface terminal 3 wiring color White and red Guide plate Cap bolt with spring wa...

Page 107: ...verse z z When installing the analog interface align the flat surface of the analog interface shaft with the position of the D shaped hole Flat surface of the analog interface shaft z z After replacement be sure to perform initialization See 7 4 4 1 I F CALIBRATION on page 36 z z When installing be careful not to pinch the harness in the lever moving parts ...

Page 108: ...age 77 Remove the control lever assembly See 8B 5 1 6 Replacing and Installing the Control Lever Assembly on page 103 Lower the rubber cover until the screw is visible Control lever assembly Rubber cover Remove the two button bolts with spring washer M4 x 8 and the button bolt with spring washer M4 x 30 and remove the lever grip A Button bolt with spring washer M4 x 8 Button bolt with spring washe...

Page 109: ...s M4 x 8 Clamp Melt the solder of the micro switch terminals and replace the micro switch Be careful not to disconnect the contacts crimped onto the wiring Switch for machine gun button Switch for missile button Wiring color blue Wiring color green Wiring color black Wiring color black Switch for missile button Switch for machine gun button Control lever metal part B z z When installing be careful...

Page 110: ...ing it around the shaft one time in the clockwise Shaft Front side z z Arrange the cable by wrapping it around the shaft one time in the clockwise direction starting from the analog interface side z z Arrange the cable along the side surface of the square pipe z z After replacement be sure to perform initialization See 7 4 4 1 I F CALIBRATION on page 36 ...

Page 111: ... 2 3 Turning the Power Switch On on page 77 Remove the control lever assembly See 8B 5 1 6 Replacing and Installing the Control Lever Assembly on page 103 Disassemble the lever grip See steps and of 8B 5 1 8 Replacing the Control Lever Switch Micro Switch on page 106 Remove and replace the machine gun button and machine gun button spring Machine gun button Machine gun button spring To install perf...

Page 112: ...ng the Power Switch On on page 77 Remove the control lever assembly See 8B 5 1 6 Replacing and Installing the Control Lever Assembly on page 103 Disassemble the lever grip See steps and of 8B 5 1 8 Replacing the Control Lever Switch Micro Switch on page 106 Remove and replace the missile button and missile button spring Missile button Missile button spring To install perform the procedure in rever...

Page 113: ...he Power Switch On on page 77 Remove the control lever assembly See 8B 5 1 6 Replacing and Installing the Control Lever Assembly on page 103 Remove the button bolt with spring washer M4 x 30 and two cap bolts with spring washer M3 x 30 and remove the motor cover Cap bolt with spring washer M3 x 30 Button bolt with spring washer M4 x 30 Vibration motor Motor cover Disconnect the connector remove th...

Page 114: ...screws Vibration motor Motor bracket Wind the harness of the new vibration motor around the ferrite core one time attach the core spacer to the ferrite core and install the vibration motor ferrite core and core spacer to the lever base B Phillips pan head screw with flat and spring washers M3 x 6 Motor bracket Lever base B Vibration motor Ferrite core Core spacer Connector Wind the harness of the ...

Page 115: ...ge 77 Remove the control lever assembly or the throttle lever assembly See 8B 5 1 6 Replacing and Installing the Control Lever Assembly on page 103 Remove the E ring spring end spring and spring stopper Stainless steel part Control lever Shaft Spring stopper Spring Spring end E ring Replace the spring or spring stopper z z Apply silicon grease Shin Etsu Chemical Co Ltd G 40M or equivalent product ...

Page 116: ...l lever assembly See steps to of 8B 5 1 8 Replacing the Control Lever Switch Micro Switch on page 106 Remove the six button bolts with spring washer M4 x 8 and remove the cover fixing frame and rubber cover Button bolt with spring washer M4 x 8 Button bolt with spring washer M4 x 8 Cover fixing frame Rubber cover Replace the rubber cover To install perform the procedure in reverse See steps to and...

Page 117: ...rting this task Turn off the power switch See 8A 2 3 Turning the Power Switch On on page 77 Remove the control lever assembly See 8B 5 1 6 Replacing and Installing the Control Lever Assembly on page 103 Remove the grips A and B of the control lever assembly See steps to of 8B 5 1 8 Replacing the Control Lever Switch Micro Switch on page 106 Remove the rubber cover See steps to of 8B 5 1 13 Replaci...

Page 118: ...ip harness X axis analog interface Y axis analog interface Phillips pan head screw M3 x 20 Phillips pan head screw M3 x 20 Lever harness Phillips pan head screw with spring washer M5 x 14 Lever harness Clamp Clamp base Grip harness Remove the two Phillips pan head screws with spring washer M5 x 14 and remove the lever sub assembly from the installation plate Lever sub assembly Installation plate P...

Page 119: ...pring stopper spring spring end and E ring are reused The stainless steel plate is not used Lever sub assembly Spring stopper Stainless steel plate Spring Spring end E ring Remove the four cap bolts with spring washer M5 x 35 of the new lever sub assembly and remove the guide plate Guide plate New lever sub assembly Cap bolt with spring washer M5 x 35 Be careful as the four corner nuts M5 may fall...

Page 120: ...back portion of the installation plate Screen side Analog interface installation hole with fixture Analog interface installation hole without fixture Analog interface installation hole without fixture Screw hole in the shaft Analog interface installation hole with fixture Make sure that the four corner nuts M5 are properly inserted before assembly Apply silicon grease Shin Etsu Chemical Co Ltd G 4...

Page 121: ...xis analog interface Y axis analog interface Grip harness Phillips pan head screw with spring washer M5 x 14 Lever harness Clamp Clamp base Grip harness z z When installing be careful not to pinch the harness in the moving parts z z When installing the analog interface align the flat surface of the analog interface shaft with the position of the D shaped hole Flat surface of the analog interface s...

Page 122: ...ft one time in the clockwise Front side Screen side Use the four cap bolts with spring washer M5 x 35 to install the guide plate removed in step Guide plate Cap bolt with spring washer M5 x 35 During assembly the four corner nuts M5 may rotate loosely so that the bolts do not tighten In this case use a thin rod or other tool to push the nuts M5 toward the bolt side z z When installing the guide pl...

Page 123: ... grip See steps to and of 8B 5 1 8 Replacing the Control Lever Switch Micro Switch on page 106 Make sure that the grip harness is wired correctly before installing the grip Grip harness Clamping band Missile button Lever grip A Lever grip B Pull the rubber cover up to the base of the lever arm Rubber cover Control lever assembly ...

Page 124: ...ector and use four Torx bolts black M5 x 12 to install the control lever See 8B 5 1 6 Replacing and Installing the Control Lever Assembly on page 103 z z When installing be careful not to pinch the harness z z After installation be sure to perform initialization See 7 4 4 1 I F CALIBRATION on page 36 ...

Page 125: ... task Turn off the power switch See 8A 2 3 Turning the Power Switch On on page 77 Remove the four Torx bolts black M5 x 12 and lift up the throttle lever assembly Disconnect the connector Control lever assembly Throttle lever assembly Throttle lever assembly Connector Torx bolt black M5 x 12 To install perform the procedure in reverse z z When installing check the connector orientations and insert...

Page 126: ... Replacing the Throttle Lever Assembly on page 123 Loosen the double point M4 x 6 and remove the analog interface together with the analog interface bracket Analog interface Analog interface bracket Double point M4 x 6 Remove the analog interface from the analog interface bracket Analog interface terminal 1 wiring color White and red Analog interface terminal 2 wiring color White and blue Analog i...

Page 127: ...verse z z When installing the analog interface align the flat surface of the analog interface shaft with the position of the D shaped hole Flat surface of the analog interface shaft z z After replacement be sure to perform initialization See 7 4 4 1 I F CALIBRATION on page 36 z z When installing be careful not to pinch the harness in the lever moving parts ...

Page 128: ...ards are sensitive to static electricity If a person handles a PC board while charged with static electricity the parts on the PC board may be damaged Before handling a PC board discharge the static electricity from your body Example touching the surface of grounded metal Turn off the power switch See 8A 2 3 Turning the Power Switch On on page 77 Remove the four Torx bolts M5 x 12 and remove the c...

Page 129: ...crew with flat and spring washers M4 x 10 Phillips pan head screw with flat and spring washers M4 x 10 Camera cover Remove the connector and the two Phillips pan head screws M2 x 4 from the camera bracket then replace the USB camera Phillips pan head screw M2 x 4 Camera bracket USB camera Connector To install perform the procedure in reverse z z After replacement be sure to perform the camera shoo...

Page 130: ... to avoid electric shock accident or injury to yourself or others as well as damage to the electronic circuits be sure to turn off the power switch before starting this task a Replacing the bill validator Turn off the power switch See 8A 2 3 Turning the Power Switch On on page 77 Open the padlock and remove the lock bar B Lock bar B Use the service key to open the door Service key ...

Page 131: ...m this task to operate the machine without using the bill validator z z Perform this task before joining the front and rear assemblies Turn off the power switch See 8A 2 3 Turning the Power Switch On on page 77 Use the coin door key to open the door and remove the four flange socket bolts M8 x 12 from the inside of the coin box and the two flange socket bolts M8 x 12 from inside the hole on the si...

Page 132: ...ll validator and push the harnesses into the coin box Push the harnesses into this hole Remove the bill validator box and install the supplied hole cover using the six supplied countersunk nuts with washers M8 in four locations inside the coin box and two locations on the bottom surface of the base Countersunk nuts with washer M8 Countersunk nuts with washer M8 Hole cover Close the coin door ...

Page 133: ...ock accident or injury to yourself or others as well as damage to the electronic circuits be sure to turn off the power switch before starting this task Turn off the power switch See 8A 2 3 Turning the Power Switch On on page 77 Use the coin door key and open the door Coin door key Raise the upper lock lever lower the lower lock lever and remove and replace the CASHFLOW CASHFLOW Lock lever To inst...

Page 134: ...oard while charged with static electricity the parts on the PC board may be damaged Before handling a PC board discharge the static electricity from your body Example touching the surface of grounded metal Turn off the power switch See 8A 2 3 Turning the Power Switch On on page 77 Remove the four Torx bolts M5 x 12 and remove the LED cover Torx bolt M5 x 12 LED cover Disconnect the connector remov...

Page 135: ...g washer M2 x 6 and remove the LED module full color LED module full color LED bracket Phillips pan head screw with flat and spring washers M2 x 6 To install perform the procedure in reverse z z When installing check the connector orientations and insert the connectors firmly until they lock securely z z When installing be careful not to pinch the connectors and harness ...

Page 136: ...while charged with static electricity the parts on the PC board may be damaged Before handling a PC board discharge the static electricity from your body Example touching the surface of grounded metal Turn off the power switch See 8A 2 3 Turning the Power Switch On on page 77 Make sure that the power switch of the machine is turned off then remove the six Torx bolts silver M5 x 8 and six flat wash...

Page 137: ...amp Clip Clip Pull the hook forward to release it To install perform the procedure in reverse When installing the LED module white secure it so that there are three light emitters outside the clips on both sides z z When installing check the connector orientations and insert the connectors firmly until they lock securely z z When securing the LED modules white with the clips be sure not to pinch t...

Page 138: ...ult in injury or machine damage Turn off the power switch See 8A 2 3 Turning the Power Switch On on page 77 Remove the three Torx bolts silver M5 x 12 and remove the POP light cover POP light cover Torx bolt silver M5 x 12 Replace the LED lights The LED lights are hot immediately after the power switch is turned off Although the LED lights are not hot enough to cause burns be careful when replacin...

Page 139: ...he fuse burns out again soon after replacement there may be some other cause for the abnormality Turn off the power switch immediately disconnect the power cord plug from the outlet and contact your distributor a Cord box assembly Turn off the main power switch of the machine See Turning the Power Switch On of page 77 Cord box assembly Fuse Main power switch OFF Use a standard screwdriver to rotat...

Page 140: ...d European specifications only Turn off the main power switch of the machine See Turning the Power Switch On of page 77 Cord box assembly Fuse Main power switch OFF Use a standard screwdriver to rotate the fuse counter clockwise and remove it Replace with a new fuse with the same rating as the removed fuse Fuse ...

Page 141: ...rmed by a technician 139 Service 8B Service Test Mode Troubleshooting 24 Replacing the Shock Absorber Open the door to expose the shock absorber Push the shock absorber from the back side to remove and replace it Door Shock absorber Door damper part ...

Page 142: ... M5 x 12 remove the upper two Torx bolts M5 x 12 and remove the filter tray Torx bolt M5 x 12 Torx bolt M5 x 12 Filter tray Filter tray Torx bolt M5 x 12 Torx bolt M5 x 12 Right outer side of the front assembly Inside the front assembly below the control lever Lift up and remove Lift up and remove Control lever assembly Throttle lever assembly Remove the filter from the filter tray and replace it ...

Page 143: ...ing the lamp Using other lamp than the dedicated lamp may result in malfunction damage or injury Also do not reuse an old lamp For inquiries regarding the dedicated lamp contact your distributor z z Contact your distributor for regular cleaning of the inside of the projector Continued operation with dust accumulated inside the projector may result in fire or malfunction Cleaning of the inside of t...

Page 144: ...ccident or injury to yourself or others as well as damage to the electronic circuits be sure to turn off the main power switch before starting this task Refer to 8A 1 1 5 Installing the Projector Unit on page 64 and remove the projector unit by reversing the procedure Refer to 8A 1 1 5 Installing the Projector Unit on page 64 and install the projector unit After installation adjust the projector p...

Page 145: ...o do not reuse an old lamp Doing so may result in malfunction damage or injury To order a lamp unit contact your distributor z z Do not place the removed lamp unit on or near flammable matter Doing so may result in fire z z Do not leave the removed lamp unit where customers may touch it If the lamp unit is dropped it may be damaged and glass shards may cause injury z z The lamp unit of this machin...

Page 146: ...e lamp is made of glass so be careful not to touch it with bare hands subject it to strong impact or scratch it Dirt impact or scratches may cause the glass to break z z When replacing the lamp unit be sure to remove the lamp unit from this machine and perform the work on a flat surface Secure an area next to the machine cabinet to place the removed projector unit Spread out a vinyl sheet or other...

Page 147: ...xing screw Lamp unit Lamp unit handle Terminal portion z z Do not loosen any screws other than the lamp unit fixing screws z z Remove the lamp unit gently from the projector unit If the light source lamp is damaged pulling out the lamp unit quickly may cause glass shards to scatter z z Do not expose the removed lamp unit to water or other substances or place it where children may touch it or near ...

Page 148: ...internal fan Be sure to thoroughly remove any glass shards from around the fan Fan z z Be careful not to damage the equipment inside the lamp enclosure when cleaning the inside of the lamp enclosure Glass shards may have entered the inside of the projector unit so hold the projector unit by the handles shake it gently forward and back and to the right and left and confirm whether there is any soun...

Page 149: ...nit or the vinyl sheet spread on the floor so use a vacuum cleaner and clean the areas around the projector especially near the exhaust port Align the new lamp unit as shown in the figure and insert it into the lamp enclosure while pressing in the direction of the arrow Then insert the terminal portion securely and secure the lamp unit with two fixing screws Fixing screw Lamp unit Terminal portion...

Page 150: ...nt work thus far Use a vacuum cleaner to thoroughly clean the floor inside the machine the seat around the levers and other areas then wipe these areas using a cloth moistened with a small amount of water Connect the supplied power cord to the removed projector unit and connect the power cord plug to an outlet The POWER indicator lights up red and the STATUS indicator remains off or lights up red ...

Page 151: ...EO STATUS indicator Disconnect the power cord connected in step then install the projector unit by reversing the procedure See 8A 1 1 5 Installing the Projector Unit on page 64 Turn on the main power switch and enter Test mode Select the PROJECTOR TEST item in the I O TEST screen to open the page that displays the current projector status and confirm that LAMP TIME indicates 0 HOUR If 0 HOUR is no...

Page 152: ...ectronic circuits be sure to turn off the power switch before starting this task Open the projector cover See 8A 1 1 5 Installing the Projector Unit on page 64 Open the front lid See 8A 1 1 5 Installing the Projector Unit on page 64 Loosen the knurled screw M4 x 16 Filter tray F Knurled screw M4 x 16 Front lid Remove the filter tray F and remove the filter F Filter F Filter F Filter tray F Filter ...

Page 153: ...shock accident or injury to yourself or others as well as damage to the electronic circuits be sure to turn off the power switch before starting this task Loosen the two knurled screws M4 x 16 at the back of the projector cover and remove the filter tray R Knurled screw M4 x 16 loosen only Projector cover Filter tray R Remove and replace the filter R Filter R Filter tray R To install perform the p...

Page 154: ... others as well as damage to the electronic circuits be sure to turn off the power switch before starting this task Open the projector cover See 8A 1 1 5 Installing the Projector Unit on page 64 Open the front lid See 8A 1 1 5 Installing the Projector Unit on page 64 Remove the four countersunk nuts M4 then remove and replace the lens cover Lens cover Countersunk nut M4 To install perform the proc...

Page 155: ...self or others as well as damage to the electronic circuits be sure to turn off the power switch before starting this task Remove the projector unit See 8A 1 1 5 Installing the Projector Unit on page 64 Remove the two lower Phillips truss screws M4 x 10 and loosen the two upper Phillips truss screws M4 x 10 Loosen only Projector cover Phillips truss screw M4 x 10 Open the front lid and disconnect ...

Page 156: ...fan motor so that the air inlet the side with the finger guard faces the back side of the projector case Projector case To install perform the procedure in reverse z z Be careful of the air inlet facing when installing the fan motor If the fan motor is installed with the air inlet facing the wrong direction the fan motor will not operate correctly and the projector unit may become damaged ...

Page 157: ...TTERN screen See 7 4 5 Projector Test MONITOR TEST on page 41 Adjust the vertical and lateral positions and viewing angle of the projector as described on the following pages so that the white lines on the right and left edges of the VIEW ANGLE ADJUST PATTERN display screen are located at the edges of the dome screen as shown in the figure below Screen Approximate adjustment method Screen Screen S...

Page 158: ...6 x 55 to move the screen display up and down Rotate clockwise to lower and counter clockwise to raise the screen display Cap bolt M6 x 55 Projector assembly Countersunk nut M6 Rotate counter clockwise to raise the screen display Rotate clockwise to lower the screen display Adjust the vertical position so that the white lines on the right and left edges of the VIEW ANGLE ADJUST PATTERN display scr...

Page 159: ... bolt M6 x 12 functions as the axis loosen only Projector assembly Move the rear of the projector assembly to the right and left around the axis of the loosened flange socket bolt M6 x 12 above the lens The screen display moves to the right and left accordingly Flange socket bolt M6 x 12 The projector assembly rotates right and left around this screw as the axis Adjust the lateral position so that...

Page 160: ...ach screw just enough so that the projector assembly can be moved Flange socket bolt M6 x 8 loosen only Projector assembly Move the projector assembly forward and back to move the edges of the screen display in and out Adjust so that the white lines on the right and left edges of the VIEW ANGLE ADJUST PATTERN display screen are within the edges of the dome screen After finishing the adjustment tig...

Page 161: ...Do not charge heat disassemble short circuit or place the batteries in a fire Do not leave dry cell batteries that have run out or are past the recommended use date indicated on the batteries in the remote controller Do not mix different types of dry cell batteries or use new and old batteries together Should battery fluid adhere to equipment do not touch the battery fluid directly If you happen t...

Page 162: ...ller z z Do not disassemble the remote controller z z In rare cases remote controller operations may not be accepted easily depending on the location of use or surrounding conditions In these cases point the remote controller directly at the projector unit and perform the operation again Open the projector cover and front lid of the projector assembly see 8A 1 1 5 Installing the Projector Unit on ...

Page 163: ...age 162 5 AUTO POSITION button button COMPUTER button VIDEO button Used to select menu items and make adjustments 6 KEYSTONE ENTER button Adjusts the screen distortion Enters the selected mode Remote controller 1 ON button Turns on the power 2 STANDBY button Turns off the power standby mode 3 MENU button Displays the menu There are two types of menu display Press the MENU button to display the Qui...

Page 164: ...of the projector unit control panel and the remote controller 8B 6 3 Various Projector Settings on page 159 can be used to display menus on the screen and make various settings and adjustments Press the MENU button to display the QUICK MENU and INFORMATION Menu External signal input is required to enable adjustments using the Quick Menu When a control button that cannot be executed is pressed an i...

Page 165: ...entation Results in a bright and crisp image Standard Results in a natural image Theater Sets a mellow image suitable for movies USER Reflects the values set using the Picture Quality Menu in the Detailed Menu CONTRAST 30 Adjusts the contrast of the image BRIGHTNESS 30 Adjusts the brightness of the image COLOR TEMP Standard Low High USER Adjusts the color temperature of the image SHARPNESS 5 Adjus...

Page 166: ...urs or less 0 H is displayed When the lamp operation time exceeds 10 hours the time is displayed in 1 hour units When the lamp operation time exceeds 3 750 hours the bar display turns yellow When the time exceeds 4 750 hours the bar display turns red The lamp life is 5 000 hours INPUT Displays the name of the input terminal inputting the currently projected video signal RESOLUTION Displays the res...

Page 167: ...h is hazardous to the human body and the environment When disposing of the used lamp follow the applicable regulations for collection transportation and disposal The software used in this machine is protected by copyright laws It is prohibited to copy adapt distribute publicly or use the software for purposes other than the operation of this machine Infringement of the copyright laws may subject p...

Page 168: ...ide joint L 1 717 910 2 Side joint R 1 717 911 3 Side cover L MA 1 734 205 4 Side cover R MA 1 734 206 5 Lower side cover L MA 1 734 207 6 Lower side cover R MA 1 734 208 7 Cover joint 1 717 916 8 Caution sticker Finger pinching POD EXP 1 461 627 9 Operation Manual 1 This manual 735 100 10a Power cord UL 1 3 m U S specifications UL AC15A125V 3000 011 116 10b Power cord BSI 3 m European specificati...

Page 169: ...1 12 24 40 36 61 62 37 64 33 27 43 44 16 10 17 18 26 31 29 30 32 35 46 34 28 45 14 50 51 50 51 25 48 22 49 6 8 15 13 53 54 1 38 7 5 2 9 41 42 39 47 4 3 21 Game PC board 5 1CH AMP PC board NAJV S PC board Opposite side Fan assembly see page 185 Cord box assembly see page 181 Service plate assembly see page 174 Power panel assembly see page 174 Control lever assembly see page 183 Throttle lever asse...

Page 170: ...e A 1 734 220 12 ES3 X base B 1 734 221 13 NA JV base 1 734 222 14 Dome stay R 1 734 223 15 10 pin Faston tab 1 734 224 16 Flange guard 1 734 225 17 Lever base L 1 734 226 18 Lever base R 1 734 227 19 Camera box cover 1 734 229 20 Acrylic cover 1 734 230 21 PCB roof B 1 734 231 22 PCB roof case 1 734 232 23 Camera bracket 1 734 233 24 ES3 X base C 1 734 234 25 Oval dome 1 717 930 26 Dome frame 1 7...

Page 171: ...40 48 Side flange guard R 1 734 241 49 Stay cover R 1 734 242 50 Filter PCB cover 2 734 316 51 Filter tray PCB cover 2 734 317 52 Camera cover 1 734 309 53 PCB duct 1 734 321 54 PCB duct sticker 1 734 322 55 USB cable between game PC board and USB camera 1 2300mm 011 098 56 USB cable between game PC board and NA JV S PC board 1 350mm 011 100 57 LAN cable between game PC board and Strait PC board 1...

Page 172: ...t base 1 734 264 4 Top frame 1 734 265 5 Top cover bracket 1 734 266 6 Sign panel A EXP 1 735 109 7 Sign panel B 1 734 268 8 Sign panel C 1 734 269 9 Top cover MA 1 734 270 10 Rear cover MA 1 734 271 11 Rear mark box 1 734 272 12 Rear panel A 1 734 273 13 Rear panel B 1 734 274 14 Rear cover metal part 1 734 275 15 LED bracket 1 734 276 16 LED cover 1 734 277 17 Window metal part 2 734 278 18 Wind...

Page 173: ...or line sticker B 1 734 288 28 Rear window line sticker A 1 734 289 29 Rear window line sticker B 1 734 290 30 Door open sticker 1 734 291 31 Number sticker 001 1 734 292 32 Skull and crossbones sticker 1 734 293 33 Number sticker USS 1 734 294 34 No step sticker 1 734 295 35 Number sticker NAVY 1 734 296 36 Power supply case 2 718 031 37 Side frame 1 718 033 38 Rear frame 1 718 034 39 Back frame ...

Page 174: ...047 50 Stay shaft 1 718 048 51 Stay pin 1 718 049 52 Door spring 1 718 050 53 Door stopper rubber 1 718 051 54 Door handle 1 718 052 55 Handle spacer 1 718 053 56 Handle bracket 1 718 054 57 Handle bracket cover 1 718 055 58 Door MA 1 734 308 59 Rear window 1 718 057 60 Top cover S_MA 1 734 297 61 Door hinge 1 718 060 62 Door receiver 1 718 062 63 Speaker bracket R 1 718 066 64 Speaker bracket L 1...

Page 175: ...vel adjuster 4 KYW16 75 6B 102 045 81 Cam lock 1 N92 L10 101 142 82 Magnet catch 1 MC JM45WT 101 209 83 Damper 1 DI 4000 106 236 84 Flange bush 2 80F 1206 104 025 85 Square pipe plug 4 KN 1160B 102 203 86 Fork sticker 2 229 441 87 Caution sticker Capacity limit POD EXP 1 461 620 88 Triangle sticker 1 734 319 89 Catch base MS 1 734 320 90 Rear cover sticker D 1 734 324 91 Stopper plate 1 710 834 92...

Page 176: ... VS150E 12 009 262 5 Service plate assembly 1 2 3 7 4 6 8 5 No Name Qty Type or Rating No 1 Service panel 1 734 245 2 Service sticker 1 734 228 3 Push button red Service 1 SDP 103 C22RB red 000 336 4 Push button green Enter 1 SDP 103 C22GB green 000 619 5 Slide switch Test 1 SDS 103A 03 13BJ 000 312 6 Rocker switch Reset switch 1 JW L21RKK 000 665 7 Toggle switch Select 1 SDSA 331G CR 000 337 8 Do...

Page 177: ...tor hook R 1 734 299 4 Adjustment tray 1 734 300 5 Projector cover 1 718 101 6 Lens cover MA 1 718 102 7 Front lid 1 718 103 8 Dust case 1 718 104 9 Projector grip 2 718 107 10 Projector hanger 1 718 109 11 Stay frame 1 718 110 12 Key hook 1 718 111 13 Lock washer 1 718 112 14 Filter tray F 1 718 113 15 Filter tray R 1 718 114 16 Spring bracket 1 718 115 17 Filter F 1 718 116 18 Filter R 1 718 117...

Page 178: ...1 2117 105 140 26 Hook and loop fastener A 1 25 mm 106 238 27 Hook and loop fastener B 1 25 mm 106 239 28 Decorative knob screw 1 UN 2013W 110 044 29 Fan motor 1 MF930 BC F7 005 409 30 Fan guard 1 FG930D 005 410 31 Replacement lamp for the projector 1 002 596 If you wish to specify the number same number for Part No 24 consult your distributor when ordering ...

Page 179: ...Opposite side 1 2 5 6 3 4 7 8 No Name Qty Type or Rating No 1 Seat pipe L 1 734 303 2 Seat pipe R 1 734 304 3 Seat back 1 734 305 4 Seat cushion 1 727 950 5 Seat speaker cover 2 710 962 6 Speaker 2 FW 100A141 1 006 145 7 Seat adaptor 1 734 307 8 Woofer 1 FL130U70 4 006 184 ...

Page 180: ...8 7 Coin return cover P 1 412 520 8 Coin selector 1 9 Channel bracket 1 CB 81M with CB 81M micro switch 100 145 10 Compression coil spring 1 DC 541 105 153 11 Coin lock 1 F750 DS8 random number 101 175 12 Clasp thin 1 Multi purpose type t3 2 101 176 13 Coin box JPN 1 734 310 14 Service door 1 734 311 15 Selector bracket 1 734 312 16 Shooter 1 734 313 17 Cover panel 1 734 314 18 Coin micro switch 1...

Page 181: ...BK NEL 1 735 116 6 Cover panel N 1 735 117 7 Coin counter label 1 735 118 8 Hole cover 1 735 119 9 Fuse Sicker B 1 735 120 10 Padlock 1 C 555N 45 101 264 11 Cam lock 1 N92 L10 101 142 12 Coin box N 1 735 121 13 Guard panel 1 735 122 14 Bill validator box 1 735 123 15 Fuse holder 1 ø5 mm x 20 mm or ø6 3 mm x 32 mm 001 112 16 Fuse 1 ø5 0 mm x 20 mm TIME LAG 6 3A 250V 011 114 17 Coin counter 2 003 05...

Page 182: ...35 117 3 Hole cover 1 735 119 4 Fuse sticker D 1 735 128 5 Coin box N 1 735 121 6 Guard panel 1 735 122 7 Fuse holder 1 ø5 mm x 20 mm or ø6 3 mm x 32 mm 001 112 8 Fuse 1 ø5 0 mm x 20 mm FAST ACTING 2A 250V 001 115 9 Coin counter 1 003 055 10 Fuse holder cap 1 ø5 mm x 20 mm 001 113 If you wish to specify the number same number for Part No 11 consult your distributor ...

Page 183: ... box assembly 1 5 3 4 6 2 8 7 No Name Qty Type or Rating No 1 Cord box 1 734 244 2 Fuse sticker 1 3 Strait PC board 1 307 308 4 Fuse 1 5 Noise Filter 1 RPE 2010R 011 103 6 Fuse holder 1 001 109 7 Fuse holder cap 1 001 110 8 Power switch 1 JW L21RKKF1 008E 000 665 ...

Page 184: ...0 4 Spring 1 734 251 5 Analog interface bracket 1 734 252 6 Finger guard 1 734 253 7 Stopper 1 734 254 8 Throttle lever grip A 1 L and R make a set 734 256 9 Throttle lever grip B 1 10 Throttle sticker EXP 1 735 129 11 Analog interface 1 RVQ24YN04 06 20F B102 008 079 12 Side base L B 1 734 260 13 Side base R B 1 734 261 14 Throttle lever assembly 1 734 259 15 Spring washer 1 734 255 ...

Page 185: ... 2 307 856 5 Spring stopper 1 306 791 6 Spring 1 307 849 7 Spring end 1 306 828 8 Grip harness 1 307 850 9 Control lever grip A 1 L and R make a set 307 881 10 Control lever grip B 1 11 Motor cover 1 307 882 12 Machine gun button 1 307 063 13 Machine gun button spacer 1 307 880 14 Machine gun button spring 1 307 126 15 Switch For Machine gun button and Missile button 1 307 853 16 Missile button 1 ...

Page 186: ...g No 21 Vibration motor 1 307 859 22 Ferrite core 1 307 860 23 Core spacer 1 307 861 24 Clamp bracket 1 307 862 25 Clamp large 1 307 863 26 Clamp small 2 307 864 27 Lever harness 1 307 865 28 Lever sub assembly 1 307 866 29 Guide plate 1 306 812 ...

Page 187: ...Parts List Parts List Test Mode Troubleshooting 12 Fan assembly 1 2 3 4 No Name Qty Type or Rating No 1 Front cover 1 734 246 2 Fan bracket 1 734 247 3 Fan 1 9GV1224P1J10 005 540 4 Fan guard 1 8130 TR 005 413 ...

Page 188: ...ty Type or Rating No 1 a POP EXP 1 U S and European specifications 735 131 1 b POP EXP ASIA Asian specifications 735 124 2 POP bracket A 1 734 347 3 POP light bracket A 1 734 325 4 POP light bracket B 1 734 326 5 POP light cover 1 734 327 6 Lamp socket 3 002 672 7 LED light 3 002 675 ...

Page 189: ...C Mini DIN 8P Female RS 232C FG10 GN YE FT43 FG4 X16 1 GY VL 3P P 2 WH X17 1 GY VL 4P P 2 WH X18 1 BK VL 3P R 2 WH X19 1 GY VL 4P R 2 WH X20 1 GY YL 2P P 2 WH CB8 CN2 IEC60320 C13 AC Cross Flow Fan FM3 100VAC0 4A 0 5A 1 2 6 GN YE 1 BK 1 6 GN YE 1 GY X8 4 BU VL 6P R 2 WH 3 X7 4 BK 3 VL 6P P 2 BK 2 3 CB5 CN2 HDMI 19P Male BLACK BK X15 1 BK 1 VL 4P R 2 BK 2 3 GN YE 4 X14 1 BK 1 VL 4P P 2 BK 2 3 GN YE...

Page 190: ...VICE 12 UP 13 DOWN 14 ENTER 17 COM 20 CN5 USB B Female JV I O X37 1 WH RD XAD 32P P 11 WH BK 27 WH LT GN 5V 1 CN2 XAD 32P H COM 11 FAN CONTROL 27 DOOR 8 NEW 18 GND 39 8 WH VT 18 GY 39 GY GND 1 CN1 VH 4P H 12VDC 2 N C 3 N C 4 CN2 IN3 BK φ3 5 Stereo Jack SIDE L R CN3 IN2 OG φ3 5 Stereo Jack SEAT WOOFER CN4 IN1 LT GN φ3 5 Stereo Jack SEAT L R CB9 CN2 USB B Male BK 12VDC 4 12VDC 1 CN2 VH 6P H 12VDC 6 ...

Page 191: ..._IN1 5 COIN_IN2 6 COM 19 X74 1 OG SM 2P P 2 BK X75 1 OG SM 2P P 2 BK X76 1 OG SM 2P P 2 BK X79 1 WH BN SM 4P P 2 WH PK 3 WH GY 4 OG SEAT_L 1 CN12 VL 8P H SEAT_L 2 SEAT_R 3 SEAT_R 4 N C 5 N C 6 SEAT_WOOFER 7 SEAT_WOOFER 8 X50 1 BN EL 12P P 2 GY 3 BK 4 BK 5 OG 6 WH BN 7 WH GY 8 9 10 11 12 GN YE X51 1 BN EL 12P R 2 GY 3 WH BK 4 BK 5 OG 6 WH BN 7 WH GY 8 9 10 11 12 GN YE SCT2 GU5 3 WH BK 1 2 SCT3 GU5 ...

Page 192: ... 2 WH X17 1 GY VL 4P P 2 WH X18 1 BK VL 3P R 2 WH X19 1 GY VL 4P R 2 WH X20 1 GY YL 2P P 2 WH CB8 CN2 IEC60320 C13 AC Cross Flow Fan FM3 100VAC0 4A 0 5A 1 2 6 GN YE 1 BK 1 6 GN YE 1 GY X8 4 BU VL 6P R 2 WH 3 X7 4 BK 3 VL 6P P 2 BK 2 3 CB5 CN2 HDMI 19P Male BLACK BK X15 1 BK 1 VL 4P R 2 BK 2 3 GN YE 4 X14 1 BK 1 VL 4P P 2 BK 2 3 GN YE 4 GN YE FT56 FG21 FT4 FT5 FT7 VT FT8 3 GN YE 4 3 GN YE 4 3 GN YE...

Page 193: ... 12 UP 13 DOWN 14 ENTER 17 COM 20 CN5 USB B Female JV I O X37 1 WH RD XAD 32P P 11 WH BK 27 WH LT GN 5V 1 CN2 XAD 32P H COM 11 FAN CONTROL 27 DOOR 8 NEW 18 GND 39 8 WH VT 18 GY 39 GY GND 1 CN1 VH 4P H 12VDC 2 N C 3 N C 4 CN2 IN3 BK φ3 5 Stereo Jack SIDE L R CN3 IN2 OG φ3 5 Stereo Jack SEAT WOOFER CN4 IN1 LT GN φ3 5 Stereo Jack SEAT L R CB9 CN2 USB B Male BK 12VDC 4 12VDC 1 CN2 VH 6P H 12VDC 6 TP T...

Page 194: ...1 WH YL 2P R 2 BK X70 1 OG YL 2P P 2 BK X71 1 WH YL 2P R 2 BK FG12 GN YE FT53 LED_RD 21 CN2 XAD 32P H LED_BU 23 LED_GN 25 COIN_COUNT1 1 CN3 XAD 40P H COIN_COUNT2 2 COIN_IN1 5 COIN_IN2 6 COM 19 X74 1 OG SM 2P P 2 BK X75 1 OG SM 2P P 2 BK X76 1 OG SM 2P P 2 BK X79 1 WH BN SM 4P P 2 WH PK 3 WH GY 4 OG SEAT_L 1 CN12 VL 8P H SEAT_L 2 SEAT_R 3 SEAT_R 4 N C 5 N C 6 SEAT_WOOFER 7 SEAT_WOOFER 8 X50 1 BN EL...

Page 195: ... C13 AC Cross Flow Fan FM3 100VAC0 4A 0 5A 1 2 6 GN YE 1 BK 1 6 GN YE 1 GY X8 4 BU VL 6P R 2 WH 3 X7 4 BK 3 VL 6P P 2 BK 2 3 CB5 CN2 HDMI 19P Male BLACK BK X15 1 BK 1 VL 4P R 2 BK 2 3 GN YE 4 X14 1 BK 1 VL 4P P 2 BK 2 3 GN YE 4 GN YE FT56 FG21 FT4 FT5 FT7 VT FT8 3 GN YE 4 3 GN YE 4 3 GN YE 3 GN YE GY FT16 WH FT17 BU FT19 VT FT20 CB1 CN1 8P8C Modular Plug BK CB1 CN2 8P8C Modular Plug BK TP VIDEO 1 ...

Page 196: ...12 UP 13 DOWN 14 ENTER 17 COM 20 CN5 USB B Female JV I O X37 1 WH RD XAD 32P P 11 WH BK 27 WH LT GN 5V 1 CN2 XAD 32P H COM 11 FAN CONTROL 27 DOOR 8 NEW 18 GND 39 8 WH VT 18 GY 39 GY GND 1 CN1 VH 4P H 12VDC 2 N C 3 N C 4 CN2 IN3 BK φ3 5 Stereo Jack SIDE L R CN3 IN2 OG φ3 5 Stereo Jack SEAT WOOFER CN4 IN1 LT GN φ3 5 Stereo Jack SEAT L R CB9 CN2 USB B Male BK 12VDC 4 12VDC 1 CN2 VH 6P H 12VDC 6 TP TP...

Page 197: ... YL 3P R 2 BK 3 GN YE FG18 FG13 GN YE FT46 GN YE FT47 X66 1 OG YL 2P P 2 BK X67 1 WH YL 2P R 2 BK X68 1 OG YL 2P P 2 BK X69 1 WH YL 2P R 2 BK X70 1 OG YL 2P P 2 BK X71 1 WH YL 2P R 2 BK FG12 GN YE FT53 LED_RD 21 CN2 XAD 32P H LED_BU 23 LED_GN 25 COIN_COUNT1 1 CN3 XAD 40P H COIN_COUNT2 2 COIN_IN1 5 COIN_IN2 6 COM 19 X74 1 OG SM 2P P 2 BK X75 1 OG SM 2P P 2 BK X76 1 OG SM 2P P 2 BK X79 1 WH BN SM 4P...

Page 198: ......

Page 199: ...t C 2009 Ariel Manzur JSON C A JSON implementation in C Copyright c 2004 2005 Metaparadigm Pte Ltd cyclone physics Copyright c 2003 2009 Ian Millington Permission is hereby granted free of charge to any person obtaining a copy of this software and associated documentation files the Software to deal in the Software without restriction including without limitation the rights to use copy modify merge...

Page 200: ...PYRIGHT HOLDER OR CONTRIBUTORS BE LIABLE FOR ANY DIRECT INDIRECT INCIDENTAL SPECIAL EXEMPLARY OR CONSEQUENTIAL DAMAGES INCLUDING BUT NOT LIMITED TO PROCUREMENT OF SUBSTITUTE GOODS OR SERVICES LOSS OF USE DATA OR PROFITS OR BUSINESS INTERRUPTION HOWEVER CAUSED AND ON ANY THEORY OF LIABILITY WHETHER IN CONTRACT STRICT LIABILITY OR TORT INCLUDING NEGLIGENCE OR OTHERWISE ARISING IN ANY WAY OUT OF THE ...

Page 201: ...IDED BY NTT AS IS AND ANY EXPRESS OR IMPLIED WARRANTIES INCLUDING BUT NOT LIMITED TO THE IMPLIED WARRANTIES OF MERCHANTABILITY AND FITNESS FOR A PARTICULAR PURPOSE ARE DISCLAIMED IN NO EVENT SHALL NTT BE LIABLE FOR ANY DIRECT INDIRECT INCIDENTAL SPECIAL EXEMPLARY OR CONSEQUENTIAL DAMAGES INCLUDING BUT NOT LIMITED TO PROCUREMENT OF SUBSTITUTE GOODS OR SERVICES LOSS OF USE DATA OR PROFITS OR BUSINES...

Page 202: ... this software may not be called OpenSSL nor may OpenSSL appear in their names without prior written permission of the OpenSSL Project 6 Redistributions of any form whatsoever must retain the following acknowledgment This product includes software developed by the OpenSSL Project for use in the OpenSSL Toolkit http www openssl org THIS SOFTWARE IS PROVIDED BY THE OpenSSL PROJECT AS IS AND ANY EXPR...

Page 203: ...tartup or in documentation online or textual provided with the package Redistribution and use in source and binary forms with or without modification are permitted provided that the following conditions are met 1 Redistributions of source code must retain the copyright notice this list of conditions and the following disclaimer 2 Redistributions in binary form must reproduce the above copyright no...

Page 204: ...UBSTITUTE GOODS OR SERVICES LOSS OF USE DATA OR PROFITS OR BUSINESS INTERRUPTION HOWEVER CAUSED AND ON ANY THEORY OF LIABILITY WHETHER IN CONTRACT STRICT LIABILITY OR TORT INCLUDING NEGLIGENCE OR OTHERWISE ARISING IN ANY WAY OUT OF THE USE OF THIS SOFTWARE EVEN IF ADVISED OF THE POSSIBILITY OF SUCH DAMAGE The licence and distribution terms for any publically available version or derivative of this...

Page 205: ...ADDITIONAL LICENSING REQUIREMENTS AND OR USE RIGHTS a Specific Use NBGI designed the device for a specific use You may only use the software for that use b Other Software You may use other programs with the software as long as the other programs directly supports the manufacturer s specific use for the device or provide system utilities resource management or anti virus or similar protection Softw...

Page 206: ...system but all other copies of the VHD Image may only be used for maintenance and updating 4 POTENTIALLY UNWANTED SOFTWARE The software may include Windows Defender If Windows Defender is turned on it will search this device for spyware adware and other potentially unwanted software If it finds potentially unwanted software the software will ask you if you want to ignore disable quarantine or remo...

Page 207: ...elp You may choose to switch them off or not use them Digital Certificates The software uses x 509 version 3 digital certificates These digital certificates confirm the identity of user sending information to each other and allow you to encrypt the information The software retrieves certificates and updates certificate revocation lists over the Internet Auto Root Update The Auto Root Update featur...

Page 208: ...u use a Microsoft search provider use of the information sent is subject to the Microsoft Online Privacy Statement This statement is available at go microsoft com fwlink linkid 31493 If you use a third party search provider use of the information sent will be subject to the third party s privacy practices You can turn search suggestions off at any time To do so use Manage Add ons under the Tools b...

Page 209: ... the NET Framework NET Components You may conduct internal benchmark testing of those components You may disclose the results of any benchmark test of those components provided that you comply with the conditions set forth at go microsoft com fwlink LinkID 66406 Notwithstanding any other agreement you may have with Microsoft if you disclose such benchmark test results Microsoft shall have the righ...

Page 210: ... operation of nuclear facilities aircraft navigation or communication systems and air traffic control 17 NO WARRANTIES FOR THE SOFTWARE The software is provided as is You bear all risks of using it Microsoft gives no express warranties guarantees or conditions Any warranties you receive regarding the device or the software do not originate from and are not binding on Microsoft or its affiliates Wh...

Page 211: ...orp Portions of this software are based in part on the work of Sam Leffler and Silicon Graphics Inc Because Microsoft has included the Sam Leffler and Silicon Graphics software in this product Microsoft is required to include the following text that accompanied such software Copyright 1988 1997 Sam Leffler Copyright 1991 1997 Silicon Graphics Inc Permission to use copy modify distribute and sell t...

Page 212: ...om this software without specific prior written permission THE UNIVERSITY OF SOUTHERN CALIFORNIA makes no representations about the suitability of this software for any purpose THIS SOFTWARE IS PROVIDED AS IS AND WITHOUT ANY EXPRESS OR IMPLIED WARRANTIES INCLUDING WITHOUT LIMITATION THE IMPLIED WARRANTIES OF MERCHANTABILITY AND FITNESS FOR A PARTICULAR PURPOSE Other copyrights might apply to parts...

Page 213: ...soft is required to include the following text that accompanied such software Copyright 1993 by OpenVision Technologies Inc Permission to use copy modify distribute and sell this software and its documentation for any purpose is hereby granted without fee provided that the above copyright notice appears in all copies and that both that copyright notice and this permission notice appear in supporti...

Page 214: ...US without license from the U S Commerce department Copyright 1994 by the Massachusetts Institute of Technology All Rights Reserved Export of this software from the United States of America may require a specific license from the United States Government It is the responsibility of any person or organization contemplating export to obtain such a license before exporting WITHIN THAT CONSTRAINT perm...

Page 215: ... Data Files or Software and to permit persons to whom the Data Files or Software are furnished to do so provided that a the above copyright notice s and this permission notice appear with all copies of the Data Files or Software b both the above copyright notice s and this permission notice appear in associated documentation and there is clear notice in each modified Data File or in the Software a...

Page 216: ...t Microsoft is required to include the following text that accompanied such software W3C SOFTWARE NOTICE AND LICENSE http www w3 org Consortium Legal 2002 copyright software 20021231 This work and included software documentation such as READMEs or other related items is being provided by the copyright holders under the following license By obtaining using and or copying this work you the licensee ...

Page 217: ...cense from Dolby Laboratories Dolby and the double D symbol are trademarks of Dolby Laboratories Confidential unpublished works Copyright 1992 1997 Dolby Laboratories All rights reserved Portions of this software are based in part on the work of Andrei Alexandrescu Because Microsoft has included the Andrei Alexandrescu software in this product Microsoft is required to include the following text th...

Page 218: ...d or sell copies of the Software and to permit persons to whom the Software is furnished to do so subject to the following conditions The above copyright notice this permission notice and the above About Notice shall be included in all copies or substantial portions of the Software THE SOFTWARE IS PROVIDED AS IS WITHOUT WARRANTY OF ANY KIND EXPRESS OR IMPLIED INCLUDING BUT NOT LIMITED TO THE WARRA...

Reviews: