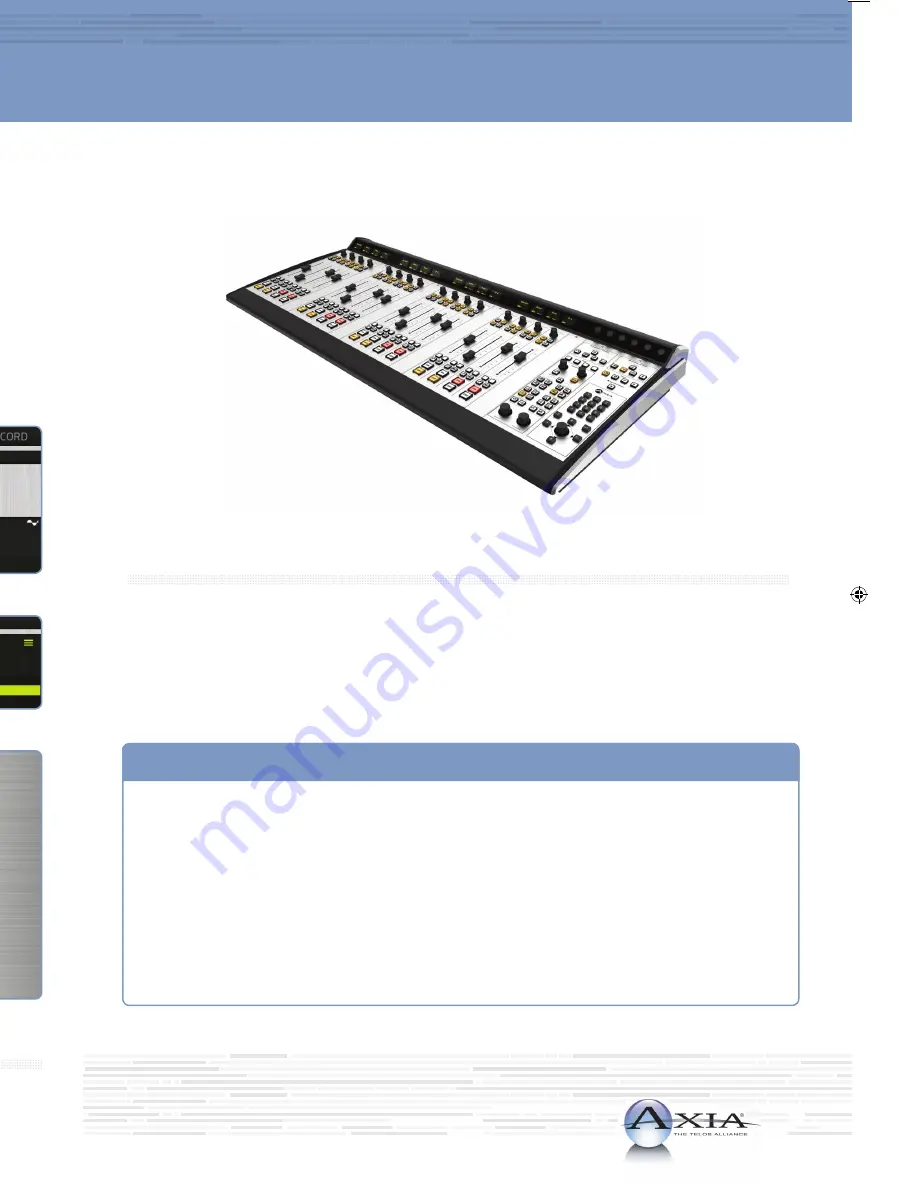
AxiA Fusion AoiP Console
QuiCk-stArt instAllAtion Guide
system ConFiGurAtion
sourCe ConFiGurAtion
sourCe ConFiGurAtion
(Cont.)
1. Using a PC connected to your studio network, launch
a web browser and enter the assigned IP address
into the browser’s address bar. When prompted for
authentication enter user name “user”, password is
left blank.
2. The Fusion control center will launch (A). In the left
column, under “Mix Engine”, select the “Network”
link (B), click the “Install” button at the bottom of the
new page.
3. Enter the value “1” into the “Console Count” field (C)
and click “Apply Console Count” (D).
4. In the “PS CONSOLE: 1” (E) section, select the
discovered console from the drop down menu (F).
Click “Apply IP” (G) to set the IP address and link it to
StudioEngine or PowerStation.
5. Your Console is now connected and will display
“Inactive“ on each channel. On the Monitor Module
keypad (H) Press and hold the “*” key and “2” key
until “Capture” is displayed.
6. Release the keys. For the full-sized Fusion Monitor/
Navigation Module, press the “Enter” key, for a
Fusion M 2-Fader Module, press the “#” key.
7. Remain logged in to the Fusion Control Center and
continue to Source Configuration.
1. In the Fusion Control Center, in the left column under
“Console”, select “Sources” (A).
2. Click the “Create New Source Profile” button (B).
3. On the Source Profile screen, select “Source Type”
from the drop down list (C).
4. Enter the name of the source in the “Source name”
field (D).
5. Click the browse button to the right of the “Primary
source” field (E) and select the desired source from
the list.
6. Click “Apply”.
7. In the left column under “Mix Engine”, select “Prog
and mon out” (F).
8. Enter (G) the planned channel numbers for
either the StudioEngine (Livewire Sources) or
PowerStation (Livewire Sources from DSP) outputs.
9. Click the “Apply” button.
10. StudioEngine users-skip Step 11 and proceed to
Step 12.
11. PowerStation users continue to the next step
below, “For PowerStation users ONLY”.
12. On the Fusion Console Surface, press the channel
encoder knob (K) found at the top of the fader strip
for Channel Options.
13. The connected video monitor will display the
Channel Options (L). Rotate the encoder knob (K)
one step to select the source window. (Selected
options will be outlined in yellow.) Once the desired
option is selected, press the encoder knob (K) to
enter the selection.
14. Select the “Current Source” option (M). The next
view will show configured source profiles (N).
15. Rotate the encoder knob (K) to highlight the source
just created.
16. Press the encoder knob (K) to select the highlighted
source.
17. Press the Program 1 button on the fader strip (O) so
it is illuminated.
18. Press the “On” button (P) on the fader strip.
19. Move the fader (Q) up-you should hear audio. The
meters on your video display should be active (R).
20. Note: To hear the audio, make sure Program 1 is
selected in the monitor section for CR Monitor
and that the volume is at an appropriate level.
For StudioEngine users only: make sure the xNode
output feeding your speaker has been assigned the
CR Monitor source output of the StudioEngine.
21. Repeat “Source Configuration” steps to configure
additional sources.
A
B
C
E
F
G
D
H
A
B
C
E
D
M
L
N
R
O
Q
P
H
I
J
your setuP is ComPlete!
That’s it! You are now ready to experience the Axia Fusion, a powerful,
flexible and easy to use console, packed with all of the capabilities and
features you need. Enjoy!
K
Items you need to supply:
• Either a StudioEngine mixing engine and separate
Axia Power Supply, or PowerStation mixing engine
(with their appropriate power supply cables)
• 1080p Monitor with DVI Connector
• USB Keyboard (for PowerStation setup only)
• PC with network access
• Configured Network Switch
Included items:
• Fusion Console
• Fusion Power Cable
• CAT5 Ethernet Cable
REQUIRED EQUIPMENT, CABLES, AND ACCESSORIES:
There are a few additional items required for a successful installation. Check the list below and make sure
you have what you need.
a.
In the left column under “I/O subsystem main”,
select “Destinations” (H).
b. When prompted for authentication enter user name
“user”, password is left blank.
c.
Enter useful labeling in the “Name” field (I).
d. Click the browse button (J) to the right of the
“Channel” field and select the CR Monitor source
from the PowerStation.
e.
Click the “Apply” button.
f.
Continue to Step 12.
For PowerstAtion users only
This step configures the designated output on the back
of the PowerStation which provides audio to the monitor
speaker amplifier for the CR Monitor DSP source.
We have made Fusion the easiest Axia console, ever, to set up. This quick start guide will take you through the
basic steps to configure your new Fusion and have you up and running in no time. Before we get started, let’s
check your installation type and make sure you have what you need.
Installation type:
You’ve got your choice of two mixing engines to pair with the Fusion, the
StudioEngine
or
the
PowerStation.
We are providing instructions for both setups, so make sure you follow the instructions
for your engine type
.
tHAnk you For PurCHAsinG tHe AxiA Fusion Console.
G
F