Award BV600TBL, Instruction Manual
The Award BV600TBL, a versatile product, comes with an included Instruction Manual to assist users. This comprehensive manual provides detailed instructions on product usage, maintenance, and troubleshooting. Download it for free from manualshive.com to make the most of your BV600TBL, ensuring an optimal user experience.
Share
Download


Reviews:
No comments
Related manuals for BV600TBL
JQ-332A
Brand: Haier Pages: 8
JQ-332A
Brand: Haier Pages: 8
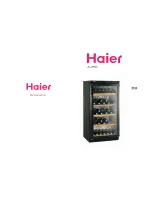
JC-298G
Brand: Haier Pages: 6

WC-2034
Brand: Salton Pages: 9

274 02 40
Brand: N'Finity Pages: 14

TWC-51
Brand: TecLime Pages: 17

Modverre12
Brand: Richelieu Pages: 8

FITT-10080
Brand: Häfele Pages: 2

Echelon Wine Captain 2275ZWC
Brand: U-Line Pages: 2

Millenium DWC450W
Brand: Danby Pages: 38

JC-201M
Brand: Hanseatic Pages: 52

JUB248RBCX
Brand: Jenn-Air Pages: 32

DCW106S-SC
Brand: Maitre' D Pages: 6

6200VS-ECC
Brand: CellarPro Pages: 33

CTP177A
Brand: La Sommeliere Pages: 72

RW414364
Brand: Gaggenau Pages: 24

NL24WSG0 series
Brand: Northland Pages: 52

JLWF451
Brand: John Lewis Pages: 4


