Avermedia ER310, User Manual
The Midland ER310 manual is a valuable resource for understanding and utilizing this innovative emergency radio. With its compact design and reliable performance, users can confidently navigate through various features and functionalities. Download your free copy of the manual from manualshive.com and harness the full potential of your Midland ER310.
Share
Download


Reviews:
No comments
Related manuals for ER310

VOICE & MUSIC DM-10
Brand: Olympus Pages: 101

MDR513H/F7
Brand: Magnavox Pages: 2
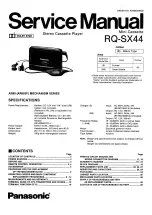
RQ-SX44
Brand: Panasonic Pages: 26

DS-2600
Brand: Olympus Pages: 51

DMX AIO Recorder
Brand: EuroLite Pages: 20

DR-40X
Brand: Tascam Pages: 80

DA-78HR
Brand: Tascam Pages: 78

RTR501B
Brand: T&D Pages: 2

M-629V
Brand: Sony Pages: 11

HDR3810
Brand: Philips Pages: 2

DVDR730/00
Brand: Philips Pages: 2

DVDR70/001
Brand: Philips Pages: 2

DVDR3510V
Brand: Philips Pages: 74

PV-6232A
Brand: Inter-m Pages: 24

DIGIMERGE DNR200 Series
Brand: FLIR Pages: 2

RECODE-1
Brand: VocoPro Pages: 24


