Avaya L159 Headset Quick
Reference Guide
Release 1
Issue 1
December 2018
©
2018, Avaya Inc.
All Rights Reserved.
Avaya L159 Headset
Thank you for purchasing the Avaya L159 Headset. Read
the instructions carefully before using this product, and
retain them for future reference.
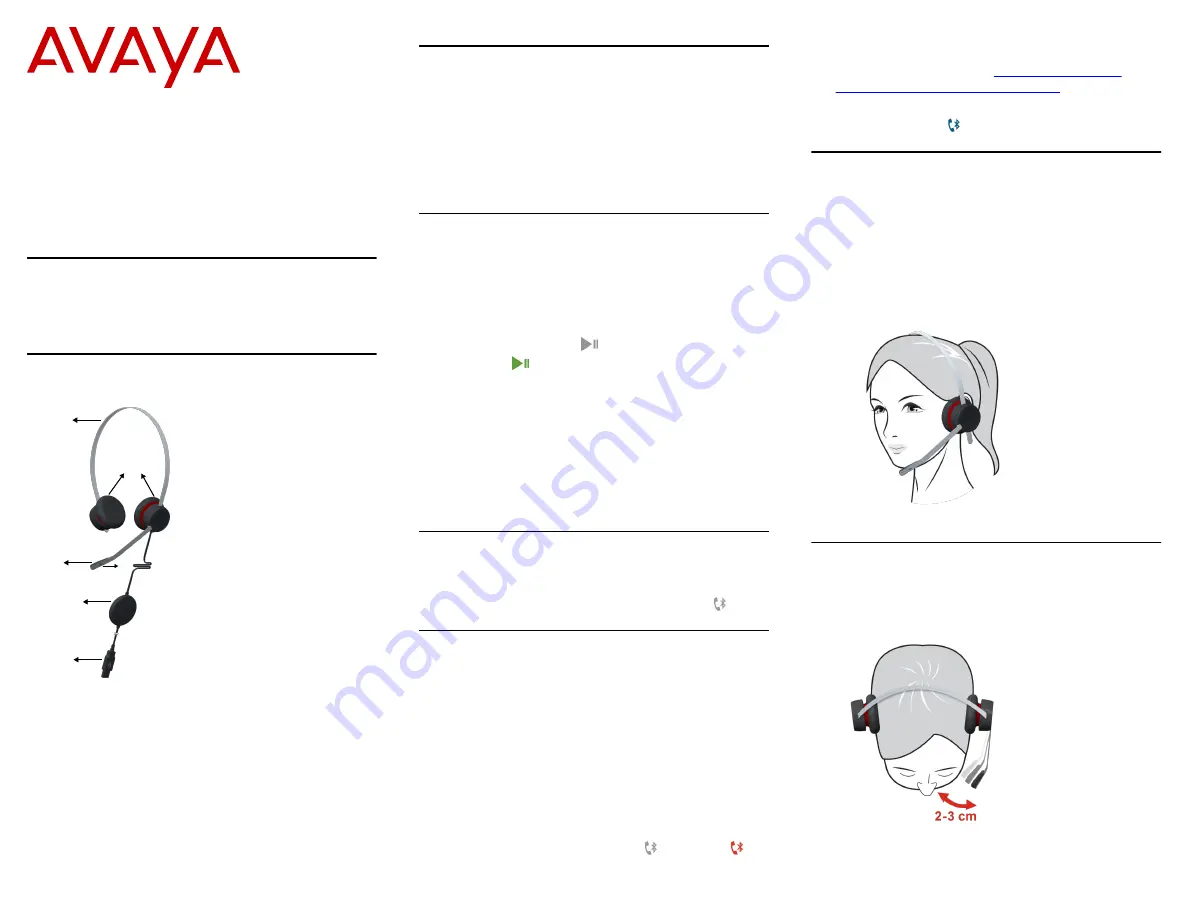
Part overview
2
1
3
4
5
6
1– Headband
2– Speaker
3– Microphone
4– Busy LED
5– Avaya L100 Touch Controller with Bluetooth
6– USB connector
Features
• Rotating microphone boom arm that can be worn on
the left or right side
• Adjustable headband and microphone that provides
a customized fit
• High resolution audio
• Bluetooth
• Touch sensor with primary functions
Connecting the headset to a personal
computer
1. Plug the USB connector.
• At the first instance, the taskbar displays a pop-up
message. The message includes information that
the headset is connected and ready for use.
• The Play/Pause key on the headset changes its
status to
.
The Play/Pause key changes its status only if you
have installed the Avaya Setup Tool on your
computer.
2.
(Optional)
If you are using Windows 7, at the first
plug in, set the Avaya L159 Headset as the default
device.
a. Navigate to
Control Panel
>
Sound Settings
.
b. Select the Avaya L159 Headset.
Bluetooth
The headset has built-in Bluetooth for pairing the headset
with a mobile device. When the headset is not paired with
a mobile device, the Bluetooth status remains off .
Pairing the headset with a mobile
device
1. On the Avaya L100 Touch Controller with Bluetooth,
press and hold the Bluetooth logo for 5 seconds.
You can hear the voice prompt “Pairing,” and the
Bluetooth indicator starts flashing alternately blue and
red.
2. Turn on Bluetooth on your mobile device.
3. Search for nearby Bluetooth devices and select the
headset.
You can hear the voice prompt “Connected,” and the
Bluetooth indicator changes from to solid red .
Your mobile device is now connected with the
headset.
For more information, see
personal computer and mobile device
If your mobile device is out range of the headset, then
the Bluetooth logo starts blinking.
Adjusting the headband
All Avaya corded headsets have a flexible and adjustable
headband.
1. Place the headband on your head.
You can place the speaker with microphone on your
left or right ear as per your own comfort.
2. Adjust the headband for a comfortable fit.
Positioning the microphone
For optimal sound quality, position the bendable boom
arm in front of your mouth at a distance of 2–3 cms.
1


