AutoAqua QEye&QShooter QES-200, Installation Manual
The AutoAqua QEye&QShooter QES-200 is an innovative aquatic equipment that optimizes your aquarium maintenance. Its advanced features ensure efficient installation, saving you time and effort. Access the comprehensive Installation Manual for free download exclusively at manualshive.com, providing invaluable instructions to enhance your aquatic experience.
Share
Download


Reviews:
No comments
Related manuals for QEye&QShooter QES-200

2050RX
Brand: Yardbeast Pages: 10

N4250
Brand: Haldex Pages: 3

Floorboy XL300
Brand: Overmat Pages: 18

PET755
Brand: Philips Pages: 2

MV 9DM2
Brand: Toshiba Pages: 2

VTD21FQR
Brand: Toshiba Pages: 24

IK-TF7
Brand: Toshiba Pages: 36

MV 9DM2
Brand: Toshiba Pages: 68

GRL100-701B
Brand: Toshiba Pages: 473

Piste Box EP-G01
Brand: EnPointe Pages: 14

MegaView
Brand: Arecont Vision Pages: 10

UVC Quartz Glass Replacement Kit
Brand: SuperFish Pages: 2
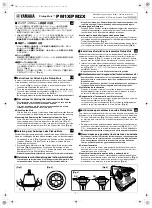
Pickup Mute PM1X
Brand: Yamaha Pages: 2

Spark SP-5000M-GE2
Brand: JAI Pages: 100

CHELSEA 267 Series
Brand: Parker Pages: 44

H7001
Brand: Acer Pages: 19

NTS-pico
Brand: Elproma Pages: 19

FAVORIT 88419 W0P
Brand: AEG Pages: 20


