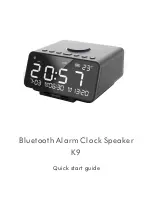
background image

IAN 290253

USB-WECKER /

USB ALARM CLOCK /

RÉVEIL USB


USB-WECKER

Bedienungs- und Sicherheitshinweise


USB ALARM CLOCK

Operation and safety notes


RÉVEIL USB

Instructions d‘utilisation et consignes 

de sécurité


USB-WEKKER

Bedienings- en veiligheidsinstructies

USB BUDÍK

Pokyny pro obsluhu a bezpečnostní 

pokyny

DESPERTADOR USB

Instrucciones de utilización y de 

seguridad

DESPERTADOR USB

Instruções de utilização e de 

segurança

Summary of Contents for HG02918A

Page 1: ...OCK Operation and safety notes RÉVEIL USB Instructions d utilisation et consignes de sécurité USB WEKKER Bedienings en veiligheidsinstructies USB BUDÍK Pokyny pro obsluhu a bezpečnostní pokyny DESPERTADOR USB Instrucciones de utilización y de seguridad DESPERTADOR USB Instruções de utilização e de segurança ...

Page 2: ...e 33 FR BE Instructions d utilisation et consignes de sécurité Page 61 NL BE Bedienings en veiligheidsinstructies Pagina 91 CZ Pokyny pro obsluhu a bezpečnostní pokyny Strana 119 ES Instrucciones de utilización y de seguridad Página 145 PT Instruções de utilização e de segurança Página 172 ...

Page 3: ...A 1 2 3 4 5 7 6 ...

Page 4: ...B 8 ...

Page 5: ...C 10 11 9 ...

Page 6: ...D 12 ...

Page 7: ...me 20 Batteriebetrieb 20 Stromversorgung durch eine Niederspannungsquelle 20 Batterien ersetzen entfernen 20 Inbetriebnahme 21 Grundeinstellungen vornehmen 21 Wechsel der Alarmeinstellungen 24 Alarm Funktion aktivieren deaktivieren 25 Schlummer Funktion verwenden 26 Wechsel der Tag Nacht Einstellung 26 Verwenden der klanggesteuerten Funktion 27 Fehlerbehebung 28 Reinigung und Pflege 29 Entsorgung ...

Page 8: ... Gebrauch in Innenräumen USB WECKER Einleitung Wir gratulieren Ihnen zum Kauf Ihres neuen Produktes Sie haben sich damit für ein hochwertiges Produkt entschieden Die Bedienungsanleitung ist Teil dieses Produktes Sie enthält wichtige Hinweise zu Sicherheit Gebrauch und Entsorgung ...

Page 9: ...umtemperatur Das Produkt ist nur zur Verwendung in privaten Haushalten geeignet und nicht für die gewerbliche Nutzung vorgesehen Teilebeschreibung 1 Taste SET Drücken Sie diese Taste um zwischen der Zeit Datums Temperaturanzeige zu wechseln Halten Sie diese Taste gedrückt um zu den Grundeinstellungen zu gelangen Bestätigen Sie Ihre Einstellungen mit dieser Taste 2 Taste UP Drücken Sie diese Taste ...

Page 10: ...igeänderung bestätigt wird 4 Taste ALARM Drücken Sie diese Taste um den Alarmeinstellungsmodus aufzurufen Halten Sie diese Taste gedrückt um die Alarmfunktion zu aktivieren deaktivieren 5 Taste SNOOZE Drücken Sie diese Taste um die Schlummerfunktion zu aktivieren wenn der Alarm ertönt Halten Sie diese Taste gedrückt um die Schlummerfunktion zu deaktivieren 6 USB Buchse 7 Batteriefach 8 Batteriefac...

Page 11: ...2 USB Kabel Technische Daten Betriebsspannung 4 5 V Gleichstrom Batterien 3 x Batterien LR03 Typ AAA 1 5 V Temperaturbereich ca 0 50 C 32 122 F Polarität der Stromversorgung am USB Kabel 5 V Gleichstrom 200 mA Lieferumfang 1 USB Wecker 3 Batterien LR03 1 USB Kabel 1 Bedienungsanleitung ...

Page 12: ...ch vor der ersten Benutzung des Produkts mit allen Bedien und Sicherheitshinweisen vertraut Händigen Sie alle Unter lagen bei Weitergabe des Pro dukts an Dritte ebenfalls mit aus WARNUNG LEBENS UND UNFALLGEFAHR FÜR KLEINKINDER UND KINDER Dieses Produkt kann ...

Page 13: ...physischen sensorischen oder mentalen Fähigkeiten oder Mangel an Erfahrung und Wissen benutzt werden wenn sie beaufsichtigt oder bezüglich des sicheren Gebrauchs des Produkts unterwiesen wurden und die daraus resultierenden Gefahren verstehen Kinder dürfen nicht mit dem Produkt spielen ...

Page 14: ...ung dürfen nicht von Kindern ohne Beaufsichtigung durchgeführt werden Sicherheitshinweise für Batterien Akkus LEBENSGEFAHR Halten Sie Batterien Akkus außer Reichweite von Kindern Suchen Sie im Falle eines Verschluckens sofort einen Arzt auf ...

Page 15: ...T CH EXPLOSIONSGEFAHR Laden Sie nicht aufladbare Batterien niemals wieder auf Schließen Sie Batterien Akkus nicht kurz und oder öffnen Sie diese nicht Überhitzung Brandgefahr oder Platzen können die Folge sein ...

Page 16: ...erien Akkus niemals in Feuer oder Wasser Setzen Sie Batterien Akkus keiner mechanischen Belastung aus Risiko des Auslaufens von Batterien Akkus Vermeiden Sie extreme Bedingungen und Temperaturen die auf Batterien Akkus einwirken ...

Page 17: ...Heiz körpern direkte Sonnen einstrahlung Vermeiden Sie den Kontakt mit Haut Augen und Schleim häuten Spülen Sie bei Kontakt mit Batteriesäure die betroffenen Stellen sofort mit klarem Wasser und suchen Sie umgehend einen Arzt auf ...

Page 18: ...16 DE AT CH SCHUTZ HAND SCHUHE TRAGEN Ausgelaufene oder beschädigte Batterien Akkus können bei Berührung mit der Haut Verätzungen verursachen Tragen Sie deshalb in diesem Fall geeignete Schutzhandschuhe ...

Page 19: ...Falle eines Auslaufens der Batterien Akkus entfernen Sie diese sofort aus dem Produkt um Beschädigungen zu vermeiden Verwenden Sie nur Batterien Akkus des gleichen Typs Mischen Sie nicht alte Batterien Akkus mit neuen ...

Page 20: ...terien Akkus wenn das Produkt längere Zeit nicht verwendet wird Risiko der Beschädigung des Produkts Verwenden Sie ausschließlich den angegebenen Batterietyp Akkutyp Setzen Sie Batterien Akkus gemäß der Polaritäts kennzeichnung und ...

Page 21: ...19 DE AT CH an Batterie Akku und des Produkts ein Reinigen Sie Kontakte an Batterie Akku und im Batteriefach vor dem Einlegen Entfernen Sie erschöpfte Batterien Akkus umgehend aus dem Produkt ...

Page 22: ...rrekte Polarität Diese wird im Batteriefach 7 angezeigt Schließen Sie das Batteriefach 7 Stromversorgung durch eine Niederspannungsquelle Schließen Sie den runden Stecker des USB Kabels 12 an die USB Buchse 6 und verbinden Sie es über einen USB Port mit Ihrem Computer Alternativ können Sie einen im Einzelhandel erhältlichen USB Adapter verwenden Batterien ersetzen entfernen Hinweis Wenn das Displa...

Page 23: ...ien ein falls Sie das Produkt mit Batterien betreiben möchten Achten Sie hierbei auf die Polarität im Batteriefach 7 angezeigt der Batterien Schließen Sie das Batteriefach 7 Ihr Produkt ist nun wieder betriebsbereit Inbetriebnahme Grundeinstellungen vornehmen Halten Sie die Taste SET 1 3 Sekunden lang gedrückt um in die Betriebsart Grundeinstellungen zu gelangen Drücken Sie nun in jedem folgenden ...

Page 24: ...g zu bestätigen Sie gelangen automatisch in den nächsten Programmschritt Hinweis Wenn Sie 15 Sekunden lang keine Einstellung vornehmen wechselt das Produkt automatisch wieder in den Normal Modus Folgende Einstellungen können nacheinander vorgenommen werden Schritt Einstel lung Anzeige Beschreibung Jahr einstellen Jahresanzeige blinkt Das Jahr kann bis 2099 eingestellt werden ...

Page 25: ...stellen Tagesanzeige blinkt Stunden einstellen Stundenanzeige blinkt Minuten einstellen Minutenanzeige blinkt Datums format einstellen DDMM MMDD Datumsanzeige im Format Tag Monat DDMM oder Mo nat Tag MMDD Ý Tempera tureinheit einstellen C F Temperaturanzeige in Grad Celsius C oder Grad Fahren heit F ...

Page 26: ...er Alarm kann auf Alarm aus 5 Tage Alarm oder 7 Tage Alarm eingestellt werden 1 Drücken Sie die Taste ALARM 4 um zu den Alarmeinstellungen zu gelangen 2 Drücken Sie Taste UP 2 oder DOWN 3 um zwischen A1 5 A1 und 7 A1 zu wechseln Hinweise A1 steht für Alarm aus 5 A1 steht für die Einstellung 5 Tage Alarm der Alarm ertönt nur von Montag bis Freitag 7 A1 steht für die Einstellung 7 Tage Alarm der Ala...

Page 27: ...Sie Taste UP 2 oder DOWN 3 um die Minute einzustellen 10 Drücken Sie Taste SET 1 um zu bestätigen und zur Einstellung Alarm 2 zu gelangen 11 Wiederholen Sie Schritte 3 bis 10 um die Alarmzeiten A2 und A3 einzustellen Alarm Funktion aktivieren deaktivieren Halten Sie die ALARM Taste 4 für 3 Sekunden gedrückt um die Alarmfunktion zu aktivieren und zu deaktivieren Wenn der Alarm aktiv ist wird die Al...

Page 28: ... Signalton stoppt und wird 5 Minuten später wieder aktiviert Die Alarmanzeige 11 blinkt im Display Halten Sie zum endgültigen Ausschalten des Alarm Signals die Taste SNOOZE 5 3 Sekunden lang gedrückt Erst jetzt endet die Schlummerfunktion Wechsel der Tag Nacht Einstellung Dieses Produkt kann auf 4 Helligkeitsstufen eingestellt werden L3 hellste Stufe L0 dunkelste Stufe 1 Drücken Sie die Taste DOWN...

Page 29: ... DOWN 3 um die Startzeit für den Tag Modus auszuwählen 6 Drücken Sie Taste SET 1 um zu bestätigen und zur Einstellung des Nacht Modus zu gelangen 7 Wiederholen Sie Schritte 2 bis 6 um den Nacht Modus einzustellen Verwenden der klanggesteuerten Funktion Dieses Produkt kann auf Berührung oder akustische Signale reagieren Halten Sie die Taste UP 2 gedrückt um die klanggesteuerte Funktion ein auszusch...

Page 30: ...et Fehlerbehebung Das Produkt enthält empfindliche elektronische Bauteile Daher ist es möglich dass es durch Funkübertragungsgeräte in unmittelbarer Nähe gestört wird Elektrostatische Entladungen können zu Funktionsstörungen führen Im Falle derartiger Fehlfunktionen halten Sie die Tasten UP 2 und DOWN 3 gleichzeitig 3 Sekunden lang gedrückt Dies setzt das Produkt auf seine Werkseinstellungen zurüc...

Page 31: ...en Tuch Entsorgung Die Verpackung besteht aus umweltfreundlichen Materialien die Sie über die örtlichen Recyclingstellen entsorgen können Beachten Sie die Kennzeichnung der Verpackungsmaterialien bei der Abfalltrennung diese sind gekennzeichnet mit Abkürzungen a und Nummern b mit folgender Bedeutung 1 7 Kunststoffe 20 22 Papier und Pappe 80 98 Verbundstoffe ...

Page 32: ...ltung Werfen Sie Ihr Produkt wenn es ausgedient hat im Interesse des Umweltschutzes nicht in den Hausmüll sondern führen Sie es einer fachgerechten Entsorgung zu Über Sammelstellen und deren Öffnungszeiten können Sie sich bei Ihrer zuständigen Verwaltung informieren Defekte oder verbrauchte Batterien Akkus müssen gemäß Richtlinie 2006 66 EG und deren Änderungen recycelt werden Geben Sie Batterien ...

Page 33: ...nicht über den Hausmüll entsorgt werden Sie können giftige Schwermetalle enthalten und unterliegen der Sondermüllbehandlung Die chemischen Symbole der Schwermetalle sind wie folgt Cd Cadmium Hg Quecksilber Pb Blei Geben Sie deshalb verbrauchte Batterien Akkus bei einer kommunalen Sammelstelle ab ...

Page 34: ...bH Co KG Stiftsbergstraße 1 DE 74167 Neckarsulm DEUTSCHLAND dass dieses Produkt USB WECKER HG02918A HG02918B der Richtlinie 2014 53 EU und 2011 65 EU entspricht Der vollständige Text der EU Konformitätserklärung ist unter der folgenden Internetadresse verfügbar www owim com ...

Page 35: ...efore initial use 48 Powered by batteries 48 Powered by low voltage source 48 Replacing removing the batteries 49 Initial use 49 Changing basic settings 49 Changing alarm settings 52 Activate and deactivate the alarm function 53 Using the snooze function 54 Changing day night setting 54 Using the sound controlled function 55 Troubleshooting 56 Cleaning and care 57 Disposal 57 Simplified EU declara...

Page 36: ... use only USB ALARM CLOCK Introduction We congratulate you on the purchase of your new product You have chosen a high quality product The instructions for use are part of the product They contain important information concerning safety use and disposal Before using the product ...

Page 37: ...his product shows time date and indoor temperature The product is only suitable for use in private households and is not intended for commercial use Parts description 1 SET button Press this button to switch among the time date temperature display Hold this button to access the basic settings mode Confirm settings with this button 2 UP button Press this button to select the time display format 12 ...

Page 38: ...d while the display change is confirmed 4 ALARM button Press this button to access the alarm settings mode Press and hold this button to active or deactivate the alarm function 5 SNOOZE button Press this button to active the snooze function when the alarming Press and hold this button to deactivate the snooze function 6 USB socket 7 Battery compartment 8 Battery compartment cover 9 PM indicator 10...

Page 39: ...B cable Technical data Operating voltage 4 5 V direct current Batteries 3 x batteries LR03 type AAA 1 5 V Temperature range approx 0 50 C 32 122 F USB cable polarity of the power supply 5 V direct current 200 mA Scope of delivery 1 USB alarm clock 3 Batteries LR03 1 USB cable 1 Instructions for use ...

Page 40: ...using the product please familiarise yourself with all of the safety information and instructions for use When passing this product on to others please also include all the documents WARNING DANGER OF DEATH AND ACCIDENTS FOR TODDLERS AND CHILDREN ...

Page 41: ...l as by persons with reduced physical sensory or mental capacities or lacking experience and or knowledge so long as they are supervised or instructed in the safe use of the product and understand the associated risks Children should not be allowed to play with the product ...

Page 42: ...ing and user maintenance should not be performed by children without supervision Safety instructions for batteries recharge able batteries DANGER TO LIFE Keep batteries rechargeable batteries out of reach of children ...

Page 43: ...y swallowed seek immediate medical attention DANGER OF EXPLOSION Never recharge non rechargeable batteries Do not short circuit batteries rechargeable batteries and or open them Overheating fire or bursting can be the result ...

Page 44: ...atteries rechargeable batteries into fire or water Do not exert mechanical loads to batteries rechargeable batteries Risk of leakage of batteries rechargeable batteries Avoid extreme environmental conditions and temperatures ...

Page 45: ...argeable batteries e g radiators direct sunlight Avoid contact with the skin eyes and mucous membranes In the event of contact with battery acid thoroughly flush the affected area with plenty of clean water and seek immediate medical attention ...

Page 46: ...ed or damaged batteries rechargeable batteries can cause burns on contact with the skin Wear suitable protective gloves at all times if such an event occurs In the event of a leakage of batteries rechargeable batteries immediately remove ...

Page 47: ...uct to prevent damage Only use the same type of batteries rechargeable batteries Do not mix used and new batteries rechargeable batteries Remove batteries rechargeable batteries if the product will not be used for a longer period ...

Page 48: ...isk of damage of the product Only use the specified type of battery rechargeable battery Insert batteries rechargeable batteries according to polarity marks and on the battery rechargeable battery and the product ...

Page 49: ...47 GB IE Clean the contacts on the battery rechargeable battery and in the battery compartment before inserting Remove exhausted batteries rechargeable batteries from the product immediately ...

Page 50: ...es type AAA in the battery compartment 7 Be sure the polarity is correct This is indicated in the battery compartment 7 Close the battery compartment 7 Powered by low voltage source Plug the USB cable s 12 round plug into the USB socket 6 and connect to your computer with a USB port Alternatively you can use a USB adapter which can be bought from a retailer ...

Page 51: ... the battery compartment 7 by the handle of the battery compartment cover 8 If applicable remove the old batteries When powered by batteries insert new batteries Check the polarity shown in the battery compartment 7 of the batteries Close the battery compartment 7 Your product is now again ready for use Initial use Changing basic settings Press and hold the SET button 1 for 3 seconds to access the...

Page 52: ...ers Press the SET button 1 to confirm a setting You will automatically advance to the next programming step Note If no changes are made for 15 seconds the product will automatically return to normal display mode The following programming steps can be adjusted one after the other Step Setting Display Explanation Set year The year display flashes The year can be set up to 2099 Set month The month di...

Page 53: ... flashes Set hour The hour display flashes Set minute The minute display flashes Set date format DDMM MMDD The date display format in Day Month DDMM or Month Day MMDD Ý Set tem perature unit C F The temperature display unit in degree Celsius C or degree Fahrenheit F ...

Page 54: ...th 3 alarm times A1 A2 A3 Each alarm can be set with alarm off 5 day alarm or 7 day alarm 1 Press the ALARM button 4 to access the alarm settings mode 2 Press UP button 2 or DOWN button 3 to switch among A1 5 A1 and 7 A1 Notes A1 means alarm off 5 A1 means 5 day alarm setting the alarm sounds from Monday to Friday only 7 A1 means 7 day alarm setting the alarm sounds on everyday ...

Page 55: ... minute display flashes 9 Press UP button 2 or DOWN button 3 to set the minute 10 Press SET button 1 to confirm and enter the Alarm 2 setting 11 Repeat steps 3 to 10 to set the A2 and A3 alarm time Activate and deactivate the alarm function Press and hold the ALARM button 4 for 3 seconds to active and deactivate alarm function If the alarm in active the alarm indicator 11 will display in time disp...

Page 56: ...tion The alarm sound stop with the alarm indicator 11 flash in the time mode The alarm will sound again 5 minutes later To actually shut the alarm off press and hold the snooze button 5 3 seconds The snooze function will now turn off Changing day night setting This product can be set with 4 brightness levels L3 brightest L0 dimmest 1 Press the DOWN button 3 for 3 seconds to access the day night se...

Page 57: ... Press UP button 2 or DOWN button 3 to select the start time for day mode 6 Press SET button 1 to confirm and enter night mode setting 7 Repeat steps 2 to 6 to set the night mode also Using the sound controlled function This product can be reacted by touch or acoustic signal Press and hold the UP button 2 to turn on off the sound controlled function ...

Page 58: ...delicate electronic components For this reason it is possible that it can be disrupted by radio transmitting equipment in the immediate vicinity Electrostatic discharges can lead to malfunctions In the event of such malfunctions press and hold the UP button 2 and DOWN button 3 at the same time for 3 seconds This will reset the product and perform a brief test of the display The product is then rea...

Page 59: ...of at local recycling facilities Observe the marking of the packaging materials for waste separation which are marked with abbreviations a and numbers b with following meaning 1 7 plastics 20 22 paper and fibreboard 80 98 composite materials The product and packaging materials are recyclable dispose of it separately for better waste treatment The Triman logo is valid in France only ...

Page 60: ...as reached the end of its useful life and not in the household waste Information on collection points and their opening hours can be obtained from your local authority Faulty or used batteries rechargeable batteries must be recycled in accordance with Directive 2006 66 EC and its amendments Please return the batteries rechargeable batteries and or the product to the available collection points ...

Page 61: ... not be disposed of with the usual domestic waste They may contain toxic heavy metals and are subject to hazardous waste treatment rules and regulations The chemical symbols for heavy metals are as follows Cd cadmium Hg mercury Pb lead That is why you should dispose of used batteries rechargeable batteries at a local collection point ...

Page 62: ...Stiftsbergstraße 1 DE 74167 Neckarsulm GERMANY declares that the product USB ALARM CLOCK HG02918A HG02918B is in compliance with Directive 2014 53 EU and 2011 65 EU The full text of the EU declaration of conformity is available at the following internet address www owim com ...

Page 63: ...ur piles 77 Alimentation électrique grâce à une source basse tension 78 Remplacer retirer les piles 78 Mise en service 79 Configurer les paramètres 79 Changement des réglages de la sonnerie 81 Activer désactiver la sonnerie du réveil 83 Utilisation de la fonction de répétition de la sonnerie 84 Réglage du changement sur le mode diurne nocturne 84 Utiliser la fonction de commande par le son 85 Réso...

Page 64: ...Nous vous félicitons pour l achat de votre nouveau produit Vous avez opté pour un produit de grande qualité Le mode d emploi fait partie intégrante de ce produit Il contient des indications importantes pour la sécurité l utilisation et la mise au rebut Veuillez lire consciencieusement toutes les indications d utilisation et de sécurité du produit ...

Page 65: ...prévu pour être utilisé dans le domaine domestique et n est pas approprié pour une utilisation à des fins commerciales Description des pièces 1 Touche SET Appuyez sur la touche pour basculer entre l heure la date l affichage de la température Maintenez cette touche enfoncée afin de parvenir aux réglages des paramètres Validez vos réglages avec cette touche 2 Touche UP Appuyez sur cette touche pour...

Page 66: ...validée 4 Touche ALARM Appuyez sur cette touche pour appeler le mode de réglage de la sonnerie Maintenez cette touche enfoncée pour activer désactiver la sonnerie du réveil 5 Touche SNOOZE Appuyez sur cette touche pour activer la fonction de répétition de la sonnerie lorsque celle ci retentit Maintenez cette touche enfoncée pour désactiver la fonction de répétition 6 Prise USB 7 Compartiment des p...

Page 67: ...ture 12 Câble USB Caractéristiques techniques Tension de fonctionnement 4 5 V courant continu Piles 3 piles LR03 type AAA 1 5 V Plage de température env 0 50 C 32 122 F Polarité de l alimentation électrique avec câble USB 5 V courant continu 200 mA Contenu de la livraison 1 Réveil USB 3 Piles LR03 1 Câble USB 1 Mode d emploi ...

Page 68: ...mière utilisation du produit familiarisez vous avec l ensemble des consignes de fonc tionnement et de sécurité Trans mettez l ensemble des documents concernant le produit lorsque vous le cédez à un tiers AVERTISSEMENT DANGER DE MORT ET RISQUE DE BLESSURES ...

Page 69: ...utilisé par des enfants de plus de 8 ans et par des personnes ayant des capacités physiques sensorielles ou mentales réduites ou ayant une expérience et des connaissances limitées seulement s ils sont surveillés ou s ils ont reçu les instructions concernant l utilisation en ...

Page 70: ...ompris les risques encourus Les enfants ne doivent pas jouer avec le produit Le nettoyage et l entretien domestique de l appareil ne doivent pas être effectués par un enfant sans surveillance Consignes de sécurité pour piles accus DANGER DE MORT ...

Page 71: ...les accus hors de la portée des enfants Consultez immédiatement un médecin en cas d ingestion RISQUE D EXPLOSION Ne rechargez jamais des piles non rechargeables Ne court circuitez jamais de piles d accus et ou ne les ouvrez pas ...

Page 72: ... susceptible de provoquer une surchauffe un incendie ou une explosion Ne jamais jeter des piles piles rechargeables accus au feu dans l eau Ne pas exercer de pressions mécaniques sur des piles piles rechargeables accus ...

Page 73: ...ues dus à la fuite de piles d accus Évitez les conditions et températures extrêmes pouvant exercer une influence sur les piles accus par ex positionnement sur des radiateurs exposition à la lumière directe du soleil ...

Page 74: ...tez tout contact avec la peau les yeux et les muqueuses Lors d un contact avec de l acide s écoulant de piles rincez immédiatement et abondamment à l eau claire les parties touchées et consultez aussitôt un médecin ...

Page 75: ...Z DES GANTS DE PROTECTION Des piles piles rechargeables accus endommagées ou ayant fui sont susceptibles de causer des brûlures en cas de contact avec la peau Si tel est le cas portez des gants de protection adaptés ...

Page 76: ...ile piles rechargeables accus retirez les immédiatement du produit afin d éviter tout dommage Utilisez uniquement des piles piles rechargeables accus du même type Ne mélangez pas les piles piles rechargeables accus neuves et usagées ...

Page 77: ... les piles piles rechargeables accus si vous ne comptez pas utiliser le produit pendant une période prolongée Risque d endommagement du produit Utilisez exclusivement le type de piles piles rechargeables accus indiqué ...

Page 78: ... rechargeables accus conformément au marquage de la polarité et sur les piles accus et le produit Nettoyez les contacts des piles piles rechargeables accus ainsi que ceux à l intérieur du compartiment des piles avant de les y insérer ...

Page 79: ...tirez tous les matériaux d emballage du produit Fonctionnement sur piles Retirez le couvercle du compartiment des piles 8 Insérez 3 piles de type AAA dans le compartiment des piles 7 Faites attention à la bonne polarité Celle ci est indiquée dans le compartiment des piles 7 Refermez le compartiment des piles 7 ...

Page 80: ...marque Lorsque l écran d affichage devient pale ou clignote constamment les piles doivent être remplacées Remplacez toujours toutes les piles en même temps Utilisez uniquement des piles du type LR03 Ouvrez le compartiment des piles 7 à la prise de préhension sur le couvercle du compartiment des piles 8 Retirez les piles usagées Insérez de nouvelles piles si vous souhaitez faire fonctionner le prod...

Page 81: ...r au mode de Réglages des paramètres À chaque étape de la programmation appuyez sur la touche UP 2 ou DOWN 3 pour effectuer des modifications CONSEIL Si vous maintenez la touche UP 2 ou DOWN 3 enfoncée vous faites dérouler les chiffres plus rapidement vers l avant ou vers l arrière Appuyez sur la touche SET 1 pour valider le réglage Vous passez automatiquement à la prochaine étape de la programmat...

Page 82: ...s peuvent être effectués l un après l autre Étape Réglage Affichage Description Régler l année L affichage de l année clignote L année peut être réglée jusqu à 2099 Régler le mois L affichage du mois clignote Régler le jour L affichage du jour clignote Régler les heures L affichage des heures clignote Régler les minutes L affichage des minutes clignote ...

Page 83: ...e de la tem pérature en degrés Celsius C ou en degrés Fahrenheit F À l étape de la programmation Ý appuyez sur la touche SET 1 pour valider l unité de la température Le produit revient au mode normal Changement des réglages de la sonnerie Ce produit peut être réglé sur 3 réveils A1 A2 et A3 Chaque sonnerie peut être réglée sur sonnerie sur un jour sonnerie sur 5 jours ou sonnerie sur 7 jours ...

Page 84: ... A1 désigne le réglage de la sonnerie sur 5 jours la sonnerie du réveil retentit seulement du lundi au vendredi 7 A1 désigne le réglage de la sonnerie sur 7 jours l alarme retentit chaque jour 3 Basculez entre 5 A1 et 7 A1 4 Appuyez sur la touche SET 1 pour régler l heure de la sonnerie 5 L affichage des heures clignote 6 Appuyez sur la touche UP 2 ou DOWN 3 pour régler les heures 7 Appuyez sur la...

Page 85: ...apes 3 à 10 pour régler A2 et A3 Activer désactiver la sonnerie du réveil Maintenez la touche ALARM 4 enfoncée pendant 3 secondes pour activer désactiver la sonnerie du réveil Lorsque la sonnerie du réveil est activée l affichage de la sonnerie 11 apparaît sur celui de l horloge Maintenez la touche ALARM 4 de nouveau enfoncée pour désactiver la sonnerie du réveil L affichage de la sonnerie 11 disp...

Page 86: ...n Pour éteindre définitivement la sonnerie du réveil appuyez sur la touche SNOOZE 5 pendant 3 secondes Ce n est qu à ce moment là que la fonction de répétition de la sonnerie prend fin Réglage du changement sur le mode diurne nocturne Ce produit peut être réglé sur 4 niveaux de luminosité L3 niveau le plus clair L0 niveau le plus sombre 1 Maintenez enfoncée la touche DOWN 3 pendant 3 secondes afin...

Page 87: ...r valider et basculer sur le réglage du mode nocturne 7 Répétez les étapes 2 à 6 pour régler le mode nocturne Utiliser la fonction de commande par le son Ce produit peut réagir au contact tactile ou aux signaux sonores Maintenez enfoncée la touche UP 2 pour activer désactiver la fonction de commande par le son Remarques on sd signifie que la fonction de commande par le son est activée L affichage ...

Page 88: ... proximité directe Des déchargements électrostatiques peuvent provoquer des défaillances dans son fonctionnement Si ce type de dysfonctionnements apparaît maintenez enfoncées les deux touches UP 2 et DOWN 3 pendant 3 secondes Cela réinitialise le produit aux réglages par défaut et réalise un court test d affichage Ensuite le produit est à nouveau prêt à l emploi Remarque En réinitialisant tous les...

Page 89: ...fiés avec des abbréviations a et des chiffres b ayant la signification suivante 1 7 plastiques 20 22 papiers et cartons 80 98 matériaux composite Le produit et les matériaux d emballage sont recyclables mettez les au rebut séparément pour un meilleur traitement des déchets Le logo Triman n est valable qu en France Votre mairie ou votre municipalité vous renseigneront sur les possibilités de mise a...

Page 90: ...Pour obtenir des renseignements concernant les points de collecte et leurs horaires d ouverture vous pouvez contacter votre municipalité Les piles piles rechargeables défectueuses ou usagées doivent être recyclées conformément à la directive 2006 66 CE et ses modifications Veuillez ramener les piles piles rechargeables et ou le produit aux points de collecte disponibles ...

Page 91: ...au rebut avec les ordures ménagères Elles peuvent contenir des métaux lourds toxiques et doivent être considérées comme des déchets spéciaux Les symboles chimiques des métaux lourds sont les suivants Cd cadmium Hg mercure Pb plomb Pour cette raison veuillez toujours mettre au rebut les piles piles rechargeables usagées dans les points de collecte de votre localité ...

Page 92: ...H Co KG Stiftsbergstraße 1 DE 74167 Neckarsulm ALLEMAGNE déclare que le produit RÉVEIL USB HG02918A HG02918B est conforme à la directive 2014 53 EU et 2011 65 EU Le texte complet de la déclaration UE de conformité est disponible à l adresse internet suivante www owim com ...

Page 93: ...name 106 Batterijmodus 106 Stroomvoorziening door een laagspanningsbron 106 Batterijen inleggen verwijderen 106 Ingebruikname 107 Basisinstellingen invoeren 107 Wekkerinstellingen veranderen 110 Wekkerfunctie aan uitzetten 111 Sluimerfunctie gebruiken 112 Wisselen dag nachtinstelling 112 Gebruik van de geluidgestuurde functie 113 Verhelpen van problemen 114 Schoonmaken en onderhoud 115 Afvoer 115 ...

Page 94: ...uis USB WEKKER Inleiding Hartelijk gefeliciteerd met de aankoop van uw nieuwe product U heeft voor een hoogwaardig product gekozen De gebruiksaanwijzing is een deel van het product Deze bevat belangrijke aanwijzingen voor veiligheid gebruik en verwijdering Maakt U zich voor de ingebruikname van ...

Page 95: ...t product is alleen geschikt voor gebruik in privéhuishoudens en niet voor commercieel gebruik Onderdelenbeschrijving 1 Toets SET Druk op deze toets om tussen tijd da tum temperatuuraanduiding te wisselen Houd deze toets ingedrukt om terug te keren naar de basisinstellingen Bevestig uw instelling door op deze toets te drukken 2 Toets UP Druk op deze toets om het formaat van de tijdaanduiding 12 uu...

Page 96: ...randering van aanduidingswijze bevestigd wordt 4 Toets ALARM Druk op deze toets om naar de modus voor het instellen van de wekker te gaan Houd deze toets ingedrukt om de wekkerfunctie aan uit te zetten 5 Toets SNOOZE Druk op deze toets om de sluimerfunctie aan te zetten als de wekker afgaat Houd deze toets ingedrukt om de sluimerfunctie uit te zetten 6 USB bus 7 Batterijvak 8 Batterijvakdeksel 9 P...

Page 97: ...SB kabel Technische gegevens Bedrijfsspanning 4 5 V gelijkstroom Batterijen 3 x batterijen LR03 type AAA 1 5 V Temperatuurbereik ca 0 50 C 32 122 F Polariteit van de stroomvoorziening van de USB kabel 5 V gelijkstroom 200 mA Leveringsomvang 1 USB wekker 3 Batterijen LR03 1 USB kabel 1 Gebruiksaanwijzing ...

Page 98: ...org ervoor dat u voordat u het apparaat voor het eerst gebruikt vertrouwd bent met alle veilig heidsaanwijzingen Laat het product als u dat aan een derde doorgeeft vergezeld gaan van alle documenten WAARSCHUWING LEVENSGEVAAR EN GEVAAR VOOR ONGE ...

Page 99: ...door personen met verminderde fysieke sensori sche of geestelijke vermogens of gebrek aan ervaring en kennis alleen gebruikt worden als ze onder supervisie staan of geïnstrueerd zijn wat betreft vei lig gebruik van het product en begrepen hebben welke geva ren uit dat gebruik voortvloeien ...

Page 100: ... het product spelen Schoonmaken en onderhoud mogen niet door kinderen worden uitgevoerd tenzij dat onder toezicht ge beurt Veiligheidsaanwijzin gen voor batterijen accu s LEVENSGEVAAR Houd batterijen accu s buiten bereik van kinderen ...

Page 101: ...van inslikken direct contact op met een arts ONTPLOFFINGSGE VAAR Laad niet oplaadbare batterijen nooit opnieuw op Sluit batterijen accu s nooit kort en of open ze niet Oververhitting brandgevaar of barsten kan het gevolg zijn ...

Page 102: ...ijen accu s nooit in het vuur of in water Stel batterijen accu s nooit bloot aan welke mechanische druk dan ook De kans bestaat dat de batterijen accu s dan gaan lekken Vermijd extreme omstandigheden en temperaturen die op ...

Page 103: ...eeld verwarmingselementen direct zonlicht Zorg ervoor dat uitgelopen batterijzuur niet in contact komt met huid ogen of slijmvliezen Spoel bij contact met batterijzuur de aangetaste plekken direct met veel schoon water en neem direct contact op met de huisarts ...

Page 104: ...NL BE DRAAG VEILIGHEIDS HANDSCHOENEN Lekkende of beschadigde batterijen accu s kunnen bij contact met de huid bijtende wonden veroorzaken Draag daarom in een dergelijk geval daarvoor geschikte handschoenen ...

Page 105: ...3 NL BE Haal een lekkende batterij direct uit het product om beschadigingen te voorkomen Gebruik alleen batterijen accu s van hetzelfde type Gebruik nooit oude en nieuwe batterijen accu s door elkaar heen ...

Page 106: ... batterijen accu s uit het apparaat als u dat voor lange tijd niet denkt te zullen gebruiken Kans op beschadiging van het product Gebruik uitsluitend het aangegeven soort batterijen accu s Plaats batterijen accu s conform de ...

Page 107: ...ng en op de batterij accu en op het product Maak de contacten van de batterij accu zowel als van het batterijvak schoon voordat u de batterij accu in het product plaatst Verwijder uitgeputte batterijen accu s direct uit het product ...

Page 108: ... in het batterijvak 7 aangegeven Sluit het batterijvak 7 weer Stroomvoorziening door een laagspanningsbron Steek de ronde stekker van de USB kabel 12 in de USB bus 6 en verbind deze via een USB poort met uw computer Ook kunt u een in de detailhandel verkrijgbare USB adapter gebruiken Batterijen inleggen verwijderen Tip Als het beeldscherm troebel wordt of continu knippert moeten de batterijen verv...

Page 109: ...tterijen laat werken Let hierbij op de polariteit in het batterijvak 7 aangeduid van de batterijen Sluit het batterijvak 7 weer Het product is nu weer klaar voor gebruik Ingebruikname Basisinstellingen invoeren Houd de toets SET 1 3 seconden lang ingedrukt om naar de modus Basisinstellingen te gaan Druk in de volgende programmeerstap op toets UP 2 of DOWN 3 om veranderingen in te voeren TIP Als u ...

Page 110: ...rt zet het product zichzelf automatisch weer in de normaalstand De volgende instellingen kunnen na elkaar ingevoerd worden Stap Instel ling Aanduidingen Beschrijving Jaar instellen Jaaraanduiding knippert Het jaar kan tot 2099 ingesteld worden Maand instellen De maandaandui ding knippert Dag instellen De dagaanduiding knippert Uur instellen De urenindicator knippert ...

Page 111: ...nstellen DDMM MMDD Datumaanduiding in formaat dag maand DDMM of maand dag MMDD Ý Tempera tuureen heid instellen C F Temperatuuraandui ding in graden Cel sius C of graden Fahrenheit F Druk in de programmeerstap Ý op toets SET 1 om de temperatuureenheid vast te leggen Het product keert weer terug naar de normaalstand ...

Page 112: ...instellingen te komen 2 Druk op toets UP 2 of DOWN 3 om tussen A1 5 A1 en 7 A1 te wisselen Tips A1 betekent Wekker uit 5 A1 betekent 5 wekdagen de wekker gaat alleen van maandag tot vrijdag af 7 A1 betekent 7 wekdagen de wekker gaat elke dag af 3 Maak een keuze tussen 5 A1 en 7 A1 4 Druk op toets SET 1 om de wektijd in te stellen 5 De urenindicator knippert 6 Druk op toets UP 2 of DOWN 3 om het uu...

Page 113: ...uk op toets SET 1 om de instelling te bevestigen en over te gaan naar de instelling Alarm 2 11 Herhaal stappen 3 tot 10 om de wektijden A2 en A3 in te stellen Wekkerfunctie aan uitzetten Houd de ALARM toets 4 3 seconden lang ingedrukt om de wekkerfunctie aan of uit te schakelen Als de wekker is aangezet verschijnt de wekkeraanduiding 11 in de tijdaanduiding ...

Page 114: ...toon stopt en klinkt 5 minuten later opnieuw De wekkeraanduiding 11 knippert op het beeldscherm Houd voor het definitief uitschakelen van de wekker de toets SNOOZE 5 3 seconden ingedrukt Pas nu is de sluimerfunctie uitgezet Wisselen dag nachtinstelling Dit product kan op 4 lichtsterktes ingesteld worden L3 hoogste lichtsterkte L0 laagste lichtsterkte 1 Houd toets DOWN 3 3 seconden lang ingedrukt o...

Page 115: ...WN 3 om de starttijd voor de dagmodus te kiezen 6 Druk op toets SET 1 om de instelling te bevestigen en over te gaan naar de instelling van de nachtmodus 7 Herhaal stappen 2 tot 6 om de nachtmodus in te stellen Gebruik van de geluidgestuurde functie Dit product is in staat te reageren op aanrakings of geluidssignalen Houd de toets UP 2 ingedrukt om de geluidgestuurde functie aan uit te zetten ...

Page 116: ...en van problemen Het product bevat gevoelige elektronische onderdelen Daarom is het mogelijk dat het door draadloze apparaten in de buurt wordt gestoord Elektrostatische ontladingen kunnen functiestoringen veroorzaken Houd in geval van een dergelijke fout de toetsen UP 2 en DOWN 3 tegelijkertijd 3 seconden lang ingedrukt Dit zet het product weer terug in zijn werkinstellingen en voert ook een kort...

Page 117: ...ekje Afvoer De verpakking bestaat uit milieuvriendelijke grondstoffen die u via de plaatselijke recyclingcontainers kunt afvoeren Neem de aanduiding van de verpakkingsmaterialen voor de afvalscheiding in acht Deze zijn gemarkeerd met de afkortingen a en een cijfers b met de volgende betekenis 1 7 kunststoffen 20 22 papier en vezelplaten 80 98 composietmaterialen ...

Page 118: ...Informatie over de mogelijkheden om het uitgediende product na gebruik te verwijderen verstrekt uw gemeentelijke overheid Gooi het afgedankte product omwille van het milieu niet weg via het huisvuil maar geef het af bij het daarvoor bestemde depot of het gemeentelijke milieupark Over afgifteplaatsen en hun openingstijden kunt u zich bij uw aangewezen instantie informeren ...

Page 119: ...ilieuschade door verkeerde afvoer van batterijen oplaadbare batterijen Batterijen oplaadbare batterijen mogen niet samen met het gewone huisvuil worden weggegooid Ze kunnen giftig zwaar metaal bevatten en moeten worden behandeld als gevaarlijk afval De chemische symbolen van de zware metalen zijn als volgt Cd cadmium Hg kwikzilver Pb lood Lever uw gebruikte batterijen oplaadbare batterijen aldus i...

Page 120: ...IM GmbH Co KG Stiftsbergstraße 1 DE 74167 Neckarsulm DUITSLAND dat het product USB WEKKER HG02918A HG02918B voldoet aan richtlijn 2014 53 EU en 2011 65 EU De volledige tekst van de EU conformiteitsverklaring kan worden geraadpleegd op het volgende internetadres www owim com ...

Page 121: ...do provozu 133 Provoz na baterie 133 Napájení prostřednictvím zdroje nízkého napětí 133 Výměna odstranění baterie 133 Uvedení do provozu 134 Proveďte základní nastavení 134 Změna nastavení alarmu 137 Aktivování deaktivování funkce budíku 138 Použití funkce opakovaného buzení 139 Změna nastavení den noc 139 Použití zvukem řízené funkce 140 Odstranění závad 141 Čistění a péče 141 Zlikvidování 141 Zj...

Page 122: ...oud Polarita K upotřebení pouze ve vnitřních prostorech USB BUDÍK Úvod Blahopřejeme Vám ke koupi nového výrobku Rozhodli jste se pro kvalitní produkt Návod k obsluze je součástí tohoto výrobku Obsahuje důležité pokyny pro bezpečnost použití a likvidaci ...

Page 123: ...a teplotu místnosti Výrobek je vhodný pouze pro použití v domácnostech a není určen pro komerční využití Popis dílů 1 Tlačítko SET Stiskněte toto tlačítko pro přepínání mezi zobrazením času data teploty Pro přechod k základním nastavením podržte toto tlačítko stlačené Nastavení potvrďte tímto tlačítkem 2 Tlačítko UP Stiskněte toto tlačítko pro zvolení formátu zobrazení času 12 hod nebo 24 hod Podr...

Page 124: ...změna zobrazení zazní pípnutí 4 Tlačítko ALARM Stiskněte toto tlačítko pro vyvolání režimu nastavení alarmu Podržte toto tlačítko stlačené pro aktivaci deaktivaci parmové funkce 5 Tlačítko SNOOZE Stiskněte toto tlačítko pro aktivaci funkce dřímání když zazní alarm Podržte toto tlačítko pro deaktivaci funkce dřímání 6 Zásuvka USB 7 Přihrádka na baterie 8 Kryt přihrádky na baterie 9 PM indikátor 10 ...

Page 125: ... teploty 12 USB kabel Technické údaje Provozní napětí 4 5 V stejnosměrné Baterie 3 x baterie LR03 Typ AAA 1 5 V Rozsah teplot cca 0 50 C 32 122 F Polarita napájení na USB kabelu 5 V stejnosměrné 200 mA Rozsah dodávky 1 USB budík 3 baterie LR03 1 USB kabel 1 Návod k obsluze ...

Page 126: ...ím produktu se seznamte se všemi obslužnými a bezpečnostními pokyny Při předá ní výrobku třetím osobám předejte rovněž veškeré podklady VAROVÁNÍ NEBEZPEČÍ SMRTI A NEHOD PRO BATOLATA A DĚTI Tento přístroj mohou používat děti starší 8 let i osoby se sníženými ...

Page 127: ...hopnostmi nebo s nedostatkem zkušeností a znalostí pokud jsou pod dohledem nebo byly poučeny ohledně bezpečného používání přístroje a chápou z toho vyplývající rizika Děti si nesmí s výrobkem hrát Děti nesmí provádět čištění a údržbu bez dohledu ...

Page 128: ...126 CZ Bezpečnostní pokyny pro baterie dobíjecí baterie NEBEZPEČÍ ŽIVOTA Baterie akumulátory udržujte mimo dosah dětí V případě spolknutí vyhledejte ihned lékaře ...

Page 129: ...HU Nikdy nedobíjejte nedobíjitelné baterie Nezkratujte baterie dobíjecí baterie ani je neotevírejte Přehřátí nebezpečí požáru nebo roztržení může být následkem Nikdy neházejte baterie dobíjecí baterie do ohně nebo do vody ...

Page 130: ...na baterie dobíjecí baterie mechanický tlak Riziko vytečení baterií dobíjecích baterií Vyhněte se extrémním podmínkám a teplotám které mohou na baterie dobíjecí baterie působit např na radiátorech přímém slunečním záření ...

Page 131: ...očima a sliznicemi Při kontaktu s kyselinou opláchněte ihned postižená místa čistou vodou a vyhledejte hned lékaře NOSTE OCHRANNÉ RUKAVICE Vytékající nebo poškozené baterie dobíjecí baterie mohou způsobit při styku s pokožkou popálení ...

Page 132: ...oužijte vhodné ochranné rukavice V případě úniku baterie dobíjecí baterie ihned ji vyjměte z výrobku aby nedošlo k poškození Používejte pouze stejný typ baterie dobíjecí baterie Nemíchejte staré a nové baterie dobíjecí baterie ...

Page 133: ...131 CZ Demontujte akumulátorové baterie dobíjecí baterie pokud výrobek nebude delší dobu používán Nebezpečí poškození výrobku Používejte pouze předepsaný typ baterie dobíjecí baterie ...

Page 134: ...bíjecí baterie podle označení polarity a na baterii dobíjecí baterii a na výrobku Očistěte kontakty na baterii dobíjecí baterii a v přihrádce na baterie před vložením Vyjměte okamžitě vybité baterie dobíjecí baterie z produktu ...

Page 135: ...ritu Ta je zobrazena v přihrádce na baterie 7 baterie Zavřete přihrádku na baterie 7 Napájení prostřednictvím zdroje nízkého napětí Připojte kulatý konektor kabelu USB 12 do USB zásuvky 6 a spojte jej s vaším počítačem prostřednictvím portu USB Alternativně můžete použít adaptér USB který je k dostání v maloobchodě Výměna odstranění baterie Pokyn Je li displej zakalený nebo neustále bliká musí se ...

Page 136: ...polaritu baterií ukázáno v přihrádce na baterie 7 Zavřete přihrádku na baterie 7 Váš výrobek je nyní opět připraven k provozu Uvedení do provozu Proveďte základní nastavení Podržte tlačítko SET 1 3 sekundy stlačené abyste se dostali do režimu Základní nastavení Klikněte nyní v každém následujícím kroku programu na tlačítko UP 2 nebo DOWN 3 pro provedení změny TIP Když podržíte tlačítko UP 2 nebo D...

Page 137: ...n Když jste 15 sekund neprovedli žádné nastavení výrobek se automaticky přepne zase do normálního režimu Následující nastavení lze provést po sobě Krok Nasta vení Indikace Popis Nastavit rok Bliká indikátor roku Rok může být nastaven až do roku 2099 Nastavit měsíc Bliká indikace měsíce Nastavit den Bliká indikátor dne ...

Page 138: ...Bliká indikátor hodin Nastavit minuty Bliká indikátor minut Nastavit formát data DDMM MMDD Zobrazení data ve formátu den měsíc DDMM nebo měsíc den ve tvaru MMDD Ý Nastavení jednotky teploty C F Indikace teploty v stupních Celsia C nebo stupňů Fahrenheita F ...

Page 139: ...1 A2 a A3 Každý alarm může být nastaven na Alarm vyp 5 denní alarm nebo 7 denní alarm 1 Stiskněte tlačítko ALARM 4 pro přechod k nastavením alarmu 2 Stiskněte tlačítko UP 2 nebo DOWN 3 změnu mezi A1 5 A1 a 7 A1 Upozornění A1 je Alarm vyp 5 A1 je pro nastavení 5 denní alarm alarm se spustí pouze od pondělí do pátku 7 A1 je pro nastavení 7 denní alarm alarm zazní každý den 3 Přepínejte mezi 5 A1 a 7...

Page 140: ...r minut 9 Stiskněte tlačítko UP 2 nebo DOWN 3 pro nastavení minut 10 Stiskněte tlačítko SET 1 pro potvrzení a abyste se dostali k nastavení Alarm 2 11 Opakujte kroky 3 až 10 pro nastavení dob alarmů A2 a A3 Aktivování deaktivování funkce budíku Podržte tlačítko ALARM 4 stlačené po 3 sekundy Abyste aktivovali deaktivovali funkci budíku Když je alarm aktivní indikátor alarmu 11 zobrazen v zobrazení ...

Page 141: ... za 5 minut později se znovu aktivuje Indikátor alarmu 11 bliká na displeji Podržte pro konečné vypnutí signálu alarmu tlačítko SNOOZE 5 po 3 sekundy Až nyní skončí funkce opakovaného buzení Změna nastavení den noc Tento výrobek může být nastaven na 4 úrovně jasu L3 nejjasnější fáze L0 nejtmavší úroveň 1 Stiskněte tlačítko DOWN 3 na 3 sekundy abyste se dostali do nastavení den a noc 2 Stiskněte tl...

Page 142: ... 7 Opakujte kroky 2 až 6 abyste nastavili noční režim Použití zvukem řízené funkce Tento výrobek může reagovat na dotyk nebo akustické signály Podržte tlačítko UP 2 stlačené abyste zapnuli vypnuli zvukem řízenou funkci Upozornění on sd znamená že je zapnutá funkce ovládaná zvukem Indikace se automaticky vypne když se asi 20 sekund nedetekuje žádný signál sd znamená že je zvukem ovládaná funkce vyp...

Page 143: ...ch poruch přidržte tlačítka UP 2 a DOWN 3 současně po 3 sekundy To obnoví tovární nastavení výrobku a provede rychlý test displeje Poté je výrobek opět připraven k použití Pokyn Když resetování se všechna nastavení vymažou Čistění a péče Výrobek čistěte pouze zevně měkkým suchým hadříkem Zlikvidování Balení se skládá ekologicky přijatelných materiálů které se dají likvidovat prostřednictvím místní...

Page 144: ... recyklovatelné zlikvidujte je odděleně pro lepší odstranění odpadu Logo Triman platí jen pro Francii O možnostech likvidace vysloužilých zařízení se informujte u správy vaší obce nebo města V zájmu ochrany životního prostředí vysloužilý výrobek nevyhazujte do domovního odpadu ale předejte k odborné likvidaci O sběrnách a jejich otevíracích hodinách se můžete informovat u příslušné správy města ne...

Page 145: ...ýrobek do sběrných míst které jsou k dispozici Ekologické škody v důsledku chybného zlikvidování baterií Baterie se nesmí zlikvidovat v domácím odpadu Mohou obsahovat jedovaté těžké kovy a podléhají zpracování zvláštního odpadu Chemické symboly těžkých kovů Cd kadmium Hg rtuť Pb olovo Proto odevzdejte opotřebované baterie u komunální sběrny ...

Page 146: ...to OWIM GmbH Co KG Stiftsbergstraße 1 DE 74167 Neckarsulm NĚMECKO prohlašuje že výrobek USB BUDíK HG02918A HG02918B odpovídá směrnicím 2014 53 EU a 2011 65 EU Úplné znění EU prohlášení o shodě je k dispozici na této internetové adrese www owim com ...

Page 147: ...9 Tipo de pilas 159 Suministro de corriente mediante una fuente de baja tensión 160 Retirar reemplazar las pilas 160 Puesta en funcionamiento 161 Ajustes iniciales 161 Cambio de los ajustes de la alarma 163 Activar Desactivar función alarma 165 Empleo de la función repetición 165 Cambio del ajuste de Día Noche 166 Empleo de la función de control por sonido 167 Solución de problemas 167 Limpieza y ...

Page 148: ...R USB Introducción Enhorabuena por la adquisición de su nuevo producto Ha optado por un producto de alta calidad El manual de instruc ciones forma parte de este producto Contiene importantes indicaciones sobre seguridad uso y eliminación Antes de usar el producto familiarícese con todas las indicaciones de ...

Page 149: ...nte El producto es apropiado sólo para uso privado y no está previsto para un uso comercial Descripción de las piezas 1 Tecla SET Pulse esta tecla para cambiar entre el indica dor de hora fecha temperatura Mantenga pulsada esta tecla para acceder a los ajustes iniciales Confirme sus ajustes con esta tecla 2 Tecla UP Pulse esta tecla para seleccionar el formato indicador de hora 12 h o 24 h Manteng...

Page 150: ...cla para consultar el modo de ajuste de alarma Mantenga pulsada esta tecla para activar desactivar la función de alarma 5 Tecla SNOOZE Pulse esta tecla para activar la función repetición cuando suene la alarma Mantenga pulsada esta tecla para desactivar la función repetición 6 Conector USB 7 Compartimento de pilas 8 Tapa de compartimento de pilas 9 Indicador PM 10 Pantalla 11 Indicador de alarma e...

Page 151: ...n 4 5 V CC Pilas 3 x pilas LR03 tipo AAA 1 5 V Rango de temperatura aprox 0 50 C 32 122 F Polaridad del suministro de corriente del cable USB 5 V CC 200 mA Volumen de suministro 1 despertador USB 3 pilas LR03 1 cable USB 1 manual de instrucciones ...

Page 152: ... Familiarícese antes de usar el producto con todas las indicaciones de seguridad y funcionamiento Entregue toda la documentación si transfiere el producto a terceros ADVERTENCIA PE LIGRO DE MUERTE Y ACCIDENTE PARA LOS NIÑOS Este producto puede ...

Page 153: ...apacidades físicas mentales o sensoriales reducidas siempre y cuando haya una persona responsable de su seguridad que los supervise o se los haya instruido en el uso seguro del producto y estos conozcan los posibles peligros No permita que los niños jueguen con el aparato ...

Page 154: ...nimiento no podrán llevarse a cabo por niños sin vigilancia Indicaciones de seguridad para pilas baterías PELIGRO DE MUERTE Mantenga las pilas baterías fuera del alcance de los niños En caso de ingestión accidental busque atención ...

Page 155: ...3 ES médica de inmediato PELIGRO DE EXPLOSIÓN Nunca recargue baterías no recargables No provoque un cortocircuito en las pilas baterías ni las abra ya que podría darse un sobrecalentamiento fuego o rotura ...

Page 156: ...as al fuego o al agua No someta las pilas baterías a cargas mecánicas Riesgo en caso de fuga de las pilas baterías Evite temperaturas y condiciones extremas que pudieran afectar a las pilas baterías p ej radiadores radiación solar directa ...

Page 157: ...155 ES Evite el contacto con la piel ojos y mucosas En el caso de contacto con el ácido de la batería lave los puntos afectados con agua limpia y consulte de inmediato al médico ...

Page 158: ...N Las pilas baterías dañadas o con filtraciones pueden provocar quemaduras en contacto con la piel Por ello use en todo momento guantes de protección apropiados En caso de fuga de las pilas baterías retírelas inmediatamente del producto ...

Page 159: ...vitar daños Utilice solo el mismo tipo de pilas baterías recargables No mezcle pilas baterías nuevas y usadas Extraiga las pilas baterías si no tiene previsto utilizar el producto durante un largo periodo de tiempo ...

Page 160: ...lo el mismo tipo de pilas baterías especificado Inertes las pilas baterías te niendo en cuenta la polaridad indicada y en la pila batería y en el producto Limpie los contactos de la pila batería y del compar timento de la pila antes de insertarla ...

Page 161: ...Retire por completo el material de embalaje del producto Tipo de pilas Abra la tapa del compartimento de pilas 8 Inserte 3 pilas del tipo AAA en el compartimento 7 Asegúrese de que la polaridad sea la correcta Esta se puede visualizar en el compartimento 7 Cierre nuevamente el compartimiento de pilas 7 ...

Page 162: ...cios minoristas Retirar reemplazar las pilas Nota Si la pantalla se nubla o parpadea constantemente se deberán cambiar las pilas Cambie siempre todas las pilas a la vez Utilice sólo pilas del tipo LR03 Abra el compartimento de las pilas 7 por el asa de la tapa 8 Retire en su caso las pilas gastadas Coloque las nuevas en caso de que desee hacer funcionar el producto con pilas Preste atención a las ...

Page 163: ... iniciales Pulsar en cada paso del programa la tecla UP 2 o DOWN 3 para realizar los cambios CONSEJO Si mantiene pulsada la tecla UP 2 o DOWN 3 conseguirá que los números avancen o retrocedan con más rapidez Pulse la tecla SET 1 para confirmar el ajuste Accederá automáticamente al siguiente paso del programa Nota Si no realiza ningún ajuste durante 15 segundos el programa cambiará automáticamente ...

Page 164: ...de año parpadea El año puede ser ajustado hasta 2099 Ajustar el mes Indicador de mes parpadea Ajustar el día Indicador de día parpadea Ajustar horas Indicador de horas parpadea Ajustar minutos Indicador de minu tos parpadea Ajustar formato de fecha DDMM MMDD Indicador de fecha en formato Día Mes DDMM o Mes Día MMDD ...

Page 165: ... grados Fahrenheit F En el paso de programa Ý pulse la tecla SET 1 para confir mar la unidad de temperatura El producto volverá de nuevo al modo normal Cambio de los ajustes de la alarma En este producto se pueden ajustar 3 horas de alarma A1 A2 y A3 Cada alarma se puede ajustar en Alarma apagada Alarma 5 días o Alarma 7 días ...

Page 166: ...s la alarma suena sólo de lunes a viernes 7 A1 indica el ajuste 7 A1 indica el ajuste Alar ma 7 días la alarma suena todos los días 3 Cambiar entre 5 A1 y 7 A1 4 Pulsar la tecla SET 1 para ajustar la hora de alarma 5 El indicador de horas parpadea 6 Pulse la tecla UP 2 o DOWN 3 para ajustar las horas 7 Pulse la tecla SET 1 para confirmar 8 El indicador de minutos parpadea 9 Pulse la tecla UP 2 o D...

Page 167: ...ón alarma Si la alarma está activa se visualizará la hora de alarma 11 en el indicador de tiempo Mantenga pulsada la tecla ALARM 4 para desactivar la función alarma El indicador de alarma 11 se apaga Empleo de la función repetición Pulse cualquier tecla durante mientras suene el pitido de aviso del producto para conectar la función repetición El pitido de aviso se detendrá y activará de nuevo tran...

Page 168: ...ás oscuro 1 Mantenga pulsada la tecla DOWN 3 durante 3 segun dos para acceder a los ajuste de Día Noche 2 Pulse la tecla UP 2 o DOWN 3 para seleccionar los niveles de claridad para el modo Día 3 Pulse la tecla SET 1 para confirmar 4 El indicador de horas parpadea 5 Pulse la tecla UP 2 o DOWN 3 para seleccionar la hora de inicio para el modo Día 6 Pulse la tecla SET 1 para confirmar y acceder al aj...

Page 169: ...e la función de control por sonido está conectada El indicador se desconecta automá ticamente si no se reconoce ninguna señal durante 20 segundos sd significa que la función de control por sonido está desconectada El indicador permanece encendido Solución de problemas El producto contiene componentes electrónicos sensibles Debido a esto es posible que el producto se vea afectado por aparatos próxi...

Page 170: ...roducto a los ajustes de fábrica y realizará un test breve del indicador A continuación el aparato estará listo para su uso Nota Al restablecer se eliminarán todos los ajustes Limpieza y cuidado El dispositivo sólo puede ser limpiado por fuera con un trapo suave y seco Eliminación El embalaje está totalmente fabricado a partir de materiales reciclables que se pueden desechar en las instalaciones d...

Page 171: ...cos 20 22 papel y cartón 80 98 materiales compuestos El producto y el material de embalaje son reciclables Separe los materiales para un mejor tratamiento de los residuos El logotipo Triman se aplica solo para Francia Para obtener información sobre las posibilidades de desecho del producto al final de su vida útil acuda a la administración de su comunidad o ciudad ...

Page 172: ...sus horarios Las pilas defectuosas o usadas deben ser recicladas según lo indicado en la directiva 2006 66 CE y en sus modificaciones Devuelva las baterías y o el producto en los puntos de recogida disponibles Se pueden producir daños medioambientales como consecuencia de una eliminación incorrecta de las pilas Las pilas usadas no deben desecharse en la basura doméstica Pueden contener metales pes...

Page 173: ...municipal Declaración UE de conformidad simplificada Por la presente OWIM GmbH Co KG Stiftsbergstraße 1 DE 74167 Neckarsulm ALEMANIA declara que el producto DESPERTADOR USB HG02918A HG02918B es conforme con las Directivas 2014 53 UE y 2011 65 UE El texto completo de la declaración UE de conformidad está disponible en la dirección Internet siguiente www owim com ...

Page 174: ...namento com pilha 187 Corrente elétrica através de uma fonte de baixa tensão 188 Substituir remover pilhas 188 Colocação em funcionamento 189 Realizar configurações básicas 189 Mudar a configuração do alarme 191 Ativar desativar a função do alarme 193 Utilizar a função snooze repetir 193 Mudar a configuração de dia noite 194 Utilizar a função de controlo por som 194 Eliminação de falhas 195 Limpez...

Page 175: ...ores DESPERTADOR USB Introdução Damos lhe os parabéns pela aquisição do seu novo produto Acabou de adquirir um produto de grande qualidade O manual de instruções é parte integrante deste produto Contém indicações importantes referentes à segurança utilização e eliminação Familiarize se com todas as indicações de ...

Page 176: ...e produto foi concebido exclusivamente para o uso doméstico não sendo adequado para o uso industrial Descrição das peças 1 Botão SET Prima este botão para alternar entre o indicador da hora data temperatura Mantenha o botão premido para ir às configurações básicas Confirme a sua configuração com este botão 2 Botão UP Prima este botão para escolher o formato da indicação da hora 12 horas ou 24 hora...

Page 177: ...o a alteração da indicação é confirmada 4 Botão ALARM Prima este botão para aceder ao modo de configuração do alarme Mantenha o botão premido para ativar desativar a função do alarme 5 Botão SNOOZE Prima este botão par ativar a função snooze repetir quando o alarme está a tocar Mantenha o botão premido para desativar a função snooze 6 Entrada USB 7 Compartimento de pilhas 8 Tampa do compartimento ...

Page 178: ...a 12 Cabo USB Dados técnicos Tensão de funcionamento 4 5 V corrente contínua Pilhas 3 x pilhas LR03 tipo AAA 1 5 V Zona de temperatura aprox 0 50 C 32 122 F Polaridade da corrente elétrica do cabo USB 5 V corrente contínua 200 mA Volume de entrega 1 despertador USB 3 pilhas LR03 1 cabo USB 1 manual de instruções ...

Page 179: ...7 PT Indicações gerais de segurança Antes da primeira utilização do produto ler as instruções de operação e segurança Se este aparelho fôr dado a terceiros os documentos do produto devem ser dados também ...

Page 180: ...CRIANÇAS E BEBÉS Este produto pode ser utilizado por crianças com idade superior a 8 anos e por pessoas com capacidades físicas sensoriais ou mentais reduzidas ou por pessoas sem experiência ou conhecimentos desde que sejam supervisionadas ou recebam ...

Page 181: ...es para utilizarem o produto de forma segura e compreendam os riscos envolvidos As crianças não devem brincar com o aparelho A limpeza e a manutenção do utilizador não devem ser realizadas por crianças sem vigilância ...

Page 182: ...180 PT Instruções de segurança para pilhas baterias PERIGO DE MORTE Manter as pilhas baterias fora do alcance de crianças Em caso de ingestão consulte imediatamente um médico ...

Page 183: ...PERIGO DE EXPLOSÃO Não tente carregar pilhas não recarregáveis Não coloque as pilhas baterias em curto circuito e ou não tente abri las As consequências podem ser sobreaquecimento risco de incêndio ou explosão ...

Page 184: ... no lume nem na água Não exerça cargas mecânicas sobre as pilhas baterias Risco de derrame das pilhas baterias Evite condições climáticas extremas e altas temperaturas porque podem danificar as pilhas baterias como por exemplo aquecedores ...

Page 185: ...183 PT sol direto Evite o contacto com a pele olhos e mucosas Em caso de contacto com o ácido da pilha lave as zonas afetadas com água limpa e procure imediatamente um médico ...

Page 186: ...OTEÇÃO Pilhas baterias derramadas ou danificadas podem causar queimaduras na pele Use sempre luvas de proteção adequadas na eventualidade de tal situação Em caso de derrame das pilhas baterias remova as imediatamente do produto ...

Page 187: ...185 PT para evitar danos Coloque apenas pilhas baterias do mesmo tipo Não misture pilhas baterias usadas com novas Remova as pilhas baterias se o produto não for utilizado durante um período prolongado ...

Page 188: ...ize exclusivamente o tipo de pilha bateria indicado Ao colocar as pilhas baterias verifique se a polaridade das pilhas baterias e do produto e são corretas Limpe os contactos das pilhas baterias e do compartimento delas antes de as inserir ...

Page 189: ...Elimine todo o material de embalagem do produto Funcionamento com pilha Abre a tampa do compartimento de pilhas 8 Coloque 3 pilhas do tipo AAA no compartimento das pilhas 7 Ao fazê lo tenha em conta a respetiva polaridade Essa é indicada no compartimento das pilhas 7 Feche o compartimento das pilhas 7 ...

Page 190: ...ver pilhas Indicação Se o ecrã fica nublado ou estiver sempre a piscar deve substituir as pilhas Substitua sempre todas as pilhas ao mesmo tempo Coloque apenas pilhas do tipo LR03 Abre o compartimento das pilhas 7 no punho da tampa do compartimento das pilhas 8 Se necessário remova as pilhas usadas Coloque pilhas novas no caso de querer usar pilhas no produto Ao fazê lo tenha em conta a respetiva ...

Page 191: ...ações básicas Prima em cada passo do programa o botão UP 2 ou DOWN 3 para efetuar alterações DICA Quando mantiver o botão UP 2 ou DOWN 3 premido está a realizar um avanço retorno rápido dos números Prima o botão SET 1 para confirmar uma configuração Será automaticamente redirecionado para o passo seguinte do programa Indicação Se durante 15 segundos não efetuar nenhuma configuração o produto muda ...

Page 192: ...Indicador do ano pisca Pode configurar o ano até 2099 Configurar o mês Indicador do mês pisca Configurar o dia Indicador do dia pisca Configurar a hora Indicador da hora pisca Configurar os minutos Indicador dos minu tos pisca Configurar o formato da data DDMM MMDD Indicador da data em formato dia mês DDMM ou mês dia MMDD ...

Page 193: ...ET 1 para confirmar a unidade de temperatura O produto volta ao modo normal Mudar a configuração do alarme Este produto dispõe de 3 configurações de horas de alarme A1 A2 e A3 Cada alarme pode ser configurado para Alarme desligado 5 dias de alarme ou 7 dias de alarme 1 Prima o botão ALARME 4 para aceder à configuração do alarme 2 Prima o botão UP 2 ou DOWN 3 para alternar entre A1 5 A1 e 7 A1 ...

Page 194: ...ne entre 5 A1 e 7 A1 4 Prima o botão SET 1 para configurar a hora de alarme 5 O indicador da hora pisca 6 Prima o botão UP 2 ou DOWN 3 para configurar a hora 7 Prima o botão SET 1 para confirmar 8 O indicador dos minutos pisca 9 Prima o botão UP 2 ou DOWN 3 para configurar o minuto 10 Prima o botão SET 1 para confirmar e aceder à configuração Alarme 2 11 Repita os passos 3 a 10 para configurar as ...

Page 195: ...LARM 4 novamente premido para desativar a função do alarme O indicador do alarme 11 apaga se Utilizar a função snooze repetir Prima enquanto o som de sinal do produto toca um botão qualquer para ativar a função de repetir O som de sinal pára e volta a estar ativo dentro dos próximos 5 minutos O indicador do alarme 11 pisca no ecrã Para suspender o sinal do alarme prima o botão SNOOZE 5 durante 3 s...

Page 196: ...de luminosidade para o modo de dia 3 Prima o botão SET 1 para confirmar 4 O indicador da hora pisca 5 Prima o botão UP 2 ou DOWN 3 para escolher a hora de arranque para o modo de dia 6 Prima o botão SET 1 para confirmar e aceder à configuração do modo de noite 7 Repita os passos 2 a 6 para configurar o modo de noite Utilizar a função de controlo por som Este produto reage a toques e sinais acústic...

Page 197: ...o contém componentes eletrónicos sensíveis Por essa razão é possível que haja interferências causados por dispositivos de transmissão por rádio que estejam na proximidade Descargas eletrostáticas podem causar interferências Em caso destes tipos de falhas mantenha os botões UP 2 e DOWN 3 premidos em simultâneo durante 3 segundos Isso repõe as configurações de fábrica do produto e realiza um pequeno...

Page 198: ...e seco Eliminação A embalagem é totalmente constituída por materiais recicláveis que pode eliminar nos pontos de reciclagem locais Esteja atento à especificação dos materiais da embalagem para a separação de lixo Estas são identificadas com abreviações a e números b com o seguinte significado 1 7 Plásticos 20 22 Papel e papelão 80 98 Materiais compostos ...

Page 199: ...ra a França As possibilidades de reciclagem dos artigos utilizados poderão ser averiguadas no seu Município ou Câmara Municipal Não deposite o produto utilizado no lixo doméstico a favor da proteção do ambiente Elimine o de forma responsável Pode informar se no seu município sobre os locais de recolha adequados e o seu período de funcionamento ...

Page 200: ...anos ambientais devido à eliminação incorreta das pilhas normais recarregáveis As pilhas normais recarregáveis não devem ser eliminadas juntamente com o lixo doméstico Estas podem conter metais pesados tóxicos e são consideradas resíduos perigosos Os símbolos químicos dos metais pesados são os seguintes Cd cádmio Hg mercúrio Pb chumbo Por isso deve sempre depositar as pilhas normais recarregáveis ...

Page 201: ... Co KG Stiftsbergstraße 1 DE 74167 Neckarsulm ALEMANHA declara que o produto DESPERTADOR USB HG02918A HG02918B está em conformidade com as Diretivas 2014 53 UE e 2011 65 UE O texto integral da declaração de conformidade está disponível no seguinte endereço de Internet www owim com ...

Page 202: ...IAN 290253 OWIM GmbH Co KG Stiftsbergstraße 1 DE 74167 Neckarsulm GERMANY Model No HG02918A HG02918B Version 11 2017 ...

Reviews: