background image

Instruction Manual for Portable Compressors
English

XAHS 37 DD - XAHS 70 DD7
XAS 47 DD

- XAS 90 DD7

XAS 57 DD

- XAS 110 DD7

Engine Deutz
D2011L02

Summary of Contents for XAHS 37 DD

Page 1: ...Instruction Manual for Portable Compressors English XAHS 37 DD XAHS 70 DD7 XAS 47 DD XAS 90 DD7 XAS 57 DD XAS 110 DD7 Engine Deutz D2011L02 ...

Page 2: ......

Page 3: ...Instruction Manual for Portable Compressors XAHS 37 DD XAHS 70 DD7 XAS 47 DD XAS 90 DD7 XAS 57 DD XAS 110 DD7 Printed matter N 2954 2140 02 07 2007 ATLAS COPCO PORTABLE AIR DIVISION www atlascopco com ...

Page 4: ... modifications additions or conversions made without the manufacturer s approval in writing While every effort has been made to ensure that the information in this manual is correct Atlas Copco does not assume responsibility for possible errors Copyright 2007 Atlas Copco Airpower n v Antwerp Belgium Any unauthorized use or copying of the contents or any part thereof is prohibited This applies in p...

Page 5: ...s used in this manual 12 2 2 General description 12 2 3 Markings and information labels 14 2 4 Main Parts 15 2 5 Air flow 17 2 6 Oil system 17 2 7 Continuous regulating system 17 2 8 Electrical system 18 2 8 1 Circuit diagram standard 18 2 8 2 Circuit diagram XAS 47 DDG XAS 90 DD7G Generator DDG 110V without automatic control system 20 2 8 3 Circuit diagram XAS 47 DDG XAS 90 DD7G Generator DDG 110...

Page 6: ... 4 1 Check engine oil level 43 4 4 2 Check compressor oil level 44 4 5 Oil and oil filter change 44 4 5 1 Engine oil and oil filter change 44 4 5 2 Compressor oil and oil filter change 44 4 6 Cleaning coolers 45 4 7 Cleaning fuel tank 45 4 8 Cleaning hardhat 45 4 9 Battery care 45 4 9 1 Electrolyte 45 4 9 2 Activating a dry charged battery 46 4 9 3 Recharging a battery 46 4 9 4 Battery maintenance...

Page 7: ... people as well as environment and machinery endanger people due to electrical mechanical or chemical influences endanger the environment due to leakage of oil solvents or other substances endanger the machinery due to function failures All responsibility for any damage or injury resulting from neglecting these precautions or by non observance of ordinary caution and due care required in handling ...

Page 8: ... overrun brake mechanism if it is not an automatic mechanism 4 Never exceed the maximum towing speed of the unit mind the local regulations 5 Place the unit on level ground and apply the parking brake before disconnecting the unit from the towing vehicle Unclip the safety break away cable or safety chain If the unit has no parking brake or jockey wheel immobilize the unit by placing chocks in fron...

Page 9: ...lled 17 Noise even at reasonable levels can cause irritation and disturbance which over a long period of time may cause severe injuries to the nervous system of human beings When the sound pressure level at any point where personnel normally has to attend is below 70 dB A no action needs to be taken above 70 dB A noise protective devices should be provided for people continuously being present in ...

Page 10: ... tape 11 Never weld on or perform any operation involving heat near the fuel or oil systems Fuel and oil tanks must be completely purged e g by steam cleaning before carrying out such operations Never weld on or in any way modify pressure vessels Disconnect the alternator cables during arc welding on the unit 12 Support the towbar and the axle s securely if working underneath the unit or when remo...

Page 11: ...sure vessels according to directive 87 404 EEC annex II 2 Maintenance installation requirements 1 The vessel can be used as pressure vessel or as separator and is designed to hold compressed air for the following application pressure vessel for compressor medium AIR OIL and operates as detailed on the data plate of the vessel the maximum working pressure ps in bar the maximum working temperature T...

Page 12: ...o the compressor through a heavy duty drive belt Compressor element The compressor casing houses two screw type rotors mounted on ball and roller bearings The male rotor driven by the engine drives the female rotor The element delivers pulsation free air Injected oil is used for sealing cooling and lubricating purposes Compressor oil system The oil is boosted by air pressure The system has no oil ...

Page 13: ...port leg and one of the following towing eyes AC DIN ball ITA GB or NATO As an option the unit can be equipped with an adjustable towbar a jockey wheel and or overrun parking brake for options see chapter 7 The braking system consists of an integrated parking brake and overrunbrake When driving backwards the overrunbrake is not engaged automatically Bodywork The bodywork has openings at the shaped...

Page 14: ...t connected hoses Compressor loaded Runlamp Airfilter Compressor temperature too high Rotation direction Inlet Outlet Compressor oil drain Read the instruction manual before starting Service every 24 hours Warning Part under pressure Do not stand on outlet valves Start Stop indication of switch Do not run the motor with open doors Lifting permitted Use diesel fuel only Tyre pressure Sound power le...

Page 15: ...pressor element BH Brake Handle FC1 Filler Cap engine oil RV Regulating Valve CE Compressor Element FC2 Filler Cap fuel tank S Starting Motor CP Control Panel compressor FF Fuel Filter SN Serial Number CPG Control Panel generator option FP Filler Plug compressor oil SV Safety Valve D Data plate FT Fuel Tank TB Towbar DB Drive Belt FU Fuel Pump VI Vacuum Indicator DPEC Drain Plug Engine Oil Cooler ...

Page 16: ...ve Belt DP Drain Plug E Engine F Fan FN Flow Nozzle FP Filler Plug FR Flow Restrictor OCCE Oil Cooler compressor element OF Oil Filter OLG Oil Level Gauge OS Oil Separator PG Pressure Gauge RV Regulating Valve SL Scavenge Line SR Speed Regulator SV Safety Valve SVSR Solenoid Valve Speed regulator TS Temperature Switch UA Unloader Assembly UV Unloader Valve VH Vent Hole VI Vacuum Indicator VV Vacua...

Page 17: ...t is installed a thermostatic valve will bypass the compressor oil oil will not pass through oil cooler OCCE until the working temperature is reached 2 7 CONTINUOUS REGULATING SYSTEM SEE FIG 2 3 The system comprises RV Regulating valve UA Unloader assembly SR Speed regulator The compressor is provided with a continuous regulating system This system is provided with a blow down valve which is integ...

Page 18: ...ure Switch Engine K0 Starter Solenoid part of M1 S4 Lamptest Switch K1 Shut down Relay S5 Temperature Switch Compressor K2 Blocking Relay Y1 Fuel Solenoid Valve K3 Override Start Relay V1 Diode K4 Start Relay V2 Diode S1 3 2 1 0 q q 21 20 6 8 7 9 24 25 28 29 3 5 4 2 1 8 7 1 2 12 14 4 3 26 27 12 34 35 9 10 11 p 12V DC 5 Temp K1 General alarm Lamp tester 13 15 14 11 10 13 11 9 9 9 15 14 Auxiliary 3 ...

Page 19: ... to 18 16 Lamp H2 goes out one can release start switch S1 and it returns to position 1 Exciting the safety devices occurs no longer across line 3 but across line 2 to line 4 and this way to line 3 Engine is running normally Oil pressure contact S3 opens K3 no longer excited K3 changes over 13 11 engine cuts out because fuel solenoid Y1 no longer excited and lamp H2 goes on simultaneously Thermoco...

Page 20: ... e0 e0 e0 e0 e0 e0 e54 5 6 7 8 X1 L2 L1 32A 32A Q2 16A Q3 16A Q4 13 b3 L1 L2 b6 12 b3 I n 30mA 40msec 4 5 6 7 10 11 1 3 N13 D1 e0 e0 1 2 3 4 T13 EARTHING PIN Fig 2 6 Circuit diagram No 9822 0797 01 No 9822 1055 27 For location of relais K1 K2 K3 K4 see paragraph 2 8 1 D1 Diode F1 Circuit Breaker 10A G1 Alternator G2 Battery G3 Generator H1 Temperature Alarm Lamp H2 General Alarm Lamp H3 Lamp Power...

Page 21: ...ens K3 no longer excited K3 changes over 13 11 engine cuts out because fuel solenoid Y1 no longer excited and lamp H2 goes on simultaneously Thermocontact S2 opens K3 no longer excited K3 changes over 13 11 engine cuts out because fuel solenoid Y1 no longer excited and lamp H2 goes on simultaneously Thermocontact S5 opens K1 no longer excited Contact K1 changes over 4 2 K3 no longer excited K3 cha...

Page 22: ... 5 3 29 28 25 24 9 7 8 6 20 21 Lamp tester General alarm K1 Temp 5 12V DC 0 p 9 10 11 0 1 2 3 13 Auxiliary To Circuit diagram 9822 1055 91 S1 3 2 1 0 Fig 2 7 Circuit diagram No 9822 0797 01 No 9822 1055 91 For location of relais K1 K2 K3 K4 see paragraph 2 8 1 D1 Diode E1 Ecologiser F1 Circuit Breaker 10A G1 Alternator G2 Battery G3 Generator H1 Temperature Alarm Lamp H2 General Alarm Lamp H3 Lamp...

Page 23: ...olenoid Y1 no longer excited and lamp H2 goes on simultaneously Thermocontact S5 opens K1 no longer excited Contact K1 changes over 4 2 K3 no longer excited K3 changes over 13 11 engine cuts out because fuel solenoid Y1 no longer excited and lamp H2 and H1 go on simultaneously Take over relay K2 is excited simultaneously with H1 and contact K2 closes 8 6 Thermocontact S5 cools off and closes K1 ex...

Page 24: ...3 b0 b0 To Circuit diagram 9822 0797 01 34 W1 12 b54 b0 b6 12 b54 b54 b3 16 b0 b3 b3 N b6 16 W1 b0 b0 16 b6 W1 13 b6 12 b3 L A2 A1 PE T R 14 12 11 R K6 D1 Auxiliary To Circuit diagram 9822 1055 25 D1 Diode F1 Circuit Breaker 10 A G1 Alternator G2 Battery G3 Generator H1 Temperature Alarm Lamp H2 General Alarm Lamp H3 Lamp Power Control K0 Starter Solenoid part of M1 K1 Shut down Relay K2 Blocking ...

Page 25: ...ver 13 11 engine cuts out because fuel solenoid Y1 no longer excited and lamp H2 goes on simultaneously Thermocontact S2 opens K3 no longer excited K3 changes over 13 11 engine cuts out because fuel solenoid Y1 no longer excited and lamp H2 goes on simultaneously Thermocontact S5 opens K1 no longer excited Contact K1 changes over 4 2 K3 no longer excited K3 changes over 13 11 engine cuts out becau...

Page 26: ...12 b54 b54 b3 16 b0 N b6 16 W1 b0 b0 16 b6 W1 13 b6 12 b3 13 b3 3 4 S8 H4 A1 A2 K8 13 b3 A1 A2 K7 b6 12 b6 12 b6 9 b3 b3 b3 b3 b3 b3 b6 b6 b3 b3 11 15 L A2 A1 PE T R 14 12 11 R K6 D1 2 1 3 4 5 6 7 E1 D1 Diode E1 Ecologiser F1 Circuit Breaker 10 A G1 Alternator G2 Battery G3 Generator H1 Temperature Alarm Lamp H2 General Alarm Lamp H3 Lamp Power Control H4 Lamp automatic control system K0 Starter S...

Page 27: ...d Y1 no longer excited and lamp H2 goes on simultaneously Thermocontact S5 opens K1 no longer excited Contact K1 changes over 4 2 K3 no longer excited K3 changes over 13 11 engine cuts out because fuel solenoid Y1 no longer excited and lamp H2 and H1 go on simultaneously Take over relay K2 is excited simultaneously with H1 and contact K2 closes 8 6 Thermocontact S5 cools off and closes K1 excited ...

Page 28: ...Circuit diagram 9822 0797 01 b6 b3 V1 13 12 12 b3 16 b0 16 b0 V1 35 34 c54 c0 c0 e54 c0 c0 c0 c0 c0 c0 c0 c0 c0 b0 L1 L2 b54 b0 b6 12 b54 b54 b3 b0 b0 L A2 A1 PE T R 14 12 11 R K6 D1 c0 c0 D1 Diode F1 Circuit Breaker 10 A G1 Alternator G2 Battery G3 Generator H1 Temperature Alarm Lamp H2 General Alarm Lamp H3 Lamp Power Control K0 Starter Solenoid part of M1 K1 Shut down Relay K2 Blocking Relay K3...

Page 29: ...ver 13 11 engine cuts out because fuel solenoid Y1 no longer excited and lamp H2 goes on simultaneously Thermocontact S2 opens K3 no longer excited K3 changes over 13 11 engine cuts out because fuel solenoid Y1 no longer excited and lamp H2 goes on simultaneously Thermocontact S5 opens K1 no longer excited Contact K1 changes over 4 2 K3 no longer excited K3 changes over 13 11 engine cuts out becau...

Page 30: ...lamp S5 Temperature switch compressor K0 Starter solenoid part of M1 S6 Push button glowplug M1 Starter motor Y1 Fuel solenoid valve P1 Hourmeter V1 Diode P2 Glowplug V2 Diode V1 K4 K5 F1 K4 S2 S3 K3 K2 H1 S4 H2 K2 K1 Y1 K0 P1 V2 G1 G2 P2 B D D 7 6 2 85 86 30 87 8 3 3 3 3 9 9 9 2 16 11 87a 87 86 87 87 30 30 87a 85 15 10 30 30 13 14 87a K3 S5 K0 M1 M S6 K1 K5 30 30 30 87 87 86 85 86 85 86 85 87a 87...

Page 31: ...2 Test button overspeed K9 Aux relay safety circuit Y1 Fuel solenoid valve M1 Starter motor Y20 Solenoid for overspeed protection valve N1 Overspeed module V1 Diode P1 Hourmeter V2 Diode G1 G2 B D W D M1 M K1 H1 H2 86 85 K2 K3 S2 K9 3A S3 Y1 P1 K0 Y20 S32 K9 N1 V1 K4 K4 V2 K1 K2 86 87a 87a 3 9 9 11 9 30 87 30 87 K3 S5 K0 87a 87a u 30 30 30 86 87 1 87a 87 30 87 30 85 86 85 86 85 86 85 86 2 8 3 85 6...

Page 32: ...position Be sure that the jockey wheel 2 is blocked by the blocking pin 6 Apply parking brake by pulling parking brake handle 3 upwards Place the compressor as level as possible however it can be operated temporarily in an out of level position not exceeding 15 If the compressor is parked on sloping ground immobilize the compressor by placing wheel chocks available as option in front of or behind ...

Page 33: ...th support tools Extension tube 3 Adjust required height of the towbar Tighten locking nut 2 by hand first Secondly tighten locking nut 2 with a tightening torque corresponding to table Fig 3 8 With an extension tube 3 A corresponding to table and handforce B corresponding to table easy tightening is possible Fix locking nut 2 with spring pin 1 Height adjustment should be undertaken on levelled gr...

Page 34: ...necessary to the upper mark on dipstick Consult the Engine Operation Manual for the type and viscosity grade of the engine oil 3 Check the level of the compressor oil The pointer of oil level gauge Fig 2 3 OLG should register in the green range Add oil if necessary See section 4 3 for the oil to be used 4 Check that the fuel tank contains sufficient fuel Top up if necessary Consult the Engine Oper...

Page 35: ... The starter motor will set the engine in motion The maximum allowed starter time where the starter motor is running continuously is 20 seconds If the engine does not catch a new attempt can be made after 30 seconds waiting The temperature alarm lamp H1 and the general alarm lamp H2 will go out as soon as the engine has been started 4 The start switch automatically springs back to position 1 Lamp ...

Page 36: ...engine in motion The maximum allowed starter time where the starter motor is running continuously is 20 seconds If the engine does not catch a new attempt can be made after 30 seconds waiting The temperature alarm lamp H1 and the general alarm lamp H2 will go out as soon as the engine has been started 4 The start switch automatically springs back to position 1 Lamp H1 only will go on when the comp...

Page 37: ...now be in position A 3 2 6 FAULT SITUATIONS AND PROTECTIVE DEVICES A fault which occurs with the engine either oil pressure too low oil temperature too high or alternator voltage too low will always and immediately cause the engine to cut out and the control lamp H2 will light up By doing some simple checks it can be determined what it was that caused the engine to fail low oil level clogged up co...

Page 38: ...rator can be switched off by turning the green switch S7 to position 0 Fig 3 22 Generator control box Q1 Main circuit breaker 2 pole Q2 Circuit breaker 2 pole Q3 Circuit breaker 2 pole Q4 Circuit breaker 2 pole Fault situations and protective devices When switching on the generator by means of the switch S7 there is no voltage available at the sockets Open the hood and check if the circuit breaker...

Page 39: ...ailable until the generator main switch S7 is turned OFF Operation with automatic control switch S8 ON Switch generator main switch S7 ON Generator is disconnected from socket Engine reaches nominal speed Generator is re connected after 4 secs If a consumer is connected the engine goes on for 60 secs before falling back to idle speed Generator is in standby As soon as any consumer is switched on t...

Page 40: ...or DDG 230 400V Q1 Main circuit breaker 4 pole shunt trip coil K6 Insulation monitoring relay Generator DDG 230V Q1 Main circuit breaker 3 pole shunt trip coil K6 Insulation monitoring relay Fault situations and protective devices When switching on the generator by means of the switch S7 there is no voltage available at the sockets Open the hood and check if the circuit breakers are up If the circ...

Page 41: ... switch S7 is turned OFF Operation with automatic control switch S8 ON Switch generator main switch S7 ON Generator is disconnected from socket Engine reaches nominal speed Generator is re connected after 4 secs If a consumer is connected the engine goes on for 60 secs before falling back to idle speed Generator is in standby As soon as any consumer is switched on the routine is repeated from step...

Page 42: ...r heavy duty filter element 2914 8092 00 to be ordered separately MAINTENANCE SCHEDULE Daily Initially Yearly 50 hours after initial start up or every 500 hours Service pak 2912 4391 06 Engine oil level Check Compressor oil level Check Fuel level Check Fill Air filter vacuator valves Empty Fuel filter water drain Drain Air intake vacuum indicators Check For spillage free drain water out of frame C...

Page 43: ...m start up in temperatures as low as 20 C PAROIL15W40isamineralbasedhighperformancedieselengineoil withahighviscosity index AtlasCopcoPAROIL15W40isdesigned to provide a high level of performance and protection in standard ambient conditions as from 5 C Mineral compressor oil PAROIL M 5 liter can order number 1615 5947 00 20 liter can order number 1615 5948 00 210 liter barrel order number 1615 594...

Page 44: ...located at the air receiver and compressor element Catch the oil in a drain pan Screw out the filler plug to speed up draining Tighten the plugs after draining 3 Remove the oil filter 3 e g by means of a special tool Catch the oil in a drain pan 4 Clean the filter seat on the manifold taking care that no dirt drops into the system Oil the gasket of the new filter element Screw it into place until ...

Page 45: ...HardHat can be obtained by applying high pressure cleaning in combination with liquid soap 4 9 BATTERY CARE If the battery is still dry it must be activated as described in section 4 9 2 The battery must be in operation within 2 months from being activated if not it needs to be recharged first 4 9 1 ELECTROLYTE Electrolyte in batteries is a sulphuric acid solution in distilled water The solution m...

Page 46: ... points in the driving direction to the towbar Fig 4 4 Position of arrow on tyre 4 11 STORAGE Run the compressor regularly e g twice a week until warm Load and unload the compressor a few times to operate the unloading and regulating components Close the air outlet valves after stopping 4 12 SERVICE PAKS A Service Pak is a collection of parts to be used for a specific maintenance measure It guaran...

Page 47: ...table 3 Check the minimum speed of the engine Adjust minimum speed stop screw if necessary 4 Open an outlet valve AOV just enough to let the engine E run at maximum speed The working pressure must be Y bar e see table adjust if necessary with regulating valve RV 5 Check the engine maximum speed Adjust the maximum speed by means of adjusting eccentric nut on top of speed regulator SR 6 Close the ou...

Page 48: ...eassemble in reverse order of dismantling Make sure the vacuator valve 6 points down 4 Inspect and tighten all air intake connections 5 Reset the vacuum indicator Fig 5 3 Fig 5 3 Vacuum indicator 7 Air filter contamination indicator 8 Reset button 9 Yellow indicator 5 3 AIR RECEIVER The air receiver is tested according to official standards Regularly have inspections carried out in conformity with...

Page 49: ...nsates for lining wear Lift and support the compressor Make sure that all brakes are off overrunbrake and hand brake lever The brake cables must be free from tension Lock the swivel cams of the wheel brake from the outside by means of a pin 4 mm 4 through the hole as shown in Fig 5 5 Turn the adjusting bolt 1 clockwise with a wrench till the wheel locks up Center the brake shoes by actuating the p...

Page 50: ...he towing eye pulled out in the outmost position and the hand brake lever in the downward position Fig 5 8 loosen the lock nuts Fig 5 7 2 Turn adjusting nuts and brake cable nuts Fig 5 7 4 clockwise until there is no slack in the brake mechanism The equalizer Fig 5 7 6 must remain perpendicular to main brake cable Fig 5 7 5 2 Apply the hand brake lever several times and repeat the adjustment Tight...

Page 51: ...rm lamp H2 does not light up when switching S1 to I lamp H1 lights up when applying lamptest a Lamp H2 blown b Alternator A regulator defective a Replace lamp b Disconnect the wire from alternator terminal D and connect it to terminal D If H1 lights up replace the alternator if not test S1 see remedy 1d 3 Temperature alarm lamp H1 does not light up when switching S1 to I and applying lamp test a L...

Page 52: ...il level too high a Dismount clean and refit restrictor b Replace element c Check for overfilling Release pressure and drain oil to correct level 14 Compressor shuts down through a shutdown switch a Alternator V belt broken or slipping b Compressor overheating c Engine oil pressure too low d Engine temperature too high a Re tense or replace V belt b See condition 16 c Check lubricating system d Ch...

Page 53: ... 1 Aftercooler water separator PD filter reheater 1 Aftercooler water separator PD QD filters reheater 1 Lubricator 2 Anti frost device 2 Tool box Single Safety Wheel chocks Safety cartridge Spark arrestor 1 Exhaust particle filter 1 Safety chain CE ASME Anti theft 3 Hose reel 1 Inlet shutdown valve 1 Spillage free frame Fueltank with metal fillerneck Additional fuel filter Non return valve Additi...

Page 54: ...Bolts towbar bottom Nm 80 10 Bolts towing eye towbar Nm 80 10 Bolts lifting eye flywheel housing Nm 205 20 Bolts engine drive housing M12 Nm 80 10 Bolts engine drive housing M14 Nm 125 10 Bolts compressor element drive housing Nm 80 5 Safety switches Nm 35 5 Joints adjustable towbar M24 Nm 275 25 M32 Nm 375 25 Note Secure the tank cap and drain plug of the fuel tank handtight 8 2 SETTINGS OF SHUTD...

Page 55: ...ective working pressure bar e 12 7 7 The inlet conditions are specified at the air inlet grating outside the canopy Limitations 1 Minimum effective receiver pressure bar e 4 3 3 6 2 Maximum effective receiver pressure compressor unloaded bar e 13 5 8 7 8 7 3 Maximum ambient temperature at sealevel 6 no aftercooler C 45 45 45 with aftercooler C 40 40 40 4 Minimum starting temperature C 10 10 10 5 M...

Page 56: ...bient temperature 8 0 bar e 9 0 bar e 10 0 bar e 11 0 bar e 12 0 bar e 116 psi 131 psi 145 psi 160 psi 174 psi 16 405 13 124 9 843 6 562 3 281 0 5000 4000 3000 2000 1000 0 10 0 10 20 30 40 50 14 32 50 68 86 104 122 TEMPERATURE C ALTITUDE m ALTITUDE ft TEMPERATURE F 5 0 bar e 73 psi 6 0 bar e 87 psi 7 0 bar e 102 psi 16 405 13 124 9 843 6 562 3 281 0 5000 4000 3000 2000 1000 0 10 0 10 20 30 40 50 1...

Page 57: ...d ambient temperature 5 0 bar e 73 psi 4 0 bar e 58 psi 6 0 bar e 87 psi 7 0 bar e 102 psi 16 405 13 124 9 843 6 562 3 281 0 5000 4000 3000 2000 1000 0 10 0 10 20 30 40 50 14 32 50 68 86 104 122 TEMPERATURE C ALTITUDE m ALTITUDE ft TEMPERATURE F 5 0 bar e 73 psi 4 0 bar e 58 psi 6 0 bar e 87 psi 7 0 bar e 102 psi 16 405 13 124 9 843 6 562 3 281 0 5000 4000 3000 2000 1000 0 10 0 10 20 30 40 50 14 3...

Page 58: ...aft speed generator at maximum load r min 2 700 4 Free air delivery 2 no aftercooler l s 32 43 31 50 with aftercooler l s 27 38 26 45 5 Typical oil content of compressed air mg m3 5 5 5 5 free air 6 Engine oil consumption maximum g h 12 3 12 3 15 15 7 Compressed air temperature at outlet valves no aftercooler C 90 88 93 93 with aftercooler C 30 30 30 30 8 Noise level Sound pressure level LP measur...

Page 59: ...DD XAHS 70 DD7 XAS 47 DD XAS 90 DD7 XAS 47 DDG XAS 90 DD7G XAS 57 DD XAS 110 DD7 DDG IT Designation Unit Value Value Value Value Design data Compressor 1 Number of compression stages 1 1 1 1 Engine 1 Make Deutz Deutz Deutz Deutz 2 Type D2011L02 D2011L02 D2011L02 D2011L02 3 Coolant Oil Oil Oil Oil 4 Number of cylinders 2 2 2 2 5 Bore mm 94 94 94 94 6 Stroke mm 112 112 112 112 7 Swept volume l 1 554...

Page 60: ...ads 4 6 6 Electrical power circuit 1 Rated continuous active power COP kW 5 5 4 8 4 8 2 Rated power factor lagging 1 0 8 0 8 3 Rated continuous apparent power 1 ph COP kVA 5 5 4 4 4 Rated voltage 1ph line to line V 110 230 230 5 Rated current 1ph A 50 16 16 6 Frequency droop 5 5 5 7 Rated continuous apparent power 3 ph COP kVA 6 6 8 Rated voltage 3ph line to line V 230 400 9 Rated current 3ph A 15...

Page 61: ...1 330 1 330 Height mm 1 252 1 252 Weight ready to operate kg 755 770 8 4 CONVERSION LIST OF SI UNITS INTO BRITISH UNITS 1 bar 14 504 psi 1 g 0 035 oz 1 kg 2 205 lb 1 km h 0 621 mile h 1 kW 1 341 hp UK and US 1 l 0 264 US gal 1 l 0 220 Imp gal UK 1 l 0 035 cu ft 1 m 3 281 ft 1 mm 0 039 in 1 m3 min 35 315 cfm 1 mbar 0 401 in wc 1 N 0 225 lbf 1 Nm 0 738 lbf ft t F 32 1 8 x t C t C t F 32 1 8 A temper...

Page 62: ... number 6 Vehicle identification number 7 A Maximum permitted total weight of the vehicle B Maximum permitted axle load C Maximum permitted load on the towing eye 8 Model 9 Working pressure 10 Speed 11 Engine power 12 Manufacturing year 13 CE mark in accordance with Machine Directive 89 392 EEC 14 Register number or number of notified body ...

Page 63: ......

Page 64: ...Printed in Belgium 07 2007 2954 2140 02 www atlascopco com ...
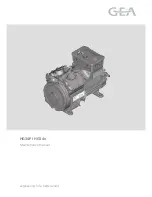
Reviews: