Asus PB238Q, User Manual
The Asus PB238Q delivers stunning visuals with its Full HD IPS panel. This user-friendly monitor enhances productivity with multiple connectivity options. Make the most of your device by downloading the comprehensive and free user manual from manualshive.com. This manual provides detailed instructions, ensuring swift setup and optimized performance.
Share
Download


Reviews:
No comments
Related manuals for PB238Q

EA223WM-BK
Brand: NEC Pages: 2

MultiSync FP1375X
Brand: NEC Pages: 16

DM-500
Brand: Tanaka Pages: 21

MD1500
Brand: G-Lab Pages: 27

Coronis 5MP (MFGD5421)
Brand: Barco Pages: 2

K2-1702
Brand: Tanaka Pages: 24

GPD-U64EM-DC2
Brand: Contec Pages: 2

F109A1
Brand: Daewoo Pages: 25

B RTU Series
Brand: Fema Pages: 36
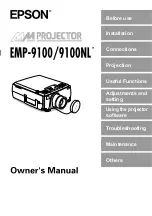
EMP-9100
Brand: Epson Pages: 117

EMP-830
Brand: Epson Pages: 141

EMP-9100
Brand: Epson Pages: 3

FPP-61HD20
Brand: Faroudja Pages: 8

U70D
Brand: Wooyoung Telecom Pages: 6

Pavilion MX704
Brand: HP Pages: 1

24fh
Brand: HP Pages: 26

22kd
Brand: HP Pages: 6

22er
Brand: HP Pages: 6


