background image

E874

R

DVD-ROM Drive

ATAPI / Enhanced IDE Interface

USER’S MANUAL

USER’S MANUAL

Summary of Contents for E874

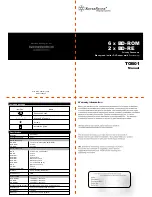
Page 1: ...E874 R DVD ROM Drive ATAPI Enhanced IDE Interface USER SMANUAL USER SMANUAL ...

Page 2: ...s appearing in this manual may or may not be registered trade marks or copyrights of their respective companies and are used only for identification or explanation and to the owners benefit without intent to infringe Windows and MS DOS are registered trademarks of Microsoft Corporation Intel is a registered trademark of Intel Corporation OS 2 are registered trademarks of International Business Mac...

Page 3: ... If this equipment does cause harmful interference to radio or television reception which can be determined by turning the equipment off and on the user is encouraged to try to correct the interfer ence by one or more of the following measures Re orient or relocate the receiving antenna Increase the separation between the equipment and receiver Connect the equipment to an outlet on a circuit diffe...

Page 4: ...A DEL ÄR ÖPPNAD STIRRA EJ IN I STRÅLEN VARO AVATTAESSA OLET ALTTIINA LASERSÄTEILYLLE VARNING LASERSTRÅLNING NÄR DENNA DEL ÄR ÖPPNAD ÄLÄ TUIJOTA SÄTEESEEN STIRRA EJ IN I STRÅLEN VORSICHT UNSICHTBARE LASERSTRAHLUNG WENN GEÖFFNET NICT IN DEN STRAHL SEHEN ATTENTION RADIATION DU FAISCEAU LASER INVISIBLE EN CAS D OUVERTURE EVITER TOUTE EXPOSITION AU FAISCEAU CAUTION USE OF ANY CONTROLS OR ADJUSTMENTS OR...

Page 5: ...upgrade to anASUS DVD ROM Drive is its backward compatibility with CD ROMs Thus you will be able to take advantage not only of the growing number of DVD ROM titles today for your entertainment education and productivity but also the thousands of CD ROM titles currently avail able This means that your ASUS DVD ROM Drive can play old CD ROMs CD I disks CD R disks and VCDs and of course DVD ROMs Anot...

Page 6: ...ted using a CD audio cable G is for Ground 5 Digital Audio output connector offers high quality audio effect by outputting digital signal to a D A converter or for recording to a digital audio tape DAT or professional audio recording system The connector follows the EBU IEC958 standard set by the European Broadcast Union 6 Testingjumpersarereservedformanufacturer sinternaltesting diagnosticpurpose...

Page 7: ...rface connector 3 If you have a sound card connect the 4 pin CD audio cable to the DVD ROM Drive s Analog Audio line out connector 4 Otherwise proceed to the next step NOTE If the pin definitions on your sound card are not the same as that see preced ing section on your DVD ROM Drive check with your dealer for a compatible cable 4 If you do not have a sound card plug earphones headphones or powere...

Page 8: ...ndows NT 2000 will automatically detect it and determine the appropriate settings for the drive and install or load the correct driver OS 2 and Other Operating Systems YourDVD ROMDrivesupportstheATAPIdriveinterface Yoursystemshouldbeable to automatically detect your DVD ROM Drive and load the appropriate device driver III SOFTWARE INSTALLATION ...

Page 9: ...rive other wise this indicator will not light This indicator flashes whenever your DVD ROM Drive is busy reading information from your disc or when your drive is in use 4 Emergency Ejection Hole allows you to manually eject the tray in case of power failure See Emergency Eject for more information 5 Select Buttons allows you to manually control your audio discs without having to run any software p...

Page 10: ...o eject the tray using the steps below you may damage your DVD ROM Drive 2 Locate the Emergency Ejection Hole of your DVD ROM Drive See Front Panel Controls for the location 3 Insert the end of a large straightened paper clip about 3 cm 1 25 inches into the Emergency Ejection Hole slightly toward the right 4 Push gently but firmly until the tray is released then carefully pull the tray open WARNIN...

Page 11: ...for the statement DEVICE C ASUS_CD ASUSCD SYS D ASUSCD01 see Software Installation for more information DOS only 2 Change the IRQ setting of the device that is using IRQ 14 or IRQ 15 for example sound card or motherboard Refer to the card or motherboard documentation for more information DOS only PROBLEM CannotdetecttheDVD ROMDrive Windows9xorWindowsNT CAUSE There are times when Windows cannot det...

Page 12: ...adphones Jack If there is no sound from your earphones or headphones consult your dealer about your faulty drive 4 Connect earphones or headphones to the sound card s Headphones Jack Ifthereisnosoundfromyourearphonesorheadphones check to see the audio cable is connected from the drive to the sound card refertoyour soundcardmanualformoreinformation Iftheaudio cableisconnectedandthereisstill nosound...

Page 13: ...cesses data see preceding explanation on CAV technology the drive will achieve lower data transfer rates Use a full disc if possible to get the maximum transfer rate from your drive 3 Change the transfer mode of your DVD ROM Drive to Multi word or Ultra DMA Mode to maximize its capability For DOS see Custom Setup under SOFTWARE INSTAL LATION for more information For Windows 95 or Windows NT Bus Ma...

Page 14: ...d so you may be trying to play a DVD movie from a region other than the one specified for your MPEG 2 card or DVD player software SOLUTION Check your DVD movie to see which Region Code it has then purchase an MPEG 2 card and or DVD player software specific for that region 4 Your DVD ROM drive reads data at different speeds depend ing on the disc format Your DVD ROM drive performs at its best when ...

Page 15: ...our DVDROM s front panel Set the volume controls of your drive and powered self amplified speakers to minimum before starting or restarting your computer 9 If you removed any drive or other items other than your DVDROM Drive put them back into place and secure them to your computer 10 Slide your DVDROM Drive now into place and fasten it to your system with the screws provided 11 Replace the cover ...

Page 16: ...utonomes à la prise jack du panneau frontal de votre lecteur de DVDROM Avant de redémarrer votre ordinateur baissez le volume du lecteur et vos enceintes au minimum 9 Si au cours de l opération vous avez retiré des éléments autres que votre DVDROM remettez les en place 10 Faites glisser votre lecteur de DVDROM dans son emplacement et fixez le au système avec les vis fournies 11 Replacez le couverc...

Page 17: ... an die Lautsprecherbuchse auf der VorderseitedesDVDROM Laufwerksan DrehenSiedieLautstärkereglerdesLaufwerks und der Lautsprecher auf Minimum bevor Sie Ihren Computer starten oder neu starten 9 Falls Sie außer Ihrem DVDROM Laufwerk noch andere Geräte entfernt haben setzen Sie diese wieder ein und verbinden Sie mit Ihrem System 10 SetzenSienunIhrLaufwerkeinundbefestigenSieesmitdenmitgeliefertenSchr...

Page 18: ...una cuffia o delle casse acustiche all uscita per cuffie sul pannello frontale del DVDROM Impostate il controllo del volume del drive e delle casse acustiche al minimo prima di avviare il computer 9 Se avete rimosso altri dispositivi per installare il DVDROM drive rimetteteli al posto e fissateli al computer 10 Fissate nella giusta posizione il DVDROM tramite le viti fornite 11 Richiudete il compu...

Page 19: ...ficadosenlaclavija tipojack paraauriculareslocalizadaenelpanelfrontaldellectordeDVDROM Configúreloscontroles devolumendesuunidadydelosaltavocesalmínimoantesdeiniciaroreiniciarsuordenador 9 En caso de que hubiese extraído alguna unidad o cualquier otro elemento además de su lector de DVDROM emplácelos de nuevo en su anterior posición y fíjelos debidamente 10 InserteellectordeDVDROMenlaposicióndesea...

Page 20: ...20 ...

Page 21: ...21 ...

Page 22: ...いて下さい 9 9 9 9 9 DVDROM 以外のドライバなどを取り外した場合 元に戻します 10 10 10 10 10 付属のネジでドライバをシステムに取り付けます 11 11 11 11 11 カバーを戻します 12 12 12 12 12 電源を入れます II II II II II ソフトウェアインストール ソフトウェアインストール ソフトウェアインストール ソフトウェアインストール ソフトウェアインストール 1 1 1 1 1 DOS 及び Windows 3 1の場合 ドライバ A または B に DVDROM ドライバ for DOS Windows 3 1 のディスクを入れ A Install あるいわ B Install とタイプし Enterを押します 好みのセットアップオプションを選択し 画 面の指示に従いインストールします インストールが終わったら 再起動しま ...

Page 23: ...die zich aan de voorkant van het DVDROM stationbevindt RegelhetvolumevanuwDVDROM stationenuwluidsprekersaf ophetminimumniveaualvorensdecomputeropnieuwoptestarten 9 Indien u voordien enige stations of andere elementen verwijderd heeft plaats deze dan terug en zet deze weer in uw computer vast 10 Schuif het DVDROM station op haar plaats en zet het vast met behulp van de meegeleverde schroeven 11 Pla...

Page 24: ... аналоговому выходу Если у вас нет звуковой платы подключитенаушники или динамики к разъемудляголовного телефона расположенному на передней панели дисковода Прежде чем включать или перезапускать компьютер установите минимальный уровень громкости для дисковода и динамиков 9 Если вы предварительно извлекли из компьютера какой либо дисковод или другое устройство кроме дисковода DVDROM верните их на м...

Page 25: ...ts frampanelen Ställ in volym av din enhet och högtalarna med separat elkällan på minimum innan du startar elle startar om din dator 9 Om du har tagit bort några enheter eller andra delar förutom DVDROM enheten återplacera dem och kontrollera att dem sitter fast 10 Sätt in din DVDROM enhet i utrymmet och fastskruva den till systemet med de befintliga skruvorna 11 Återplacera luckan på din dator oc...

Page 26: ... cscnews asus com tw WWW www asus com tw FTP ftp asus com tw pub ASUS ASUS COMPUTER INTERNATIONAL Marketing Technical Support Address 6737 Mowry Avenue Fax 1 510 608 4555 Mowry Business Center Building 2 BBS 1 510 739 3774 Newark CA 94560 USA Email tsd asus com Fax 1 510 608 4555 WWW www asus com Email info usa asus com tw FTP ftp asus com Pub ASUS ASUS COMPUTER GmbH Marketing Technical Support Ad...

Reviews: