


FAST TRACK
XGA
LCD MULTIMEDIA PROJECTOR
SETTING UP
1.
Place the projector on a stable, hard
surface at the desired distance from
the projection screen.
2.
Connect the computer source
equipment to the computer connector
port of the LCD projector.
3.
Connect video sources if required,
using the supplied A/V cable. If
necessary use SCART adapter.
4.
Connect one end of the mouse cable
marked ‘LCD’ into the mouse port on
the LCD projector and the other end
marked ‘MA’ (Mouse Adapter) into the
appropriate mouse adapter,
determined by which mouse type you
are using.
5.
Ensure the ventilation grills on the
LCD projector are not obstructed.
Apply mains power to the projector.
Remember to switch on the unit at the
Power ON/OFF switch!
6.
Apply mains power to the various
items of source equipment.
Improper use of this LCD projector
may cause a risk of damage or personal
injury due for example to electric shock or
the strong light source. Detailed safety
instructions are given in the user guide and
these must be followed at all times.
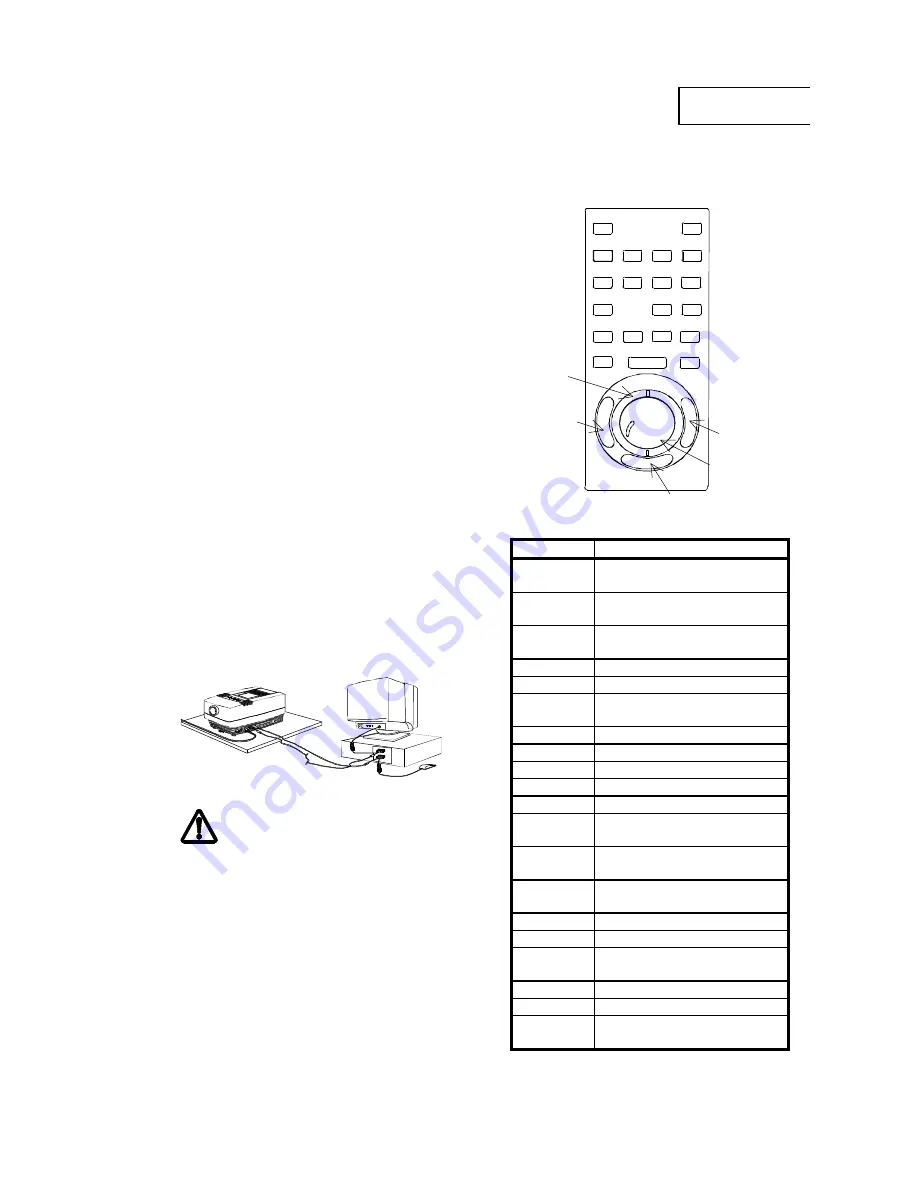
USING THE REMOTE CONTROL
The key functions explained:
KEY
FUNCTION
RESET
Defaults to the standard
settings for active source
ON/OFF
Turns the projected image
ON/OFF.
CONTR
Alters the contrast of light
and dark colors.
BRIGHT
Alters the brightness.
VOLUME
Volume up/down
FREEZE
Holds the image projected
on the screen
COMPUTER
Computer source active.
VIDEO
Video source active.
S-VIDEO
S-video source active.
MASK
Applies mask to the image.
SCALE
Direct 1:1 mapping/scaling.
PAN
Allows panning within
oversized images.
PROG
Programmed menu
selection
POINTER
Applies a trackball-controlled
pointer to the screen.
LIGHT
Keys are illuminated.
MENU
Activates the menu system.
TRACKBALL
Simulates the actions of the
desktop mouse.
LEFT KEY
Emulates left mouse key.
RIGHT KEY
Emulates right mouse key.
BOTTOM
KEY
Click-and-hold function
(drag).
ON/OFF
MUTE
FREEZE
S-VIDEO
PROG
MENU
RESET
CONTR
BRIGHT
VOLUME
COMPUTER
VIDEO
MASK
SCALE
PAN
LIGHT
POINTER
TRACKERBALL
PLATE
RIGHT KEY
TRACKERBALL
BOTTOM KEY
LEFT KEY
ENGLISH
Summary of Contents for Impression 970
Page 44: ......


