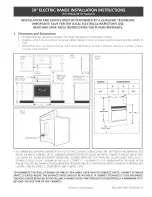
background image

Summary of Contents for 183D6379P021

Page 1: ...tule 19 90 Selecting Types of Cookware 9 Self Cleaning 99 93 Special Features 18 Surfi_ce Units 7 8 Timed Baldng and Roasting 17 Care and Cleani_ 22 30 lass Cooktop 29 30 Self Cleaning Oxen 22 23 Ina_llation Ins rue dons Anti Tip Device 31 37 Before You Begin 31 Electrical Connections 33 36 Le_ ling 37 Troubleshooting Tips 39 43 Accessories 44 Consumer Support Consumer Support Back Co_er Product R...

Page 2: ...ang out flora d_e wall r any reason make sure d_e device is properly engwg_d when you push the range back against tile wall If it is not dmre is a possible risk of the range tipping oxer and causing iqju U if you or a child stand sit or lean on an open door Please refer to tile And Tip device information in this manual Failure to take this precaution could result in tipping of the range and i lju ...

Page 3: ...fl_se or switching off the circuit breaken E I Do not leme children alone children should not be left alone or unanended in an area where an appliance is in use They should never be allowed to sit or stand on any part of the appliance _ _ Do not allow anyone to climb stand or hang on the door storage drawe_ or cooktop They could damag_ the range and even tip it o _I causing se re persona ii_uYy _t...

Page 4: ...k in color During arm after use do not much or let clothing or oflxer flammable mamrials contact fire surface units areas nearby the surtZace units or arty inmrior area of the oxen allow sufficient time for cooling first Potentially hot surfitces include the cooktop areas thcing the cooktop oxen xent opening surthces near the opening crevices around the oven door and metal trim parts above the doo...

Page 5: ...f clothing Proper relationship of cookware to surface unit will also improve efficiency L Nexer leaxe the smtaace units unattended at high heat settings Boiloxers cause smoking and greasy spilloxers that may catch on fire Only certain types of glass glassA eramic earthenware or other glazed containers are suitable for cookmp service others may break because of the sudden chang_ in temperature To m...

Page 6: ..._id wiping any surlaace unit areas nnfil they haw cooled and the indicator ligilt has g_ne off Sugar spills aIe dm exception to this Please see Cleaning the glass cooktop secdon fi i When the cooktop is cool nse only the recommended cleaning cream to clean the cooktop E To moid possible damage to die cooking surface do not apply cleaning cream to the glass surt_ace when it is hot E I Alter cleanin...

Page 7: ...power level you set Be sure you turn the control knob to OFFwhen you finish cooking SURFACE UNIT O oil O0 REAR OFF HI LO t 9 1 82 HOT SURFACE oo 0 4111 FRONT DFF H_ 98 Indicator Lights on radbntglassmodels only A HOT SURFACEindicator light will glow when any radiant element is turned on and will remain on tmtil the SUll ilce is cool enough to touch A SURFACE UNIT on indicator light will glow when ...

Page 8: ...to contintle cooking To avoid eve cooking relnove pans ti om tile surelce units when the ti od is cooked Avoid placing awthing on the surfi_ce unit until it has cooled completel Water stains mineraldeposits areremovable usingthecleaning creamorfull strangth white wnegar Useof w bdow cleanermay leavean kidescent film on thecooktop Theclean bgcream wff removethis discoloration Don t store heavy tern...

Page 9: ...IFns t1 oi11 steaIll oi heat rise caution when camfing Pans with rounded curved ridged or warped bottoms are not recommended Porcelain EnamelCoveredCastIron recommended _ long as tile cookware is covered completely with porcelain enamel this cookware is recolmnelMed Caution is i eCOllli lended f i cast iron cookware that is not completely covered with smooth porcelain enamel as it may scratch the ...

Page 10: ...if only shght y from the atchedposition Make sure the latch is movedto the wht as far as it wi go Touchthe CLEAR OFF pad Allow the oven to cool for one hour Putthe oven backlbto operation If the function errorcode repeats disconnectthe power to the range and ca for service KITCHEN TIMER ON OFF or TIMER ON OFFPad Touch this pad to select tile tiIller eattlI e Then touch tile and pads to a just tile...

Page 11: ...von section Indicator Lights on some pads EO Tmode lasts several seconds afier the last pad press START TIMEON OFFand COOKING TIMEON OFFwiII be the on pads lit if either of these options is selected Example START TIMEis selected with BAKE the START TIME pad will remain lit until the clock reaches the programmed time at _hich point it will turn off and the BAKE I EMPRECALL pad lig _t will lig _t up...

Page 12: ...mt end up and pull it out To replace place the end ot the shelf stoi locl_s on the sui port tilt up the front and push the shelf in NOTE The shelf is not designed to slide out at the special low shelf R position The oven has a special low shelf R position just above the oven bottom Use it when extra cooking space is needed for example when cooking a large turke_ The shelf is not designed to sfide ...

Page 13: ... to line tile broiler pan and broiler grid However you must mold the fi il tightly to the grid and cut slits in it just like the grid _Muminum fi il may also be used to catch a sl illove_ To do so place a small sheet of fi il on a lower shelf several inches below the fl od Never entirely cover a shelf with aluminmn fi il This will disturb the heat circulation and result in poor baking Leavethe doo...

Page 14: ...i thick 2to2 YLIbs 1 whole cut up 2 to 2 YzIbs split lengthwise Breast 2 to 4 slices 2 split 24 1 lb to Yz thick 2 1 thick 2 Yzto Y4 thick i thick 1 thick 2 W thick 2 I thick about 1 lb 2 1 thick about 10 to 12 oz 2 IW thick about 1 lb Shelf Position E D D C C D B B D E D D C C C C D D D D First Side Time min 10 6 8 10 10 15 20 25 25 3 3 4 18_0 10 10 6 8 10 15 7 10 9 14 Second Side Time rain 710 4...

Page 15: ...ocL_ in yore kitchen you may wish to turn off tile time of day clock display on your range Touch tile CLOCKpad once to turn off tile time of day display _Mthough you will not be able to see it tile clock maintains tile correct time of day Touch tile CLOCKpad again to recall the clock display Thetimer is a minute timer onl_ TheCLEAR OFF pad does not affect flTetime_ To Set the Timer Thetknerdoesnot...

Page 16: ...in the display recall the remaining time by touching the KITCHEN TIMER ON OFF or TIMER ON OFFpad and then touching the or pads to enter tile new tiIlle vo I W lIlt To Cancel the Timer Touch tile KITCHEN TIMER ON OFF or TIMER ON OFFpad twice or or TIME End of Cycle Tones onsomemodels Clear the tones by pressing the pad of the flmction wm are using Power Outage If a flashing tl_ne s in the display y...

Page 17: ...l I 8I aI lllled alll lint ot iIlle then tuFn off automatically Touch tile CLEJIR 0FFI ad to clear tile displa if necessarx Removethe food from the oven Remember even thoughthe oven shuts off automatica y foods continue cookl gafter controls are off How to Set a Delayed Start and Automatic Stop Theoven will turn on at the tlYneof dayyouset cook for a specific length of timeand then turn off automa...

Page 18: ...mostat Adjustment feature are also Special Features but they are addressed separately in the following sections 12 Hour Shut Off With this feature should you forget and leave the oven on the control will autornatlcally turn off the oven after 12hours duringbaking functionsorafter 3 hoursduringa broil function If you wish to mrn OFF this tbattli e tollow the stops below Touch the BAKE and BROILHI t...

Page 19: ...4 or pads to increase or decrease tile tel lllerattlFe ill 2_ incFel ents Touch ll e START ONpad NO TE I Ie CLEAR OFFand COOKING TIME pads are a tive hnJng tile Sabbath I atmx When the display shows D the oven is set f17 Sabbath When the display shows D C the oven is baking roasting How to Set for Timed Baking Roasting Immediate Start and Automatic Stop NOTE Tounderstandhow the oven control works ...

Page 20: ... HI LO pads at the same time until the display sho rsSE _lp the CLOCK pad mltil ONor OFFatltlears ill the distlla 0Nindi at_ s that the o_en rill automadcallv tllrll offalier 12 horn s OFFindicates that tile o en will not automatically mrn olti See the Special Features section lot m explanation of the 12 Hour Shut Off cat ure buch the START ON pad NOTE If a power outage occurred while the oven was...

Page 21: ...ther Models Touch tile BAKE and BROILHI LO pads at tile same time for 2 seconds tmtil tile display shows SE Touch tile BAKE pad A two digit number sho_s in tile display Tile oven temperature can be a iusted up to 35 F hotter or 35 F coole_ Touch tile 4 pad to increase tile temperature in 1 degree increments X q en you have made tile a jusm_ent touch tile START ON pad to go back to tile time of day...

Page 22: ... oven bottonl Make sure tile oven light bull cover is in place and the oven light is off CAUTION The grates a ddrip pans on some models should never be cleaned in the self cleaning oven Do not use commercial oven cleaners or oven protectors in or near the self cleaning oven A conlbination ot any of these products phis tile high clean cycle teniperatures nlav danlage tile porcelain finish el tile o...

Page 23: ...ouch tile SELFCLEANpad Tile oven shuts off automatically when tile clean cycle is complete and 0 00 will flash in the display Slide the latch handle to tile left as flu as it will g and oi en tile loo_ ToStop a Clean Cycle Touch tile CLEAR OFFpad Wait until tile oven has cooled below tile hwking temperature to tmlatch tile loo_ You will not be able to open tile door fight away unless the oven has ...

Page 24: ...the nlnges The gasKet is oeslgnea win 8 gap at the bottom to allow for erooer air clrculaTiol Because the area inside the gasket is cleanedduringtheself clean cycle youdonotneedto cleanthisbyhand onself clean models Theareaoutside thegasket andthe frontframecanbecleanedwitha soap filled steel wool pad hotwater and detergent Rinsewell witha vinegarandwatersohltion Donotruborcleanthedoor gasketithas...

Page 25: ...per towel and wipe the edges of the oven shelves with the paper towel Wire cover holder OvenLightReplacement on some models CAUTION Before replacing your ovenlight bulb turn the oven light off and disconnectthe electrical power to the rangeat the main fuse or circuit breakerpanel Be sm e to let the light cover and bull cool completely remove the cover Z Hold a hand under the coxer so it doesn t fi...

Page 26: ...and remove it To replace the storage drawer Insert glides at the back i I _he drawer beyond the st I on range glides IJfi the drawer if necessm to insert easilx _ I et the front of the drawer down then push in to close jl Pull the knobstraight off the stem ControlPanel and Knobs It s a good idea m wipe the control panel after each use ff the veil Use a dam I cloth to clean or rinse For cleaning ri...

Page 27: ...nsomemodels Be sure all the controlsare turned to OFFendthe surface unitsare cool before attempting to remove them To clean the sm_ilce milts mrn the control to the highest setting tot a minute The coils will 1 1111 oIc_ anY soil Toremove a surface unit To remove the drip pans for cleaning the surfilce units must be removed first i ifl the suitilce unit about 1 inch above the drip pan and pull it ...

Page 28: ...e bottle well Place a small am ount of EI_d_IA BI YTE _ Stainless Steel Appliance Cleaner on a damp cloth or damp paper towel Clean a small area approximatel 8 x 8 rubbing with the orain of the stainless steel if applicable D_ and buffwith a clean hT paper towel or soft cloth Repeat as necessary NOTE If a mineral oil based stainless steel al pliance cleaner has been used befi re to clean the appli...

Page 29: ...TE _ Cleaning Pad for Ceramic Cooktops Allow tile cookto I to cool Spread a few droI S ot CEIL_dVIA BRYTE _ Ceramic Cooktop 2leaner on tile entire burned residue area Using tile included CEI_4A BRYTE _ Cleaning Pad fin Ceramic Cooktops rub tile residue area alI lving i resstlre as needed If any residue remains repeat tile steps listed above as needed For additional protection alter all residue has...

Page 30: ...uch as jelly or fudge and have a spillover it can cause permanent damage to the glass surface unless the spillover is immediately removed Damage from Sugary Spills and Melted Plastic Turn off all surface traits Remo_ e hot pans Wearing an oven mitt a Use a single edge razor blade scraper CER _d vlA BRYTE Ceramic Cooktop Scraper to ii ove tile spill to a cool aI ea oi1 tile cooktop b Remove the spi...

Page 31: ...f your range Electricity to the range can be disconnected at the outlet without moving the range if the outlet is in the preferred location remove lower drawer To reduce the risk of burns or fire when reaching over hot surface elements cabinet storage space above the cooktop should be avoided If cabinet storage space is to be provided above the cooktop the risk can be reduced by installing a range...

Page 32: ... listed microwave oven or cooking appliance over the cooktop shall conform to the installation instructions packed with that appliance If cabinet storage is installed reduce the risk by installing a range hood that projects horizontally a min of 5 beyond the bottom of the cabinets Make sure the wall covering countertops and cabinets around the range can withstand heat generated by the range oven o...

Page 33: ...s that new construction not existing utilize a 4 conductor connection to an electric range When installing an electric range in new construction follow Steps 3 and 5 for 4 wire connection You must use a 3 wire single phase A C 208Y 120 Volt or 240 120 Volt 60 hertz electrical system If you connect to aluminum wiring properly installed connectors approved for use with aluminum wiring must be used I...

Page 34: ...lief and tighten Allow enough slack to easily attach the cord terminals to the terminal block If tabs are present at the end of the winged strain relief they can be removed for better fit NOTE Do not install the power cord without a strain relief The strain relief bracket should be installed before reinstalling the rear range wiring cover Terminal _t _ block Strain relief _ Power cord Bracket Skip...

Page 35: ...ING The neutralwire of the supply circuit must be connected to the neutral terminal located in the lower center of the terminal block The power leads must be connected to the lower left and the lower right terminals of the terminal block The 4th grounding lead must be connected to the frame of the range with the ground plate and the ground screw Remove the 3 lower terminal screws from the terminal...

Page 36: ... location and enclosure of splices etc must conform to good wiring practices and local codes Skip to Step 8 and proceed with the installation 4 WIRE CONDUIT INSTALLATION Loosen the three lower terminal screws from the terminal block Remove the ground screw and ground plate and retain them Cut and discard the ground strap DO NOT DISCARD ANY SCREWS Insert the ground bare wire tip between the range f...

Page 37: ... with the range does not fit this application use the universal Anti Tip device WB2X7909 See instructions to install supplied with bracket Unless properly installed the range could be tipped by stepping or sitting on the door Injury may result from spilled hot liquids or from the range itself Raise range LEVEL THE RANGE Install the oven shelves in the oven and position the range where it will be i...

Page 38: ...e sure that the rear leveling leg is fully inserted into the Anti Tip bracket and that the bracket is securely installed OPERATION CHECKLIST Turn on one of the surface units to observe that the element glows within 60 seconds Turn the unit off when glow is detected If the glow is not detected within the time limit recheck the range wiring connections If change is required retest again If no change...

Page 39: ...f the cooktop Cookware has been slid across the cooktop surface Scratches are not remowd le Tiny scratches will become less visible in time as a result ot cleaning To avoid scratches use the reconlinended cleaning procedures Make stu e bottolilS _ cookware are clean befl re use and use cookware with SIl ooth bottoins Areas of discoloration Food spillovers not cleaned See the Cleaning the glass coo...

Page 40: ...lace the bulb Switch operating light is broken Call for service Oven will not work Plug on range is not completely Make sure electrical l ltv _ is l_lugged into a live properly inserted in the electrical outlet grounded outlet A fuse in your home may Replace fl se or reset circuit breakeI be blown or the circuit breaker tripped Oven controls hnproperly set See the Using the oven secfi_m On self cl...

Page 41: ...suited for bmilhlg tlse the broiling l an and grid that came with your 1 _1n re Aluminum foil used on the See the Usingthe oven section broiling pan mid grid has not been fitted properly mid slit as recommended In some areas the power Preheat the broil elelnent tOÀ lO lninutes voltage maybe low Broil for the longest period of time recommended in the Broiling guide Control signals after You forgot ...

Page 42: ...cking noise heating element turning off and on during cooking fmactions F anda number You have a fmaction error code Press the CLEAR OFFpad Put the oven back or letter flash in into Ol eration the display If the function code repeats Disconnect all power to the range for at least 30 seconds and then reconnect l ower f the flmction error code repeats call ti r service On sell cleaning models if a f...

Page 43: ...he way t position the right Oven starts a self clean Oven door locked during Turn the Oven Temperature knob to OFF Allow the cycle when you wanted cooking oven to cool Never t0rce the door latch handle to bake roast or broil Crackling or This is the sound of the metal This is normal popping sound heating and cooling during both the cooking and cleaning functions Excessivesmoking Excessive soil Pre...

Page 44: ...umber ready i _i iii i ii Surface Elements Drip Pans Oven Racks BroHerPan Oven Elements Light Bulbs Knobs Cleaner Cleaning Pads Tired of discolored rocks Wishing you had extm hea T duty oven racks NOW AVAILABLE for your range New innovative porcelain coated oven racks Hem T Duty Durable Able m be cleaned in a self cleaning oven on models so equipped 44 ...

Page 45: ... u contract No questions asked It s that simple Protect wmr refl igerat m dishwasher washer and hTe_ range TV VCR and much more any brand Plus there s no extra charge ti r emergency service and low monthly financing is available Even icemaker coverage and tood spoilage protection is oiii_red You can rest easy knowing that all vo u _valuable household products are protected against expensive repair...

Page 46: ...ou did not get a registration card with your product detach and return the form below to ensure that your product is registered _ _ M t here Consumer Product Ownership Registration Model Number Serial Number II I Nh Ms Nh_ Mi_s Fir q I Lasl Name I I I I I I I I I Naine I I I I I I I I I I I I _1 r el I Addr s I I I I I I I I I I I I I I I I I I I I I I I I Ap l I E lnailAddress Zip I 1 a Pla ed _ ...

Page 47: ... to the glass cooktop caused by hardened spills of sugaJ_y materiaJs or melted plastic that are not clemmd accordh_g to the directions in the Owner s MmmaJ _ Products which axe not defective broken or which axe working as described in the Owner s MmmaJ Ji Replacement of house fuses or resetting of circuit breakers _ Dmnage to the product caused by accident fire floods or acts of God _ h_ddental or...

Page 48: ...r homes VISA MasterCard and Discover cards are accepted Order by phone at 800 626 2002 dtwing nomml business hom_ Instructions contained in this manual cover procedures to be performed by any user Other servicing generally should be referred to qualified service personnel Caution must be exercised since improper servicing may cause unsafe operation Customex_ ha Cmmda should consult the yellow page...

Reviews: