Ambrell EasyHeat 0112, Technical Handbook
The Ambrell EasyHeat 0112 is a versatile induction heating system designed for a wide range of applications. For detailed instructions on how to use this product, be sure to download the free Technical Handbook and manual from manualshive.com. Get the most out of your Ambrell EasyHeat 0112 with our comprehensive user guides.
Share
Download


Reviews:
No comments
Related manuals for EasyHeat 0112

VCD 204
Brand: D+H Pages: 4

MagnaLatch ALERT
Brand: D&D Technologies Pages: 2

VISO
Brand: NAD Pages: 6

D11911
Brand: Barnstead|Thermolyne Pages: 56

CM1551
Brand: AVGO Pages: 14

CW260
Brand: PSB Pages: 2

Drive 4 Basic S
Brand: EWM Pages: 52

EE-6435V2.B.PD
Brand: EAE Pages: 50

QM 1000AS
Brand: QMotion Pages: 16

HPI111
Brand: Quest Engineering Pages: 12

DP14U Series
Brand: Daikin Pages: 36

T Sense AX1
Brand: Daikin Pages: 9

WOODSTOCK
Brand: YA Pages: 2

US-511
Brand: H&H Pages: 23

Admiral Line
Brand: SCW Pages: 119

The One MP-TO-01-C
Brand: Meet PAT Pages: 14

Hurricane Zephyr HW
Brand: ITR Pages: 89
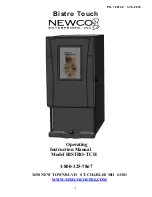
Bistro Touch
Brand: Newco Pages: 32


