Airwheel SE3, User Manual
The Airwheel SE3, a versatile and innovative luggage scooter, combines convenience and functionality. Don't miss out on exploring its full potential - download the comprehensive User Manual for free, exclusively at our manualshive.com, and unlock the true power of this revolutionary product.
Share
Download


Reviews:
No comments
Related manuals for SE3
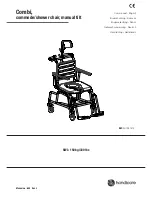
Combi
Brand: Handicare Pages: 32

EJ78X-1
Brand: E&J Pages: 20

AP600
Brand: Raz Rehab Pages: 18

4030
Brand: Lifeline Pages: 5

ThevoTherapy 1
Brand: Thomashilfen Pages: 44

Hybrid Elite
Brand: ROHO Pages: 10

AGILITY AG-LATFX-L-FL
Brand: ROHO Pages: 18

cheetah
Brand: R82 Pages: 7

Frontier
Brand: Magic Mobility Pages: 29

XXL-Rehab Shower Bench
Brand: Cobi Rehab Pages: 8

Prima AP400222
Brand: Croydex Pages: 2

MC Concept 1103
Brand: medemagroup Pages: 82

MED3071
Brand: Decon wheel Pages: 6

LI2137.521 Series
Brand: Handicare Pages: 12

UniX 2
Brand: Breezy Pages: 52


