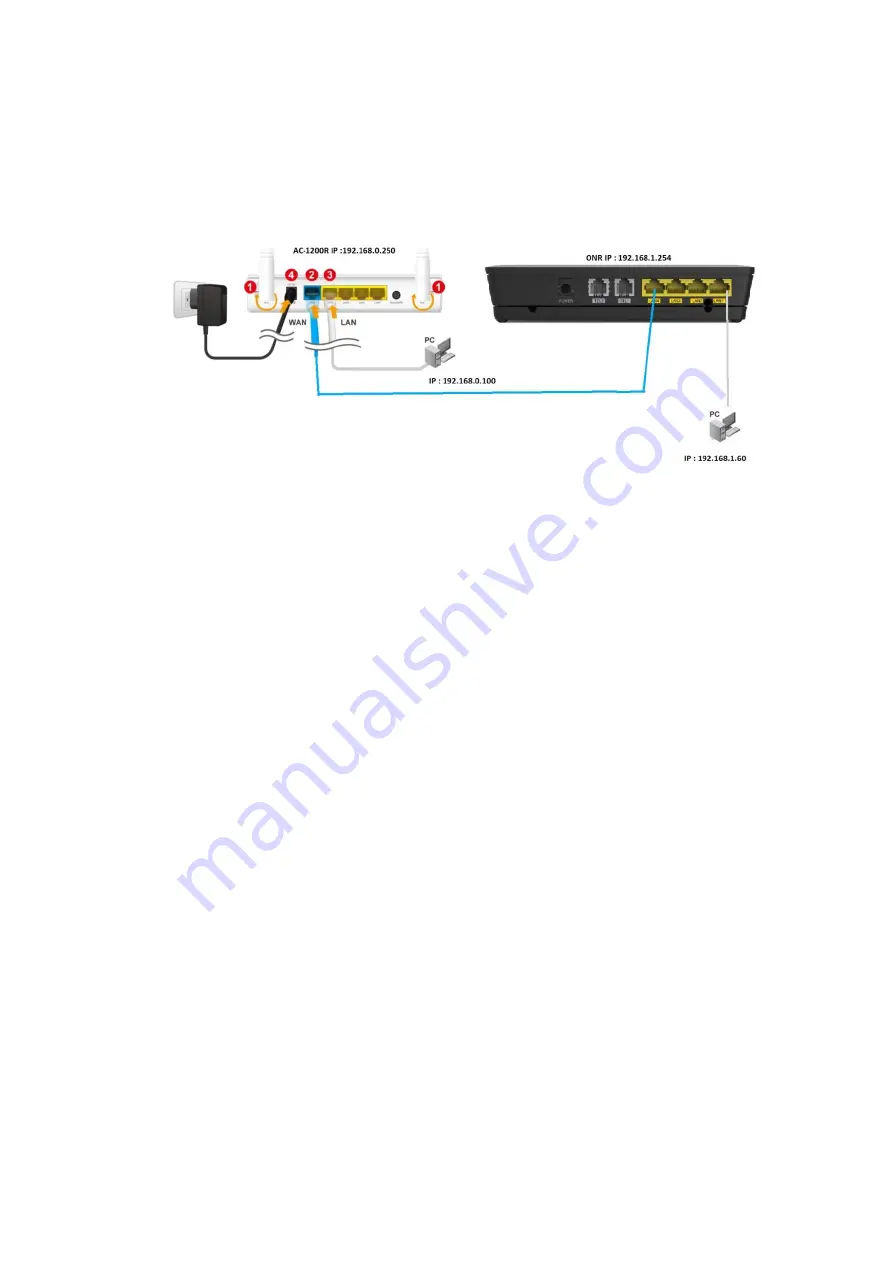
SETUP FOR ALIVE ROUTER AC-1200R
1.
INSTALLATION STEPS
Installation steps required for the AC-1200R before it can work properly in your network.
1.
Install antennas into the AC-1200R
2.
Connect
ONR LAN port
into the
WAN port of the AC-1200R
3.
Connect PC/Laptop into LAN port of AC-1200R or ONR LAN port if without AC-1200R.
4.
Connect Power jack for to the power port for both AC-1200R and ONR
5.
ON power for ONR and wait it finished boot (Power/PON/Internet light up) and follow by AC-
1200R.
6.
To access AC-1200R .Then open the browser on your PC and type in “192.168.0.250” to reach the
web management
7.
Please proceed to AC-1200R configuration.
2.
AC-1200R Configuration
Important Before you start. Please note password and SSID are case sensitive.
The default IP address is:
192.168.0.250
Subnet Mask:
255.255.255.0
When using Web UI, the login as follow:
User name:
admin
Password:
airlive
The default radio mode for Radio 1 is
802.11ac/n
The default radio mode for Radio 2 is
802.11g/b/n
The default SSID for Radio 1 is:
AirLive
The default SSID for Radio 2 is:
AirLive 5G
The default wireless mode is :
Dual Band Router Mode
After power on, please wait for 2 minutes for AC-1200R to finish boot up
Please remember to click on “Apply” for new settings to take effect
3. Prepare your PC
The AC-1200R can be managed remotely by a PC/Laptop through either wired or wireless
network. The default IP address of the AC-1200R is
192.168.0.250
with a subnet mask of
255.255.255.0 This means the IP address of the PC should be in the range of 192.168.0.1 to
192.168.0.253.
Summary of Contents for AC-1200R
Page 5: ......


