background image

1

107110-01 - 6/16

Price - $5.00

Warning:

 Improper installation, adjustment, alteration, service or maintenance can cause property damage, 

injury, or loss of life. For assistance or additional information, consult a qualified installer, service agency  or  the 

gas supplier. This boiler requires a special venting system. Read these instructions carefully before installing.

9700609


 as an EnErgY STar

®

 Partner, U.S. Boiler Company has determined that the K2WT™ Series meets the EnErgY 

STar

®

 guidelines for energy efficiency established by the United States Environmental Protection Agency (EPA).

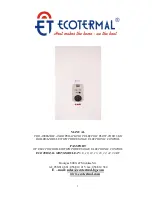
inSTaLLaTiOn, OPEraTing anD

SErViCE inSTrUCTiOnS FOr

K2WT

CONDENSING HIGH EFFICIENCY

DIRECT VENT

GAS - FIRED HOT WATER BOILER

Summary of Contents for K2WT

Page 1: ...gas supplier This boiler requires a special venting system Read these instructions carefully before installing 9700609 As an ENERGY STAR Partner U S Boiler Company has determined that the K2WT Series meets the ENERGY STAR guidelines for energy efficiency established by the United States Environmental Protection Agency EPA INSTALLATION OPERATING AND SERVICE INSTRUCTIONS FOR K2WT CONDENSING HIGH EFF...

Page 2: ...bstantial property damage CAUTION Indicates a potentially hazardous situation which if not avoided may result in moderate or minor injury or property damage WARNING Indicates a potentially hazardous situation which if not avoided could result in death serious injury or substantial property damage NOTICE Indicates special instructions on installation operation or maintenance which are important but...

Page 3: ...o disconnect any components of this boiler without positively assuring the water is cool and has no pressure Always wear protective clothing and equipment when installing starting up or servicing this boiler to prevent scald injuries Do not rely on the pressure and temperature gauges to determine the temperature and pressure of the boiler This boiler contains components which become very hot when ...

Page 4: ...THIS ENTIRE MANUAL before attempting installation start up or service Improper installation adjustment alteration service or maintenance may cause serious property damage personal injury or death DO NOT DISCONNECT PIPE FITTINGS on the boiler or in the heating system without first verifying that the system is cool and free of pressure and that your clothing will protect you from a release of hot wa...

Page 5: ...rk Polyflue Vent Systems 53 H Assembly of Centrotherm InnoFlue Vent Systems 57 I Condensate Trap and Drain 61 J Removing An Existing Boiler From Common Chimney 62 VIII Gas Piping 63 IX System Piping 65 A General System Piping Precaution 65 B Standard Piping Installation Requirements 66 C Near Boiler Piping Design 75 D Piping For Special Situations 77 X Wiring 78 XI Start Up and Checkout 89 XII Ope...

Page 6: ... hot water heating systems requiring supply water temperatures of 180 F or less It is designed for installation on a wall This boiler may be vented vertically or horizontally with combustion air supplied from outdoors It is not designed for use in gravity hot water systems or systems containing significant amounts of dissolved oxygen I Product Description ...

Page 7: ...on by a professional heating contractor in strict accordance with this manual and the requirements of the authority having jurisdiction In the absence of an authority having jurisdiction installation must be in accordance with this manual and the National Fuel Gas Code ANSI Z223 1 In Canada installation must be in accordance with the B149 1 Installation Code Where required by the authority having ...

Page 8: ...wealth of Massachusetts IV Locating the Boiler 1 Observe the minimum clearances shown in Figure 4 1 These clearances apply to combustible construction as well as non combustible walls floors ceilings and doors 2 Note the recommended service clearances in Figure 4 1 These service clearances are recommended but may be reduced to the combustible clearances provided a Access to the front of the boiler...

Page 9: ...107110 01 6 16 Figure 4 1 Minimum Clearances To Combustible Construction IV Locating the Boiler continued LEFT SIDE CLEARANCE MAY BE REDUCED TO 1 2 HOWEVER RELIEF VALVE MUST REMAIN IN SAME SPACE AS BOILER ...

Page 10: ...te holes A and B Make sure that the horizontal centerline of these holes is level Holes C and D may also be drilled at this time or after the boiler is hung on the wall If the 5 16 x 2 lag screws are used drill 3 16 pilot holes 6 The wall mounting hook is used to secure the boiler to the shipping pallet Remove this hook from the pallet and secure to the wall using the 5 16 x 2 lag screws and washe...

Page 11: ...11 107110 01 6 16 Figure 5 1 Wall Layout Mounting Hole Location V Mounting The Boiler continued ...

Page 12: ...12 107110 01 6 16 Figure 5 2 Boiler Mounting Bracket Installation Boiler Wall Mounting V Mounting The Boiler continued ...

Page 13: ...other appliances provide adequate air for combustion and or ventilation air in accordance with the manufacturer s installation manual or applicable code VI Air for Ventilation WARNING Outdoor combustion air must be piped to the air intake Never pipe combustion air from areas containing contaminates such as swimming pools and laundry room exhaust vents Contaminated combustion air will damage the bo...

Page 14: ...nly as permitted in this manual All PVC must be listed to ASTM D2665 At least 30 of CPVC pipe and at least one CPVC elbow must be installed between the boiler s vent connection and the PVC pipe Use of foam core PVC is not permitted for venting PVC vent pipe may not be used to vent this boiler in Canada WARNING Asphyxiation Hazard Failure to vent this boiler in accordance with these instructions co...

Page 15: ...15 107110 01 6 16 Figure 7 0c Split Venting VII Venting A Vent System Design continued Figure 7 0a Horizontal Twin Pipe Figure 7 0b Vertical Twin Pipe ...

Page 16: ...that all field supplied PVC or CPVC elbows be 1 4 Bend Sanitary 90 Elbow or Long Sweep 1 4 Bend type elbows Figure 7 2 In this manual sanitary and long sweep elbows are treated as having the same equivalent length Example A 3 twin pipe horizontal CPVC PVC vent system is planned for a horizontally vented 120MBH model which has the following components in the vent system 1 ft CPVC Straight Pipe 90 C...

Page 17: ...e boiler Pitch CPVC PVC vent piping 1 4 per foot Pitch Polypropylene vent piping 5 8 per foot Les chaudières de catégories I II et IV doivent présenter des tronçons horizontaux dont la pente montante est d au moins 5 8 po par pied 52 mm m entre la chaudière et l évent VII Venting A Vent System Design continued Table 7 1 Vent Air Intake Fitting Equivalent Length CPVC PVC Fitting Equivalent Length f...

Page 18: ...all thimbles so that the vent system can expand towards the terminal When a straight run of pipe exceeds 20ft and must be restrained at both ends an offset or expansion loop must be provided Figures 7 3a 7 3b When a straight horizontal run of pipe exceeds 20ft and is restrained at one end with an elbow at the other avoid putting a hanger or guide less than Y inches from the elbow in the adjoining ...

Page 19: ...19 107110 01 6 16 VII Venting A Vent System Design continued Figure 7 3 Expansion Loops for CPVC PVC Pipe Figure 7 3b Figure 7 3a Figure 7 4 Wall Penetration Clearances for PVC Vent Pipe Figure 7 3c ...

Page 20: ...lue may not be snorkeled Terminal Option B Ipex Low Profile Terminal Acceptable for Vent Options 1 2 This terminal is shown in Figure 7 7 If the terminal is oriented vertically alternate orientation shown in Fig 7 7 the exhaust opening must be on the top as shown See Section VII E of this manual and the Ipex instructions provided with the terminal for installation details Terminal Option C Diversi...

Page 21: ...PF 39UV w screen ISEP02 or ISEP0239 w screen ISEP03 or ISEP0339 w screen Intake Elbow w screen Note 3 Elbow w screen Note 3 Elbow w screen Elbow w screen Elbow w screen Elbow w screen Elbow w screen Elbow w screen Terminal Option B Ipex Low Profile Ipex 196984 Ipex 196985 Not Permitted Not Permitted Not Permitted Not Permitted Not Permitted Not Permitted Terminal Option C DiversiTech HVENT HVENT 2...

Page 22: ...inal must be at least 3 feet above any forced air inlet located within 10 feet USA Only A clearance of at least 4 feet horizontally must be maintained between the vent terminal and gas meters electric meters regulators and relief equipment Do not install vent terminal over this equipment In Canada refer to B149 1 Installation Code for clearance to meters regulators and relief equipment Do not loca...

Page 23: ...ith Low Profile Terminal Vent Options 1 2 Terminal Options B C Figure 7 8 Horizontal CPVC PVC Venting with Concentric Vent Terminal Vent Options 1 2 Terminal Options D E VII Venting B Design Requirements Unique to Horizontal Twin Pipe Venting Systems continued ...

Page 24: ...ntrotherm InnoFlue Horizontal Venting Vent Option 3 8 Terminal Option A Figure 7 10 Duravent PolyPro Horizontal Venting with Concentric Terminal Vent Options 3 4 Terminal Option F VII Venting B Design Requirements Unique to Horizontal Twin Pipe Venting Systems continued ...

Page 25: ...ntal Twin Pipe Venting Systems continued Note Air intake termination not shown Figure 7 11 Location of Vent Terminal Relative to Windows Doors Grades Overhangs Meters and Forced Air Inlets Two Pipe System Vent Terminal Shown Two Pipe System Air Intake Terminal Not Shown ...

Page 26: ...s generally recommended for both terminations Two rodent screens suitable for 3 PVC terminals are supplied with the boiler and are installed as shown in Figure 7 29 If 2 CPVC is used these screens can be cut to fit into the smaller fittings Rodent screens bird guards for PolyPro Polyflue and InnoFlue are as follows Size Vent System Rodent Screen Bird Guard 2 PolyPro DuraVent 2PPS BG 3 PolyPro Dura...

Page 27: ...36B w Screen 3PPS 12B or 3PPS 36B w Screen 2PF 10UV or 2PF 39UV w Screen 3PF 10UV or 3PF 39UV w Screen ISEP02 or ISEP0239 w Screen ISEP03 or ISEP0339 w Screen Intake 180 Elbow w Screen 180 Elbow w Screen 180 Elbow w Screen 180 Elbow w Screen 180 Elbow w Screen 180 Elbow w Screen 180 Elbow w Screen 180 Elbow w Screen Terminal Option I Ipex FGV Concentric Ipex 196105 Note 3 Ipex 196006 Note 3 Not Pe...

Page 28: ...t 135ft K2WT 180 135ft 135ft Vent Manufacturer s PN for Flex Termination Components Required 2PPS VFT 2PPS BV 2PPS FLEX 3PPS VFT 3PPS BV 3PPS FLEX IFBK02 IAWP02B IFBK03 IAWP03B Specify size of B vent e g 2PPS BV6 is for use with 6 B vent Specify length in feet Specify Flex length and B vent diameter e g IFBK022505 includes 25ft of flex and used with 5 B vent Note 1 Max vent lengths shown also appl...

Page 29: ...d from an outside wall see Section VII D for additional details All venting is Polypropylene supplied by the vent manufacturer shown in Table 7 13b The portion of this venting within the B vent is flexible All flex pipe must be installed vertically Up to two offsets four bends may be made in the vertical run of flex pipe Bends used to make these offsets may not exceed 45 degrees Because the flex p...

Page 30: ...lex 2 0 ft 2 Centrotherm InnoFlue Flex 2 0 ft 2 Selkirk Polyflue 2 0 ft 3 DuraVent PolyPro Flex 2 0 ft 3 Centrotherm InnoFlue Flex 2 3 ft 3 Selkirk Polyflue 2 3 ft B Vent Air Chase 1ft 2 Flex Vent in 5 or larger B Vent 1 0 ft 3 Flex Vent in 6 or larger B Vent 1 0 ft Note Up to four 45 degree bends may be made in flex pipe or air chase These bends are not counted when figuring equivalent length ...

Page 31: ...VC PVC Venting Vent Options 10 11 Terminal Option H Figure 7 16 Vertical CPVC PVC Venting with IPEX Concentric Vent Terminal Vent Options 10 11 Terminal Option I J VII Venting C Design Requirements Unique to Vertical Venting Systems continued ...

Page 32: ...rotherm InnoFlue Vertical Single Wall PP Venting Vent Options 12 17 Terminal Option H Figure 7 18 Duravent PolyPro Vertical Venting with Concentric Terminal Vent Options 12 13 Terminal Option J VII Venting C Design Requirements Unique to Vertical Venting Systems continued ...

Page 33: ... Venting C Design Requirements Unique to Vertical Venting Systems continued Figure 7 19 Duravent PolyPro B Vent Air Chase System Vent Options 18 19 Figure 7 20 Centrotherm InnoFlue B Vent Air Chase System Vent Options 20 21 ...

Page 34: ...ocated within horizontally within 10ft 3 Horizontal Air Intake Terminal Location Observe the following limitations on the intake terminal location also see Figures 7 22 7 23 or 7 24 The bottom of all terminals must be at least 12 above the normal snow line In no case should they be less than 12 above grade level If possible install the intake terminal on a wall away from the prevailing wind Reliab...

Page 35: ...th of 3 DuraVent Poly Pro Flex is 2 0ft From Table 7 1 the equivalent length of the second 90 elbow is 8 7ft The equivalent length of the vent system is therefore 4 8 7 30 x 2 0 72 7ft Since Vent Option 34 shows a max vent length of 135ft the planned vent length of OK Intake Equivalent length First elbow and termination elbow are ignored leaving just the straight pipe Equivalent length of the inta...

Page 36: ...WT 120 Not Permitted 135ft Not Permitted 135ft 135ft K2WT 150 135ft 135ft 135ft K2WT 180 135ft 135ft 135ft Rigid Vent Terminals Vent Coupling w Screen Coupling w Screen 2PPS 12B or 2PPS 36B w Screen 3PPS 12B or 3PPS 36B w Screen 2PF 10UV or 2PF 39UV w Screen 3PF 10UV or 3PF 39UV w Screen Intake 90 Elbow w Screen 90 Elbow w Screen 90 Elbow w Screen 90 Elbow w Screen 90 Elbow w Screen 90 Elbow w Scr...

Page 37: ...Elbow w Screen 90 Elbow w Screen 90 Elbow w Screen 90 Elbow w Screen 90 Elbow w Screen 90 Elbow w Screen 2PPS VFT 2PPS BF 2PPS FLEX 3PPS VFT 3PPS BF 3PPS FLEX 2PF 10UV or 2PF 39UV w Screen 2PF BVSC Note 4 3PF 10UV or 3PF 39UV w Screen 3PF BVSC Note 4 IFBK02 IFBK03 90 Elbow w Screen 90 Elbow w Screen 90 Elbow w Screen 90 Elbow w Screen 90 Elbow w Screen 90 Elbow w Screen Specify size of B vent e g ...

Page 38: ...10 01 6 16 VII Venting D Design Requirements Unique to Split Vent Systems continued Figure 7 22 Split Rigid Vent System Vent Options 25 32 Figure 7 23 Split Vent System Flex in B Vent Chase Vent Options 33 38 ...

Page 39: ...39 107110 01 6 16 VII Venting D Design Requirements Unique to Split Vent Systems continued Figure 7 24 Split Vent System Flex in Abandoned Masonry Chimney Vent Options 33 38 ...

Page 40: ...0 01 6 16 VII Venting D Design Requirements Unique to Split Vent Systems continued Figure 7 25 Masonry Chimney Chase Requirements Venting of Other Appliances Or Fireplace into Chase or Adjacent Flues Prohibited ...

Page 41: ...e a miter box or other method to cut pipe squarely De burr both the inside and outside of the cut end c Dry fit all vent components before assembly d The vent adaptor has two different inside diameters The larger upper inside diameter accepts 3 CPVC pipe and is used in this application the smaller lower inside diameter accepts 3 nominal PolyPro Polyflue or InnoFlue A locking ring in the adaptor pr...

Page 42: ...t side of the air intake adapter Insert the first piece of PVC air intake pipe into the air intake connection and drill a 1 8 tap hole into the PVC which lines up with the 7 32 clearance hole and secure them together with a 10 x 1 sheet metal screw Seal the joint between the intake pipe and the adaptor with RTV b All intake piping may be PVC c There is a 0 minimum clearance between the air intake ...

Page 43: ...43 107110 01 6 16 Figure 7 29 Installation of Standard Vertical Terminals Figure 7 28 Installation of Standard Horizontal Terminals VII Venting E Assembly of CPVC PVC Vent Systems continued ...

Page 44: ...t and intake air pipes through the holes and cement them to the base of the vent termination kit using a primer and cement listed for use with PVC c Fasten the vent base to the wall using the supplied screws and anchors The anchors require the drilling of a 3 16 hole x 1 3 16 deep Locate the holes using the vent base as a template d Screw the vent cap to the vent base using the supplied screws e O...

Page 45: ...1 6 16 Figure 7 31 Installation of DiversiTech Low Profile Terminal Through Sidewall Figure 7 30 Installation of IPEX Low Profile Terminal Through Sidewall VII Venting E Assembly of CPVC PVC Vent Systems continued ...

Page 46: ...6 16 VII Venting E Assembly of CPVC PVC Vent Systems continued Figure 7 33 Installation of IPEX and DiversiTech Concentric Terminal through Sidewall Figure 7 32 Cutting IPEX and DiversiTech Concentric Vent Terminals ...

Page 47: ...orizontal installations orient so that the side outlet on the Wye is on or above the horizontal plane g For horizontal installations seal the gap between the OD of the outer pipe and the exterior side of the wall with RTV sealant h Cement the rain cap onto the inner pipe If desired the rain cap can be attached to the inner pipe with the supplied stainless steel screw and nut so that it can be late...

Page 48: ...ng ring in the adaptor prevents the vent pipe from coming out of the adaptor once it is inserted Lubricate the upper gasket in the vent adaptor with soapy water and insert the first piece of 3 PolyPro into the adaptor until it bottoms out NOTICE Once a vent pipe is inserted into this adaptor it is IMPOSSIBLE to remove it Make sure the correct type of pipe is selected and that it is of the correct ...

Page 49: ...installation instructions included by the original Polypropylene venting component manufacturer M G DuraVent Polypropylene pipe sections must be disengaged 1 4 to 5 8 in 6 mm to 16 mm per joint to allow for thermal expansion 4 Installation of Horizontal Fitting Terminals Terminal Option A a See Figure 7 36 for proper orientation of twin pipe horizontal terminals Outer edge of exhaust coupling must...

Page 50: ...Installation of Duravent PolyPro UV Resistant Single Wall Horizontal Terminal Figure 7 37 Installation of Duravent PolyPro UV Resistant Single Wall Vertical Terminal VII Venting F Assembly of DuraVent PolyPro Vent Systems continued ...

Page 51: ...e e Seal the termination to the exterior wall plate with weather resistant RTV f Slide the interior wall plate over the termination and attach to the wall from inside the room g Attach the interior wall plate to the termination with the provided hardware h Install gaskets into co linear adapter i Attach co linear adapter to horizontal termination and orient so that the side outlet on the adapter i...

Page 52: ...e 7 39 Installation of Duravent PolyPro Concentric Vent Terminal Through Sidewall VII Venting F Assembly of DuraVent PolyPro Vent Systems continued Figure 7 40 Installation of Duravent PolyPro Concentric Terminal Through Roof ...

Page 53: ... Secure the adaptor to the cap using a 2 or 3 electrical conduit lock nut Seal all joints with RTV G Assembly of Selkirk Polyflue Vent Systems WARNING Asphyxiation Hazard When using PolyPro flex observe the following precautions PolyPro flex may be damaged by handling at low temperatures Do not bend uncoil or attempt to install if it has been stored at a temperature below 42 F without allowing it ...

Page 54: ...roper orientation of twin pipe vertical terminals b Remove the gasket from the end of the integral exhaust coupling and insert Selkirk 2PF HVST or 3PFHVST in its place c A 180 bend or two 90 elbows are installed on the top of the air intake pipe If two 90 elbows are used the rodent screen provided can be installed between them Figure 7 43 If a 180 bend is used install the rodent screen in the open...

Page 55: ...ference the Selkirk Polyflue instruction manual Not all vent configurations shown in the Selkirk vent manual are approved for use with this boiler Refer to Selkirk Polyflue Instructions for assembly of all flex components including the chimney cap and the adaptor to rigid Polyflue at the base of the masonry or B vent chimney In addition observe the following requirements a Refer to the appropriate...

Page 56: ...G Assembly of Selkirk Polyflue Vent Systems continued Figure 7 42 Installation of Selkirk Polyflue UV Resistant Single Wall Horizontal Terminal Figure 7 43 Installation of Selkirk Polyflue UV Resistant Single Wall Vertical Terminal ...

Page 57: ...ing out of the adaptor once it is inserted Lubricate the upper gasket in the vent adaptor with water and insert the first piece of 3 InnoFlue into the adaptor until it bottoms out NOTICE Once a vent pipe is inserted into this adaptor it is IMPOSSIBLE to remove it Make sure the correct type of pipe is selected and that it is of the correct length before inserting it into the vent adaptor b If 2 Inn...

Page 58: ...ng component manufacturer Centrotherm Polypropylene pipe sections must be disengaged 1 4 in 6mm per joint to allow for thermal expansion 4 Installation of Horizontal Fitting Terminals Terminal Option A a See Figure 7 45 for proper orientation of twin pipe horizontal terminals Outer edge of end pipe must be 10 or less from the wall surface Figure 7 5 b Use plain end UV stabilized Centrotherm 2 pipe...

Page 59: ...stallation of Centrotherm InnoFlue UV Stabilized Single Wall Horizontal Terminal Figure 7 46 Installation of Centrotherm InnoFlue UV Stabilized Single Wall Vertical Terminal VII Venting H Assembly of Centrotherm InnoFlue Vent Systems ...

Page 60: ...in Tables 7 13b or 7 21 for a list of the principle flex components required Rigid vent pipe by the same manufacturer will also be required for the run from the boiler to the base of chimney b Masonry chimneys cannot be used for an air chase c B vent chimneys can only be used for an air chase Vent options 20 21 if the B vent has the minimum size shown in Table 7 13b and is fully accessible for sea...

Page 61: ...n disposing of the condensate 1 If the corrugated condensate drain line must be extended construct the extension from PVC or CPVC pipe Insert the hose provided with the boiler into the end of the extension as shown in Figure 7 47 2 Condensate is slightly acidic Do not use metallic pipe or fittings in the condensate drain line Do not route the drain line through areas that could be damaged by leaki...

Page 62: ...nting J Removing an Existing Boiler From a Common Chimney continued WARNING Never common vent this boiler with other appliances Au moment du retrait d une chaudière existante les mesures suivantes doivent être prises pour chaque appareil toujours raccordé au système d evacuation commun et qui fonctionne alors que d autres appareils toujours raccordés au système d évacuation ne fonctionnent pas a S...

Page 63: ...er from the gas supply system by closing its individual manual shut off valve Locate leaks using approved combustible gas non corrosive leak detector solution VIII Gas Piping WARNING Explosion Hazard Failure to properly pipe gas supply to boiler may result in improper operation or leaks of flammable gas Gassupplytoboilerandsystemmustbeabsolutelyshutoffpriortoinstallingorservicingboilergaspiping Al...

Page 64: ...iping continued CAUTION Support the weight of the gas line piping independently from the boiler gas connection fitting located on the bottom of the boiler If an additional regulator is used to reduce boiler inlet pressure below 1 2 psig 3 4 kPa it must be at least 6 to 10 ft upstream of the boiler It is very important that the gas line is properly purged by the gas supplier or utility company Figu...

Page 65: ... important guideline Tap water contains dissolved oxygen which causes corrosion In a tight system this oxygen comes out of solution and is quickly removed from the system through the automatic air vent The system then remains essentially free of oxygen If the system is not tight however frequent additions of make up water can expose the heat exchanger to oxygen on a continuous basis In addition fr...

Page 66: ... the design flow rate through the heating system as you would on any other heating system All piping between the expansion tank and secondary connection tees must be at least 1 In order to keep the flow rates in the system and boiler loops independent of each other provide at least 8 diameters of straight pipe upstream of the first tee and 4 diameters downstream of the second tee Keep the distance...

Page 67: ...alve Backflow Preventer Expansion Tank Air Separator Air Vent Header Temperature Sensor When Used Cold Water Line Y Strainer Recommended To System System Zone Valves Heating System Circulator Boiler Pump Drain Valve Full Port Isolation Valves Unions Tee Plug Recommended For Future Heat Exchanger Service Relief Valve Close Nipple Locate Header Sensor As Close As Possible To Downstream Tee Hydraulic ...

Page 68: ...6 Figure 9 2a Piping Method 1 Near Boiler Piping with K2WT FastPipe Primary Secondary Header Heating Only PRIMARY SECONDARY HEADER INSTALLATION 106259 01 Sizes 080 120 106259 02 Sizes 150 180 IX System Piping continued ...

Page 69: ...69 107110 01 6 16 Figure 9 3a Piping Method 1 Near Boiler Piping Heating Plus Indirect Water Heater IX System Piping continued ...

Page 70: ...l Port Isolation Valves Tee Plug Recommended For Future Heat Exchanger Service Relief Valve Close Nipple Locate Header Sensor As Close As Possible To Downstream Tee Hydraulic Separator May Be Substituted For Tees Fill Valve Backflow Preventer Flow Check Full Port Isolation Valves Indirect Circulator Indirect Domestic Water Heater IWH Indirect Supply Indirect Return CAUTION It is the installers resp...

Page 71: ...or automatic air elimination devices and an expansion tank These separators are available from several sources and may be used in place of the closely spaced tees shown in Figure 9 2 9 3a or 9 3b When a hydraulic separator is used in place of the tees the 60 ft equivalent length limitation still applies Select a hydraulic separator having 1 or larger boiler connections that is designed for the boi...

Page 72: ...72 Figure 9 6 Piping Method 1 Near Boiler Piping Shaded Boiler Loop IX System Piping continued ...

Page 73: ...boiler model taking into account the pressure drop through the boiler s heat exchanger and internal piping These curves therefore show the flow that can be achieved through the boiler as a function of the pressure drop through the connected piping Calculation of the system pressure drop must be performed by someone having familiarity with pressure drop calculations such as an HVAC engineer Figure ...

Page 74: ...ust use Speed HI to achieve the flow requirement shown in Table 9 1 Figure 9 8a Taco Net Circulator Performance Curve IX System Piping continued Note These curves show the flow that can be achieved through the boiler as a function of the pressure drop through the connected piping ...

Page 75: ...th no other changes in the system the old expansion tank can generally be reused If the expansion tank must be replaced consult the expansion tank manufacturer s literature for proper sizing 5 Fill Valve required Either a manual or automatic fill valve may be used but a manual valve is preferred because it eliminates unmonitored additions of make up water to the system The ideal location for the f...

Page 76: ...r cut off with this boiler a Low Water Cut off Kit P N 105591 01 is available that plugs into the low voltage circuit board refer to Section X and LWCO Instruction Sheet for LWCO location and electrical connection Install the low water cut off in the supply piping at the point prescribed the local jurisdiction generally at a point above the boiler If a probe type low water cut off is used be certa...

Page 77: ... for proper heat exchanger sizing as well as flow and temperature requirements All components on the oxygenated side of the heat exchanger such as the pump and expansion tank must be designed for use in oxygenated water 2 Piping with a Chiller If the boiler is used in conjunction with a chiller pipe the boiler and chiller in parallel Use isolation valves to prevent chilled water from entering the ...

Page 78: ...adlock once power is turned off WARNING All wiring and grounding must be done in accordance with the authority having jurisdiction or in the absence of such requirements with the National Electrical Code NFPA 70 In Canada all wiring and grounding must be done in accordance with the Canadian Electrical Code Part 1 CSA C22 1 latest edition Failure to properly wire electrical connections to the boile...

Page 79: ...ection XII of this manual for information on setting up the pump operation 2 Low Voltage Connections Low voltage field connections on the low voltage PCB are shown in Figure 10 3 and are listed from top to bottom Heat T Stat 24VAC heating thermostat R 24V Hot Heat T Stat 24VAC heating thermostat W Energized or Call for Heat Heat T Stat 24VAC heating thermostat C 24V Common DHW Stat 24VAC domestic ...

Page 80: ...80 107110 01 6 16 Figure 10 2 High Voltage PCB Terminal Connections Figure 10 3 Low Voltage PCB Terminal Connections X Wiring continued ...

Page 81: ...luorescent lighting Wire the sensor to the boiler using 22 gauge or larger wire As with the sensor itself the sensor wiring should be routed away from sources of electrical noise Where it is impossible to avoid such noise sources wire the sensor using a 2 conductor UL Type CM AWM Style 2092 shielded cable Connect one end of the shielding on this cable to ground See Section XII of this manual for i...

Page 82: ...82 107110 01 6 16 Figure 10 4 Proper Installation of Header Sensor X Wiring continued ...

Page 83: ...83 107110 01 6 16 X Wiring continued Figure 10 5 Internal Ladder Diagram ...

Page 84: ...84 107110 01 6 16 X Wiring continued ...

Page 85: ...85 107110 01 6 16 Figure 10 6 Internal Wiring Connections Diagram X Wiring continued ...

Page 86: ...B 2 STRIP 40b BL SPL BL 1 J8 1 15 GR J4 12 GND 41 YE P8 4 J8 3 16 OR IGNITOR 42 YE P8 5 J7 7 17 P G P10 1 J10 7 43 GY P8 12 SPL GY 1 18 YE P10 2 J10 8 43a GY SPY GY 1 THERM 1 19 P G P10 3 J8 11 43b GY SPL GY 1 J6 1 20 BL P10 7 J3 4 44 Y G P8 11 J6 7 21 OR P10 8 J3 5 45 Y G P8 10 J6 8 22 PI P10 9 SPL P1 1 46 OR P8 9 J3 7 22a PI SPL P1 1 J3 6 47 BL P8 8 J3 8 22b PI SPL P1 1 GT02 2 48 WH P8 7 J3 9 23...

Page 87: ...87 107110 01 6 16 Figure 10 8 TACO SR504 or Equivalent Zone Panel Wiring Connection Diagram X Wiring continued ...

Page 88: ...88 107110 01 6 16 X Wiring continued Figure 10 9 Sage Zone Control Circulator Panel Wiring Connection Diagram ...

Page 89: ...ent and remove hose 7 Check all gas piping for leaks and purge piping sections that are filled with air Refer to the National Fuel Gas Code for additional information on testing and purging gas lines 8 Confirm vent system is complete and free of obstructions before attempting to fire boiler 9 Inspect all wiring for loose uninsulated or miswired connections 10 If the boiler is to be converted to pr...

Page 90: ...ted Propylene Glycol antifreeze combined antifreeze and inhibitor available from Douglas Products and Packaging 1550 E Old 210 Highway Liberty MO 64068 Tel 877 567 2560 toll free Refer to the antifreeze manufacturer s instructions for required dosage In general these products are a blend of glycol for freeze protection and inhibitors to protect the glycol from attacking metallic system components ...

Page 91: ...e has been established for the first time subsequent calls for burner operation should result in a flame on the first try 13 If there is a problem that appears before the first try for ignition or if the boiler fails to light after four tries for ignition the blinking red screen with HELP highlighted on the Home screen Figure 11 2c Touching this HELP button will take the user to the Diagnostics me...

Page 92: ...110 01 6 16 Figure 11 3 Burner Flame XI Start Up and Checkout continued Figure 11 2a Home Screen at Power Up No Call for Heat Figure 11 2b Home Screen on Heat Demand Figure 11 2c Home Screen with Active Fault ...

Page 93: ...d result in property damage personal injury or loss of life due to carbon monoxide CO poisoning WARNING Asphyxiation Hazard The outlet pressure for the gas valve has been factory set and requires no field adjustment This setting is satisfactory for both natural gas and propane Attempting to adjust the outlet pressure may result in damage to the gas valve and cause property damage personal injury o...

Page 94: ...of insulated pliers Figure 11 1 The burner should shut off immediately 18 Test any external limits or other controls in accordance with the manufacturer s instructions 19 Refer to the Operation Manual to set up the control for the system in which the boiler is installed Some common set up tasks include Setting the CH and DHW temperature set points as shipped both setpoints are set to 180 F Selecti...

Page 95: ...95 107110 01 6 16 Lighting and Operating Instructions XI Start Up and Checkout continued ...

Page 96: ...e heating load decreases This boiler is not used for any space heating This boiler is part of a modular or multiple boiler system having a total input of 300 000 BTU hr or greater This boiler is equipped with a tankless coil 4 HeatMatchTM Software When the boiler is installed with a Sage Zone Control Panel Zone Control into a multiple zone home the Control uses a patent pending HeatMatch Software ...

Page 97: ... accepts a call for heat demand from multiple places and responds according to it s Priority When more than 1 demand is present the higher priority demand is used to determine active boiler settings For example when Domestic Hot Water DHW has priority the setpoint DiffAbove Diff Below and pump settings are taken from DHW selections Active Priority isdisplayedonthe Boiler Status screen Priority Sta...

Page 98: ...is cycled off XII Operation continued If the temperature exceeds 210 F 98 9 C a manual reset hard lockout results If the boiler is responding to theinternalMultipleBoilerControlSequencer Header Sensor or an External EMS demand and the supply water temperature increases above 190 F 87 7 C the control begins to reduce the blower maximum speed settingandifthetemperatureincreasesto200 F 93 C a forced ...

Page 99: ...ted in sequential order 1 2 3 until the demand is satisfied When demand is decreasing theboilersarestoppedinreverseorderwith the Lead boiler stopped last 3 2 1 To equalize the run time the sequencer automatically rotates the Lead boiler after 24 hours of run time 4 Improved Availability The following features help improve the heat availability a Backup Header Sensor In the event of a header sensor...

Page 100: ...r is started At this point the Base Load Common Rate is released to allow boilers to modulated as required to meet heat load 11 Advanced Boiler Sequencing After there is a Call For Heat input both header water temperatureandboilerfiringratepercentareusedtostart and stop the networked boilers The control starts and stops boilers when the water temperatureis outside the user selected DiffAbove and D...

Page 101: ...tatus Running burner On circulator s On After flame is proven the sequence continues with run stabilization and low fire hold time Once the field adjustable low fire hold time is completed normal boiler operation begins modulation rate depending on temperature and setpoint selections Priority Domestic Hot Water Status Running If the Central Heat call for heat is active and a Domestic Hot Water DHW...

Page 102: ... previous menu or screen Repeatedly pressing the Close symbol will always return the display to the Home screen Arrow Symbol The Arrow symbol links together all screens in the selected group For example repeated pressing the right Arrow symbol will rotate the display around all the screens in the Status group Using this feature the user can review all the boiler status and adjustment mode screens ...

Page 103: ...eens The user may simply walk though boiler operation by repeatedly selecting the right or left arrow symbol These screens are accessed by selected the Status button from the Home screen Figure 12 6 Status Screens Figure 12 7 Boiler Status Screen Definitions NOTE Only visible if Zone Panel is connected Zone Panel 1 and 2 shown typical for 1 through 4 ...

Page 104: ...tatus of Frost Protection and pump Exercise functions This screen provides the status of the boilers five 5 possible heat demands When demand is off the Control has not detected the call for heat This screen allows the user to determine which demands are present when more than one demand is present Cycles and Hours Boiler cycles and hours are used to monitor the boilers overall compatibility to th...

Page 105: ...xiliary heat may be wired to the Zone Panel or to the boiler s DHW terminal See DHW and Auxiliary Heat Adjust menus for details Similarly DHW demand may also be wired to either the Zone Panel or the boiler s DHW terminal This screen shows the cycles and maximum heat loss for these demands independent to where they are wired 3 Status Screens continued Detail screens are accessed by selecting the De...

Page 106: ...ce Of Operation continued 5 Multiple Boiler Sequencer Screens When the Sequence Master is enabled the following screen is available The Sequencer Status screen is selected by pressing Status button from the Home screen when Sequence Master is enabled ...

Page 107: ... and press the return arrow to close the keypad Press the Save button Press the Adjust button to enter Adjustment mode Figure 12 9 Adjust Mode Screens Login to Access Adjustment Mode For Service Contact CONTRACTOR NAME ADDRESS LINE 1 ADDRESS LINE 2 PHONE NUMBER Contractor Adjust Access Level Installer Adjust Password required to Get past here Installer Password 86 Login Warning Improper settings o...

Page 108: ...ess 0 100 to 100 tenths of degree Outdoor Air Sensor Calibration Outdoor Air Sensor Calibration offset allows a single point calibration Using a reliable source reference for outdoor temperature measure outdoor air temperature Set the offset equal to the difference between the controller reading and the reference The result will be the Control s measurement matching the reference reading Enabled E...

Page 109: ...Rate fan speed setting to limit the boiler output accordingly 100 Minimum to Maximum Heat Rate Domestic Hot Water DHW Max Expected Heat Rate This parameter defines the highest modulation rate the Control will go to during a Domestic Hot Water call for heat If the rated input of the indirect water heater is less than the maximum output of the boiler change the DHW Maximum Expected Heat Rate fan spe...

Page 110: ...RPM 1600 1750 2000 Model K2WTC 120N 46 Maximum Heat Rate RPM 6500 Minimum Heat rate RPM 1600 Model K2WTC 120P 46 Maximum Heat Rate RPM 6900 Minimum Heat rate RPM 1600 Altitude 6 001 7 800 Ft Model K2WT 080N 67 K2WT 100 67 K2WT 120 67 K2WT 150N 67 K2WT 180N 67 Maximum Heat Rate RPM 6500 6900 7100 6800 6750 Minimum Heat rate RPM 1700 1700 1600 1600 1700 Model K2WT 080P 67 K2WTC 120 67 K2WT 150P 67 K...

Page 111: ...the maximum heat rate the Control then measures water temperature and fires the boiler only as hard as required for the heat demand Expected Heat Rate Adjustment Screens HeatMatch Software Example call for heat durations for a four zone house Maximum heat rate limits firing rate and prevents the Control from firing to 100 in response to a smaller zone demands Maximum Heat Rate Automatically adjust...

Page 112: ...Demand Never Any Demand Header Sensor Demand CH Off for DHW Boiler Pump run pump for Activates the boiler pump output according to selected function Never Pump is disabled and not shown on status screen Any Demand Pump Runs during any call for heat Header Sensor Demand Pump Runs when boiler is firing and when there is DHW demand Selected when Header Sensor is selected as modulation sensor and boil...

Page 113: ... Indirect Water Heater Single boiler Indirect Water Heater IWH Piped to Primary Optional Domestic Hot Water Priority Parameter Selections System Pump Central Heat Optional Priority Boiler Pump any demand DHW Pump Primary Loop Piped IWH DHW Priority Enable is optional Explanation This piping arrangement permits the system pump to run or not run when there is a domestic hot water call for heat Domes...

Page 114: ... demand DHW Pump Primary Loop Piped IWH DHW Priority Enable is optional Explanation When call for Domestic Hot Water is received the DHW pump is turned on and the boiler pump is turned on This piping arrangement permits the system pump to run or not run when there is a domestic hot water call for heat Domestic hot water priority is optional It is permissible for the domestic and system pumps to ru...

Page 115: ...ic hot water call for heat Domestic hot water priority is optional It is permissible for the domestic and system pumps to run at the same time The boiler pump must run for every call for heat Example Pump Parameter selections continued Sequencer Master Boiler 1 Boiler 2 Wiring locations Thermostat X DHW call for heat X System pump X DHW pump X Boiler Pump X X Sequencer Master Parameter Selections ...

Page 116: ... Description Contractor Name User defined Contractor Name Address Line 1 User defined Contractor Address Line 1 Address Line 2 User defined Contractor Address Line 2 Phone User defined Contractor Phone Press button to access the following screen The Manual Speed Control speed screen allows the technician to set firing rate at low or high speed for combustion testing ...

Page 117: ...ture controller Proportion Integral Derivative PID values Higher values cause a larger firing rate change for each degree of temperature change If set too high firing rate overshoots required value increases to high fire causing the temperature to exceed the Diff Above setpoint and cycle the boiler unnecessarily Lower values cause a smaller firing rate change for each degree of temperature change ...

Page 118: ...ng the temperature to exceed the Diff Above setpoint and cycle the boiler unnecessarily Lower values cause a smaller firing rate change for each degree of temperature change If set too low the firing rate response will be sluggish and temperature will wander away from setpoint Disable Disable Enable Auxiliary Priority Over Central Heat This parameter allows the Auxiliary Heat demand to be higher o...

Page 119: ...o exceed the Diff Above setpoint and cycle the boiler unnecessarily Lower values cause a smaller firing rate change for each degree of temperature change If set too low the firing rate response will be sluggish and temperature will wander away from setpoint 10 seconds 0 to 300 seconds Low Fire Hold Time Low Fire Hold Time is the number of seconds the control will wait at low fire modulation rate b...

Page 120: ...0 F 21 1 C 32 F to 100 F 0 C to 37 8 C Central Heat High Outdoor Temperature The High Outdoor Temperature parameter is the outdoor temperature at which the Low Boiler Water Temperature is supplied This parameter is typically set to the desired building temperature 110 F 43 3 C 70 F to 190 F 21 1 C to 87 8 C Central Heat Low Boiler Water Temperature The Low Boiler Water Temperature parameter is the...

Page 121: ...o 100 F 40 C to 37 8 C Auxiliary Heat Low Outdoor Temperature The Low Outdoor Temperature parameter is also called Outdoor Design Temperature This parameter is the outdoor temperature used in the heat loss calculation It is typically set to the coldest outdoor temperature 70 F 21 1 C 32 F to 100 F 0 C to 37 8 C Auxiliary Heat High Outdoor Temperature The High Outdoor Temperature parameter is the o...

Page 122: ... Setpoint Heating Element Type 180 F to 190 F 82 2 C to 87 8 C Fan Coil 100 F to 140 F 37 8 C to 60 C In Slab Radiant High Mass Radiant 160 F to 190 F 71 1 C to 87 8 C Convection Baseboard Fin Tube Convective 130 F to 160 F 54 4 C to 71 1 C Staple up Radiant Low Mass Radiant 130 F to 160 F 54 4 C to 71 1 C Radiant Baseboard 140 F to 160 F 60 C to 71 1 C Radiators ...

Page 123: ...pond to rapid load increases 70 50 100 Base Load Common Rate To maximize condensing boiler efficiency the firing rate is limited to an adjustable value Boilers are kept at or below this firing rate as long as the boilers can handle the load After last available boiler has started the modulation rate limit is released up to 100 3 1 5 Response Speed This parameter adjusts the Sequence Master tempera...

Page 124: ...and J10 8 is used as the temperature setpoint The following two parameters may be used to adjust the signal range Modbus Modbus is used as the temperature setpoint 130 F 54 4 C 80 F 26 7 C Central Heat Setpoint Central Heat 4 20mAdc Setup 4 mA Water Temperature Sets the Central Heat Temperature Setpoint corresponding to 4mA for signal input on Control Terminals J8 6 and J10 8 Current below 4mA is ...

Page 125: ...sleeved loose fitting clothing 3 Gloves 4 Eye Protection Take steps to assure adequate ventilation Wash all exposed body areas gently with soap and water after contact Wash work clothes separately from other laundry and rinse washing machine after use to avoid contaminating other clothes Discard used RCF components by sealing in an airtight plastic bag RCF and crystalline silica are not classified...

Page 126: ...vy metals carbon monoxide nitrogen oxides aldehydes and or other toxic or harmful substances which can cause death or serious injury and which are known to the state of California to cause cancer birth defects and other reproductive harm Always use proper safety clothing respirators and equipment when servicing or working nearby the appliance Failure to follow all instructions in the proper order ...

Page 127: ...erify that the gas shutoff shown in Figure 8 1 is closed e Disconnect the flexible gas line at the gas valve flare connection Figure 13 1 f Unplug the electrical connection to the gas valve g Disconnect the air proving switch tube from the gas valve outlet tap h Unplug the power and speed control cables from the blower NOTICE Warranty does not cover boiler damage or malfunction if the following st...

Page 128: ...128 107110 01 6 16 Figure 13 1 Disconnecting Flexible Gas Line Figure 13 2 Flame Ionization Electrode and Ignition Electrode Location XIII Service and Maintenance continued ...

Page 129: ...n the blower gas valve assembly looking for deterioration Replace blower and or gas valve if deterioration is found p Inspect and clean the condensate trap Place a bucket under the condensate cleanout cap on the bottom of the boiler see Figure 2 1 to catch water in the trap as well as the ball and ball support Unscrew the cap being careful not to lose the ball or ball support Flush any debris foun...

Page 130: ...130 107110 01 6 16 XIII Service and Maintenance continued Figure 13 3 Ignition Electrode Gap Figure 13 4 Condensate Trap Exploded Parts View ...

Page 131: ...er water and the use of boiler water additives NOTICE Do not remove return pipe connection from heat exchanger to service the circulator u Test the flow switch To do this Start with the boiler in standby Either close a shut off in the boiler loop or unplug the boiler pump at connector L1 see Figure 10 6 Initiate a call for heat and confirm that the boiler shows an Active Fault indicating that the ...

Page 132: ... Help button flashes and the home screen turns a red color Continue to select flashing buttons to be directed to the Fault cause B Display Faults Indication Condition Possible Cause Display Completely Dark Fan off LWCO lights off no green power light on Control No 120Vac Power at Boiler Check breaker and wiring between breaker panel and boiler Blown high voltage fuse Replacement Fuse Kit part numb...

Page 133: ...d then Disabled Master s Boiler has been powered down To clear fault restore communication or cycle power Boiler Size Setup Boiler Size Fault WARNING Boiler size setting may not match actual boiler size The Boiler size setting determines min max and light off blower speeds Incorrect boiler size can cause hazardous burner conditions and improper operation that may result in PROPERTY LOSS PHYSICAL I...

Page 134: ...lowing messages appear when the firing rate is limited or reduced to help avoid a lockout or save energy Refer to Hard Lockout section for corrective actions High Stack Temperature Limit High Supply Temperature Limit High Differential Temperature Limit The following messages appear as part of normal start and stop sequences Minimum Modulation normal start stop sequence Low Fire Hold Rate Low fire ...

Page 135: ...cked Flue Inlet Switch Special Note Before a call for heat the air pressure switch is closed When there is a call for heat with a blocked vent the air pressure switch will open due to excessive pressure of the blower against a blocked flue pipe after the blower starts The control stops the start sequence and stops the blower After the blower stops the pressure switch re closes and the cycle contin...

Page 136: ...er speed to match purge and light off setpoint Normal waiting for blower speed to match purge and light off setpoint 27 Undefined Fault Undefined Fault Consult Factory 28 or 53 Air Proving Switch Failed to Close Air Proving Switch Failed to Close The air proving switch has failed to close Check switch check switch connection and wiring Blocked vent blocked inlet blocked or disconnected air switch ...

Page 137: ...ged drain line in trap 18 Light off rate proving failed Blower is not running at Light off rate when it should or blower speed signal not being detected by Control Loose connection in 120 VAC blower wiring Loose or miswired blower speed harness Defective blower 19 Purge rate proving failed Blower is not running at Purge rate when it should or blower speed signal not being detected by Control Loose...

Page 138: ...h your local U S Boiler Wholesale distributor Should you require assistance in locating a U S Boiler distributor in your area or have questions regarding the availability of U S Boiler products or repair parts please contact U S Boiler Customer Service at 717 481 8400 or Fax 717 481 8408 ...

Page 139: ...epair Kit 105879 01 11A 11B 11C Flame Rod Repair Kit includes flame rod gasket and hardware 105880 01 12A 12B 11C Ignition Electrode Repair Kit includes electrode gasket and hardware 105881 01 13 M6 Serrated Flange Hex Burner Door Nut 101724 01 4 14 15 O Ring Repair Kit includes 2 22 mm x 2 mm O rings and 2 connection clips 105888 01 16 17 18 Repair Return Piping Assembly Kit includes return pipin...

Page 140: ...140 107110 01 6 16 XV Repair Parts continued ...

Page 141: ...epair Kit 106029 01 30 31 34 CSST Gas Line Assembly Repair Kit includes gas line assembly and gasket 106032 01 32 Air Proving Pressure Switch Repair Kit 105849 01 33 Silicone Tubing Repair Kit 105855 01 35 Gas Valve Flange Repair Kit 105831 01 37 38 39 40 Gas Valve Repair Kit includes gas valve gas orifice rubber coupling rectifier module and hardware 107174 01 40 Rectifier Module E Box 1 105828 0...

Page 142: ...142 107110 01 6 16 XV Repair Parts continued ...

Page 143: ... Gasket 104692 01 32 Air Proving Pressure Switch Repair Kit 105849 01 33 Silicone Tubing Repair Kit 105855 01 35 Gas Valve Flange Repair Kit 105831 01 38 39 43 Gas Valve Repair Kit includes gas valve gas orifice o ring gasket and hardware 107175 01 40 41 Gas Valve Harness Repair Kit 105830 01 38 39 42 43 44 Blower Inlet Shroud Assembly Kit includes shroud parts swirlplate gas orifice o ring and ha...

Page 144: ...pair Kit includes gasket bracket and trap ball 105851 01 53A Ball for Condensate Trap Repair Kit 105850 01 55 56 Vent Fitting Repair Kit includes hardware 105859 01 54 57 59 Silicone Tubing Repair Kit includes 3 16 and 3 4 tubing and spring clamp 105855 01 58 Sump Pressure Switch Repair Kit 105857 01 XV Repair Parts continued ...

Page 145: ... S Boiler Company 66 Gasket Long Vestibule Frame Control Panel 67 68 69 73 Repair Low Voltage Printed Circuit Board PCB Kit includes Low Voltage PCB and hardware 105853 01 67 70 71 72 73 Repair High Voltage Printed Circuit Board PCB Kit includes Line Voltage PCB insulator gasket and hardware 105852 01 74 8 18 x 1 2 Screw 105368 01 not shown HV LV Fuse Kit 105856 01 ...

Page 146: ...146 107110 01 6 16 XV Repair Parts continued ...

Page 147: ... 01 76 Sage 2 Boiler Control Repair Kit 107093 01 77 Thumb Screw w Clip Repair Kit includes 2 8 32 x 13 32 screws and 2 retaining clips 106033 01 78 Gasket Wire Partition 104690 01 4 79 8 18 x 1 2 Self Tapping Screw 105368 01 8 80 Programmable Display GT02L Repair Kit 107019 01 81 8 18 x 1 2 Self Tapping Screw 105368 01 6 82 Control Panel Gasket 105109 01 4 ...

Page 148: ...148 107110 01 6 16 XV Repair Parts continued ...

Page 149: ...dapter Kit includes vent adapter and vent adapter gasket 105858 01 96 8 18 x 1 2 Screw 80860716 3 97 Control Hinge Bracket 104681 01 2 98 Hinge Pin 105104 01 2 99 Left Side Panel 105068 01 105068 02 100 101 Access Panel Assembly 105072 01 102 Right Side Panel 105069 01 105069 02 103 Vestibule Frame 105093 01 104 Wiring Enclosure Cover 104679 01 105 Control Panel 104680 01 106 Display Mounting Brac...

Page 150: ... 3 4 NPT Boiler Drain Valve 806603061 118 1 NPT x 2 Nipple 806600004 119 1 NPT Tee with Side Outlet 105298 01 120 1 x 1 4 NPT Hex Reducing Bushing 806600529 121 Temperature Pressure Gauge Repair Kit 105894 01 122 1 x 3 4 NPT Hex Reducing Bushing 806600501 2 123 3 4 NPT X 4 Nipple 806600014 124 3 4 NPT 90 Elbow 806601502 125 3 4 NPT X 30 Nipple 105297 01 126 30 psi Relief Valve 81660319 ...

Page 151: ...n Part Number Qty K2WT 080 K2WT 100 K2WT 120 K2WT 150 K2WT 180 130 3 Stainless Steel Rodent Screen 102191 01 2 131 3 X 30 Schedule 40 CPVC Pipe 102193 01 132 3 Schedule 80 CPVC 90 Elbow 102192 01 133 3 PVC Coupling 105292 01 134 3 PVC Long Sweep 90 Elbow 105293 01 ...

Page 152: ...140 Low Voltage Communication Harness Repair Kit 105869 01 141 High Voltage Harness Repair Kit 105868 01 142 143 145 Repair Kit Trap Flame Trap Ground Circulator Pigtail includes wire harnesses 105870 01 144 Ignition Cable Harness Repair Kit 105907 01 not shown LWCO Jumper Repair Kit 105908 01 not shown Outdoor Temperature Sensor not shown 102946 01 ...

Page 153: ...uel mixture without a proper combustion analyzer could result in unreliable boiler operation personal injury or death due to carbon monoxide poisoning WARNING This conversion kit shall be installed by a qualified service agency in accordance with the manufacturer s instructions and all applicable codes and requirements of the authority having jurisdiction If the information in these instructions i...

Page 154: ...lly Closed K2WT 080 3 3 4 K2WT 100 3 K2WT 120 4 K2WT 150 2 3 4 K2WT 180 6 1 2 FIGURE A 1a GAS VALVE DETAIL 80MBH thru 120MBH FIGURE A 1b GAS VALVE DETAIL 150MBH 180MBH Table A 2 Starting Number of Throttle Turns for Conversion to LP Gas Appendix A continued ...

Page 155: ...er both on and off 9 A sheet of yellow labels is provided in the envelope with this manual for boilers converted from natural to LP gas Select the model from this sheet of labels and apply them as follows Apply the Rating Plate Label adjacent to the rating plate Apply the Gas Valve Label to a conspicuous area on the gas valve Apply the Boiler Conversion Label to a conspicuous surface on or adjacen...

Page 156: ...for actual boiler size 2 Confirm installation altitude 3 Power up the boiler The display will show the Home screen 4 Press Adjust button on the Home screen 5 Press Adjust button on the Adjust Mode screen 6 Press Login button to access Password screen 7 Press 5 digit display to open a keypad Enter the password 86 and press the return arrow to close keypad Press Save button 8 Press Adjust button to ...

Page 157: ...eration check CO2 and CO Air Free and ensure it is within the limits outlined in Table B1 of this Supplement Air Free Carbon Monoxide in Flue Gas must be less than 200 ppm during all operation If CO Air Free and CO2 is within these limits move to Step 6 and check fan speed at high fire operation only 5 If CO2 is outside the window outlined in Table B1 of this Supplement adjust throttle screw such ...

Page 158: ...8 8 9 3 8 8 9 3 8 8 9 3 0 0 0 6 LP 9 9 10 2 9 9 10 2 9 5 9 8 0 0 5 0 6 K2WT 150 NG 8 6 9 3 8 6 9 3 8 6 9 3 0 0 4 1 0 LP 9 8 10 3 9 8 10 3 9 8 10 1 0 3 1 2 1 4 K2WT 180 NG 8 5 9 1 8 5 9 1 8 5 9 1 2 0 1 9 1 7 LP 9 9 10 3 9 9 10 2 No application 2 5 2 4 No application NOTE THESE DE RATES ARE AT MINIMUM VENT LENGTH Max Vent Length 135 eq feet 3 inch Intake Vent Pipe Table B1 K2WT Altitude Adjustments ...

Page 159: ...a period of thirty 30 days to comply with the above requirements provided however that during said thirty 30 day period a battery operated carbon monoxide detector with an alarm shall be installed 2 APPROVED CARBON MONOXIDE DETECTORS Each carbon monoxide detector as required in accordance with the above provisions shall comply with NFPA 720 and be ANSI UL 2034 listed and IAS certified 3 SIGNAGE A ...

Page 160: ...irements shall be satisfied by the manufacturer 1 The referenced special venting system instructions shall be included with the appliance or equipment installation instructions and 2 The special venting systems shall be Product Approved by the Board and the instructions for that system shall include a parts list and detailed installation instructions e A copy of all installation instructions for a...

Page 161: ...161 107110 01 6 16 ...

Page 162: ...162 107110 01 6 16 ...

Page 163: ...163 107110 01 6 16 ...

Page 164: ...164 107110 01 6 16 U S Boiler Company Inc P O Box 3020 Lancaster PA 17604 1 888 432 8887 www usboiler net ...

Reviews: