background image

D • GR • NL • F • GB

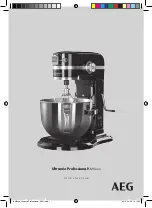
Ultramix Professional 

KM6xxx

KM6xxx_Ultramix Professional_AEG.indd   1

2016-04-06   15:14:06

Summary of Contents for ULTRAMIX PRO KM6100

Page 1: ...D GR NL F GB Ultramix Professional KM6xxx KM6xxx_Ultramix Professional_AEG indd 1 2016 04 06 15 14 06 ...

Page 2: ...de sécurité en page 7 NL Gebruiksaanwijzing 3 22 Lees het veiligheidsadvies op pagina 6 voordat u het apparaat voor het eerst gebruikt GR Εγχειρίδιο Οδηγιών 3 22 Πριν χρησιμοποιήσετε τη συσκευή για πρώτη φορά διαβάστε τις υπο δείξεις ασφαλείας στη σελίδα 5 D Anleitung 3 22 Vor der ersten Inbetriebnahme des Geräts lesen Sie bitte die Sicherheitshinweise auf Seite 4 KM6xxx_Ultramix Professional_AEG ...

Page 3: ...otjes O Stroomkabel P Garde voor slagroom en eiwit Q Metalen platte klopper voor het mengen van cakebeslag koek en taartdeeg R Deeghaak voor het kneden van deeg S Vleesmolen T Snijder Versnipperaar A Κεφαλή μοτέρ B Επιλογέας ταχύτητας C Παλμική λειτουργία D Περίβλημα E Οθόνη LCD λειτουργία Χρονοδιακόπτη F Φωτισμός εργασίας G Λαβή ανύψωσης μπολ H Κάλυμμα εξαρτημάτων I Υποδοχή εξαρτημάτων J Άξονας ε...

Page 4: ...rf nicht mit einer heißen Fläche einschließlich Ofen in Kontakt kommen Verwenden Sie keine Ersatzteile oder Zubehörteile von anderen Herstellern die nicht von Electrolux empfohlen werden Diese können eineVerletzungsgefahr für die Benutzer darstellen und zum Erlöschen der Garantie führen Vergewissern Sie sich vor dem Auseinanderbauen und der Reinigung dass der Motor zum Stillstand gekommen ist Verm...

Page 5: ...αφήνετε το καλώδιο να έρχεται σε επαφή με ζεστές επιφάνειες συμπεριλαμβανομένης της μονάδας εστιών μαγειρέματος Μηχρησιμοποιείτεεξαρτήματαήαξεσουάραπόάλλουςκατασκευαστέςπουδενσυνιστώνταιαπότην Electrolux Υπάρχεικίνδυνοςτραυματισμούγιατονχρήστηκαιενδέχεταιναακυρωθείηεγγύηση Βεβαιωθείτε ότι το μοτέρ έχει σταματήσει τελείως πριν την αποσυναρμολόγηση και τον καθαρισμό Αποφεύγετε την επαφή με κινούμενα...

Page 6: ... in contact komt met een heet oppervlak inclusief het fornuis Gebruik nooit accessoires of onderdelen van andere fabrikanten die niet door Electrolux worden aanbevolen Dit brengt het risico van letsel voor de gebruiker met zich mee en het kan het vervallen van de garantie tot gevolg hebben Controleer of de motor volledig is gestopt voordat u het apparaat demonteert en reinigt Vermijd contact met b...

Page 7: ...cordond alimentationdépasserduborddelatableouducomptoir Nelemettez pasencontactavecunesurfacechaude notammentsurunecuisinière N utilisezpasdepiècesnid accessoiresprovenantd autresfabricantsquinesontpasrecommandéspar Electrolux Ilsreprésententunrisquedeblessureetpeuvententraîneruneannulationdelagarantie Assurez vousquelemoteurestcomplètementarrêtéavantdedémonteretdenettoyerlespiècesde l appareil Év...

Page 8: ...ό σαπουνόνερο Το μπολ ο επίπεδος αναδευτήρας και ο γάντζος ζύμης μπορούν να πλυθούν σε πλυντήριο πιάτων Περιλαμβάνονται σε συγκεκριμένα μοντέλα Vor der ersten Inbetriebnahme 1 Avant d utiliser votre appareil retirez tous les emballages plastiques étiquettes ou autocollants susceptibles de se trouver sur la base moteur les bols ou les accessoires Avertissement Ne plongez jamais le bloc moteur la pr...

Page 9: ...φριά γωνία στους πείρους που είναι πάνω στους βραχίονες στήριξης μπολ Erste Schritte 3 Inclinez légèrement le bol pour le placer sur les picots situés au bout des bras de soutien du bol 2 Abaissez le bras de soutien du bol Tournez le levier de levage du bol vers la droite jusqu à ce que les bras de soutien du bol soient dans la bonne position Avertissement Garder les doigts et les mains hors de po...

Page 10: ...links tot de draagarm op zijn plaats klikt 4 Πιέστε με δύναμη προς τα κάτω το πίσω μέρος του μπολ μέχρι να ασφαλίσει στη θέση του Προειδοποίηση Μη χρησιμοποιείτε ποτέ τη συσκευή με το συρμάτινο αναδευτήρα επίπεδο αναδευτήρα ή το γάντζο ζύμης χωρίς το μπολ στη θέση του Ξεκινώντας 5 Τοποθετήστε ένα εξάρτημα στον άξονα εξαρτημάτων Ευθυγραμμίστε την υποδοχή στο πάνω μέρος του εξαρτήματος με τον πείρο ...

Page 11: ...λ πάνω στο μπολ Πιέστε προσεκτικά το κάλυμμα προς τα κάτω μέχρι να ασφαλίσει στη θέση του Για να προσθέσετε υλικά χρησιμοποιήστε μόνο την οπή στο κάλυμμα του μπολ Περιλαμβάνονται σε συγκεκριμένα μοντέλα 8 Μετακινήστε τον επιλογέα ταχύτητας από τη θέση OFF στην επιθυμητή ταχύτητα 1 P 10 Όταν η ανάμιξη έχει ολοκληρωθεί στρέψτε τον επιλογέα ταχύτητας στη θέση OFF και αποσυνδέστε τη συσκευή από την πρ...

Page 12: ...nelheidsknop naar de gewenste snelheid en druk op de knop Άλλες λειτουργίες 1 Παλμική λειτουργία Αν η συσκευή τεθεί στην ταχύτητα 1 P μπορείτε να σταματήσετε τη συσκευή προσωρινά πιέζοντας το κουμπί ΠΑΛΜΙΚΗ στον επιλογέα ταχύτητας Αν το πιέσετε πάλι η συσκευή θα ξεκινήσει για 1 5 δευτερόλεπτα Αν το πιέσετε παρατεταμένα η συσκευή θα λειτουργεί για όσο διάστημα κρατάτε το κουμπί πατημένο 2 Μπορείτε ...

Page 13: ...ld 4 Η συσκευή ξεκινά και μετρά αντίστροφα τον χρόνο που έχει παρέλθει Μπορείτε να διακόψετε την εργασία πιέζοντας το κουμπί και να συνεχίσετε πιέζοντάς το πάλι Αν δεν επιλεγεί χρόνος η οθόνη θα λειτουργεί σαν μετρητής όταν η συσκευή είναι ενεργοποιημένη 6 Σημείωση Αν ο επιλογέας ταχύτητας είναι ήδη ενεργοποιημένος προτού η συσκευή συνδεθεί η μπλε λυχνία LED του επιλογέα ταχύτητας και ο φωτισμός ε...

Page 14: ... www electrolux com pour en savoir plus 7 Zubehörvorrichtung Das Gerät wird mit einer integrierten Zubehörvorrichtung geliefert Lesen und beachten Sie stets die den Zubehörteilen beigefügten Anleitungen zur korrekten und sicheren Nutzung Weitere Informationen erhalten Sie unter www electrolux com 8 Einstellen der Zubehörwelle Das Gerät ist ab Werk so eingestellt dass das Zubehörteil den Boden der ...

Page 15: ...bol la feuille et le crochet à pâte peuvent être lavés au lave vaisselle selon le modèle 1 Schalten Sie das Gerät aus ziehen Sie den Stecker aus der Steckdose und warten Sie bis die Einsätze zum Stillstand gekommen sind Warnung Tauchen Sie niemals das Gehäuse den Netzstecker oder das Netzkabel in Wasser oder andere Flüssigkeiten 3 Das Gehäuse sollte nur mit einem weichen feuchten Tuch gereinigt un...

Page 16: ...sel geben und vermischen bis ein glatter Teig entsteht Knetfunktion Mengen und Verarbeitungsdauer Rezept Zutaten Menge Einheit Zeit Geschwindigkeit Brot Hefeteig Min Menge Mehl 252 g Min 120 s Niedrige Stufe Einstellung 1 3 Wasser 240 g Zucker 2 TL Margarine 1 EL Salz 1 TL Trockenhefe 2 TL Zubereitung Alle Zutaten in die Schüssel geben und kneten bis sie gewünschte Konsistenz erreicht ist Hefeteig...

Page 17: ...Rührvor gangs den Boden der Edelstahlschüssel Die Höhe der Rührerwelle ist falsch einges tellt Passen Sie die Höhe der Rührerwelle an Arbeitslicht und Betrieb sanzeige blinken Der Geschwindigkeitsregler wurde nicht ausgeschaltet Drehen Sie den Geschwindigkeitsregler auf die Position Verriegeln Rezepte Knetfunktion Mengen und Verarbeitungsdauer Rezept Zutaten Menge Einheit Zeit Geschwindigkeit Weic...

Page 18: ...άχαρη 36 g Φρέσκο αβγό 200 g Μπέικιν πάουντερ 1 κ γ Εκτέλεση Τοποθετήστε όλα τα υλικά στο μπολ και ανακατέψτε τα μέχρι να είναι έτοιμα Ποσότητες και χρόνοι επεξεργασίας λειτουργίας άγκιστρων Συνταγή Υλικά Ποσότητα Χρόνος Ταχύτητα Ψωμί ζύμη μαγιάς Ελάχ ποσότητα αλεύρι 252 g Τουλάχιστον 120 δ Χαμηλή ρύθμιση ρύθμιση 1 3 νερό 240 g Ζάχαρη 2 κ γ Μαργαρίνη 1 κ σ Αλάτι 1 κ γ Ξηρή μαγιά 2 κ γ Εκτέλεση Τοπ...

Page 19: ...ι το μπολ από ανοξείδωτο ατσάλι κατά τη λειτουργία Το ύψος του άξονα εξαρτημάτων δεν είναι σωστό Ρυθμίστε το ύψος του άξονα εξαρτημάτων Ο φωτισμός εργασίας και η ενδεικτική λυχνία λειτουργίας αναβοσβήνουν Ο επιλογέας ταχύτητας έχει μείνει στη θέση ενεργοποίησης Στρέψτε τον επιλογέα ταχύτητας στη θέση OFF Συνταγές Ποσότητες και χρόνοι επεξεργασίας λειτουργίας άγκιστρων Συνταγή Υλικά Ποσότητα Χρόνος...

Page 20: ...ethode Doe alle ingrediënten in de kom en meng ze tot het klaar is Deeghaken hoeveelheden en verwerkingstijden Recept Ingrediënten Hoeveelheid Eenheid Tijd Snelheid Brood gistdeeg min hoeveelheid Bloem 252 g Ten minste 120 sec Lage stand stand 1 3 Water 240 g Suiker 2 tl Margarine 1 el Zout 1 tl Droge gist 2 tl Methode Doe alle ingrediënten in de kom en kneed tot u tevreden bent Gistdeeg Pizzadeeg...

Page 21: ...deeg en verwerk het in twee delen Het opzetstuk schraapt langs de roestvrij stalen kom tijdens gebruik De hoogte van de bevestigingsschacht is niet goed Stel de hoogte van de bevestigingsschacht in De werkverlichting en het stroomlampje knipperen De snelheidsknop staat nog aan Draai de snelheidsknop op OFF Recepten Deeghaken hoeveelheden en verwerkingstijden Recept Ingrediënten Hoeveelheid Eenheid...

Page 22: ...ts dans le bol et mélangez les jusqu à ce la pâte soit prête Quantités à pétrir et durées de pétrissage Recette Ingrédients Quantité Unité Durée Vitesse Pain pâte levée quantités mini males farine 252 g Au moins 120 s Réglage bas position 1 2 eau 240 g Sucre 2 c à café Margarine 1 c à soupe Sel 1 c à café Levure sèche 2 c à café Préparation Placez tous les ingrédients dans le bol et pétrissez jusq...

Page 23: ...a hauteur de l arbre à la tige de fixa tion des accessoires Le voyant de fonctionne ment et la LED du sélect eur de vitesse clignotent Le sélecteur est resté sur une vitesse Mettre le sélecteur de vitesse sur OFF Recettes Quantités à pétrir et durées de pétrissage Recette Ingrédients Quantité Unité Durée Vitesse Pâte molle de farine 2 0 kg 180 240 s Réglage bas vitesse 1 pendant 30 secondes vitess...

Page 24: ... Zij kunnen dit product op mi lieuvriendelijke manier laten recyclen Απόρριψη Ανακυκλώστε τα υλικά που φέρουν το σύμβολο Τοποθετήστε τα υλικά συσκευασίας σε κατάλληλα δοχεία για ανακύκλωση Συμβάλλετε στην προστασία του περιβάλλοντος και της ανθρώπινης υγείας ανακυκλώνοντας τις άχρηστες ηλεκτρικές και ηλεκτρονικές συσκευές GR Αυτή η σήμανση υποδεικνύει ότι το προϊόν δεν πρέπει να απορρίπτεται μαζί ...

Page 25: ...achment cover I Attachment hub J Tool shaft K Bowl cover L Stainless steel bowl M Bowl support arm N Non slip feet O Power cord P Wire whisk for whipping cream and whisking egg whites Q Metal flat beater for blending cake sponges cookie dough and pie crusts R Dough Hook for kneading yeast doughs S Meat grinder T Slicer Shredder GB Components KM6xxx_Ultramix Professional_AEG indd 25 2016 04 06 15 1...

Page 26: ...e of table or counter do not let cord contact hot surface including the stove Do not use parts or accessories made by other manufacturers that are not recommended by Electrolux There could be a risk of injury to users and may result in the void of warranty Make sure the motor has completely stopped before disassembling and cleaning Avoid contact with moving parts Keep long hair scarfs or similar a...

Page 27: ...hat move in use 2 The Wire whip Meat grinder and Slicer Shredder should only be washed by hand in warm soapy water The bowl Flat beater and Dough hook are dishwasher proof depending on model 3 Position the bowl using a slight angle onto the pins placed on the bowl support arms 2 Move the bowl support arm down Turn the bowl lift handle clockwise until the bowl support arms are in position Warning K...

Page 28: ...ppliance with the attachments wire whip flat beater or dough hook unless the bowl is in place 7 Place the bowl cover on the bowl Gently push the cover down until it locks into place Only add ingredients using the pouring hole on the bowl cover Included in specific models 8 Move the Speed selector from OFF to desired speed 1 P 10 Once mixing is complete turn the Speed selector to OFF and unplug the...

Page 29: ...n the LCD 03 00 6 Note If the Speed selector is already turned on before the appliance is plugged in both the blue Speed selector LED light and the Work light will flash OFF and ON to let you know the Speed selector has been left on Turn the Speed selector to OFF and the lights will stop flashing Then resume operating normally 5 Work light and Power indicator light If the appliance is plugged in a...

Page 30: ... and unplug the appliance Move the bowl support arms down Use a slotted point Head screwdriver to adjust the screw Turn counter clockwise to raise the Attachment shaft turn clockwise to lower it If wrongly adjusted you may not be able to lock the bowl when lifted 1 Switch the appliance off remove the plug from the wall socket and wait until the tools have stopped completely Warning Never immerse t...

Page 31: ...31 D GR NL F GB KM6xxx_Ultramix Professional_AEG indd 31 2016 04 06 15 14 20 ...

Page 32: ... 200 g Baking powder 1 tsp Method Place all ingredients in the bowl and mix them till it is ready Hooks function quantities and Processing Times Recipe Ingredients Quantity Unit Time Speed Yeast dough bread min Quantities flour 252 g At least 120 s Low setting 1 3 setting water 240 g Sugar 2 tsp Margarine 1 tbs Salt 1 tsp Dry Yeast 2 tsp Method Place all the ingredients into the bowl and knead unt...

Page 33: ...on The rubber feet are wet Make sure the rubber feet at the bottom of the unit are clean and dry Too high setting on the speed selector Lower the speed setting It is normal for heavy loads e g heavy dough cheese Remove half and process in two batches The attachment scrapes the Stainless steel bowl during operation The height of the attachment shaft is incor rect Adjust the height of the attachment...

Page 34: ...34 KM6xxx_Ultramix Professional_AEG indd 34 2016 04 06 15 14 20 ...

Page 35: ...35 KM6xxx_Ultramix Professional_AEG indd 35 2016 04 06 15 14 20 ...

Page 36: ...3483 A KM6xxx 02 01 0316 Printed on recycled paper www aeg home com Electrolux Hausgerate GmbH Further Strasse 246 D 90429 Nurnberg Germany KM6xxx_Ultramix Professional_AEG indd 36 2016 04 06 15 14 20 ...

Reviews: