AEG DBS2300, Instruction Book
The AEG DBS2300 Instruction Book is a comprehensive manual that provides detailed guidance on the usage and maintenance of your AEG DBS2300 product. This user-friendly manual can be easily downloaded for free from manualshive.com, ensuring you have all the necessary information at your fingertips.
Share
Download


Reviews:
No comments
Related manuals for DBS2300

PV1000
Brand: UFESA Pages: 44
SC-HS60001
Brand: Scarlett Pages: 13

PSI70
Brand: Pineware Pages: 9

ST393E
Brand: BaByliss Pages: 3

Nano Titanium MiraCurl BABNTMC1C
Brand: BaByliss Pages: 9

IronMaid
Brand: NIMO Pages: 8

OptiStyle SI 3120
Brand: Braun Pages: 51

TexStyle 7 710
Brand: Braun Pages: 79

TexStyle 5 Series
Brand: Braun Pages: 80
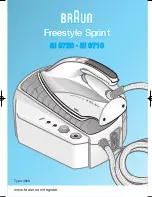
Freestyle Sprint SI 9710
Brand: Braun Pages: 73

118530014
Brand: Melchioni Pages: 32

GC2140 Series
Brand: Philips Pages: 7

HP8324
Brand: Philips Pages: 7

PRO 230 NANO 0460
Brand: SEVERIN Pages: 1

HC 6815
Brand: SEVERIN Pages: 4

BAB2197U
Brand: BaBylissPro Pages: 8

Instruction manual
Brand: Eurotops Pages: 52

BAB2264DA
Brand: BaByliss PRO Pages: 4


