Acer P7290, User Manual
The Acer P7290 offers exceptional performance and versatility for your multimedia presentations. With its high-resolution display and advanced features, this projector is the perfect choice for professionals. Ensure a hassle-free setup with the included Quick Start Manual, available to download for free from manualshive.com. Get the most out of your Acer P7290 with our comprehensive user manual.
Share
Download


Reviews:
No comments
Related manuals for P7290

NVP-2002
Brand: Naxa Pages: 20

MD2-RCA
Brand: Panamax Pages: 2

MERCURY 5000gv
Brand: Digital Projection Pages: 110

HD8000-LV
Brand: Optoma Pages: 50

DataPro-TAE/NFN-aP
Brand: Nivus Pages: 2

LC-XS25A
Brand: Eiki Pages: 81

8932WB
Brand: Dukane Pages: 24

CD-725c
Brand: BOXLIGHT Pages: 33

iSow 1000
Brand: Kodak Pages: 24

TR5451
Brand: GE Pages: 4

33666
Brand: GE Pages: 2

62690
Brand: GE Pages: 2

ELAC PR71-S
Brand: Protek Pages: 4

DLA-RS15U - Reference Series Home Cinema Projector
Brand: JVC Pages: 18

DLA-VS2000
Brand: JVC Pages: 47

DLA-X3
Brand: JVC Pages: 8

DLA-X35
Brand: JVC Pages: 12
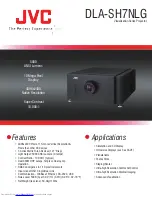
DLA-SH7NLG
Brand: JVC Pages: 2


