background image

INSTRUCTION MANUAL 

For Model AI-IAQ-SP-IoT 


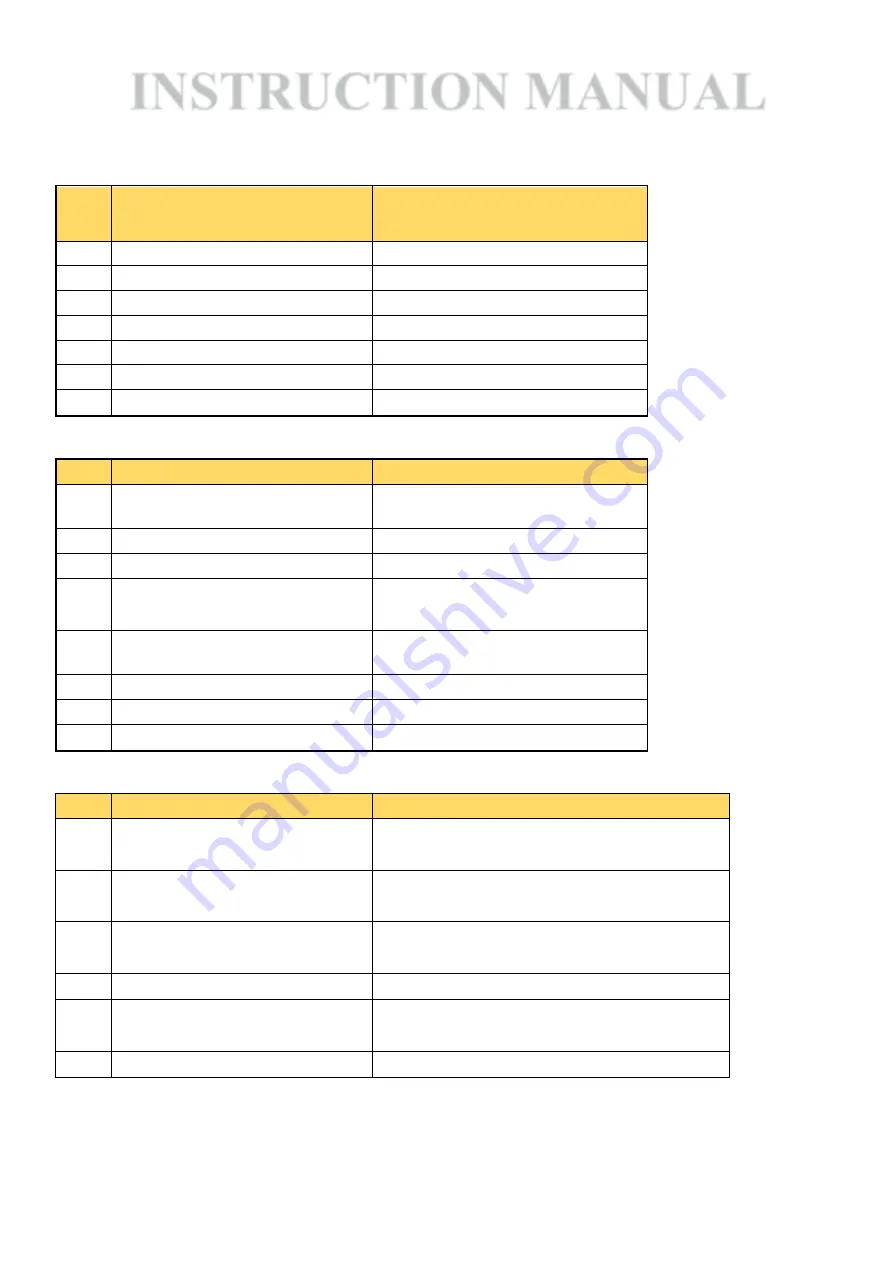
Table 1 – Basic hardware inputs 

Sl.No  Input/Points 

Placement in Instrument 

1  Temperature & Humidity Sensor   Top Panel 
2  CO2 Sensor  

Top Panel 

3  GSM Antenna  

Top Panel 

4  USB Flash Drive Input  

Side Panel 

5  On/Off Power Switch 

Side Panel 

6  SIM Slot 

Side Panel 

7  Charging Point 

Side Panel 


Table 2 – Display Indication in Device Screen 

Sl.No  Display in Screen 

Format 

1  Antenna Signal 

5 Signal Bar (when connected to 

power) 

2  Date  

DD/MM/YY 

3  Time  

HH:MM 

4  Battery Bar Indicator 

4 Bars [4 Bars- Full Battery, 1 Bar 

blinking - Low Battery] 

5  Power Indicator 

Indicates as 'P' (when connected to 

power) 

6  Temperature Indicator 

Indicates in Degree Celsius 

7  Humidity Indicator 

Indicates in RH [Relative Humidity] 

8  CO2 Indicator 

Indicates in PPM [parts per million] 


Table 3 – Basic operations of Front keys 

Sl.No  Button 

Function 

 1  Enter 

1) Enter in Admin Setting Screen 
2) Saving Value 

 2  Up 

1) Moving Up in Menu Items 

2) Changing values/digits 

 3  Right 

1) Moving Down in Menu Items 

2) Moving to next value 

 4  Exit 

Exit the Admin Setting Screen 

 5  REC 

Records the current values displayed in screen 

[Location, Date, Time, Temp, RH, CO2 

 6  SEND 

Sends the recorded values to Server 


Page 1 


Summary of Contents for AI-IAQ-SP-IoT

Page 1: ...ry Bar Indicator 4 Bars 4 Bars Full Battery 1 Bar blinking Low Battery 5 Power Indicator Indicates as P when connected to power 6 Temperature Indicator Indicates in Degree Celsius 7 Humidity Indicator Indicates in RH Relative Humidity 8 CO2 Indicator Indicates in PPM parts per million Table 3 Basic operations of Front keys Sl No Button Function 1 Enter 1 Enter in Admin Setting Screen 2 Saving Valu...

Page 2: ...umber 4 SET CO2 OFFSET To set the offset for CO2 Sensor To be used only under senior technician s presence 5 POWER SAVE TIME Time out for Backlit to save power while in battery 6 VIEW RECORDS To view the recorded data present in Device memory 7 DELETE RECORDS To delete all the records in the device memory Separate Password protection 8 EXIT Exit the Admin Setting screen Instructions For Recording ...

Page 3: ...e Instructions For posting Data to Server 1 Ensure sufficient Internet data balance is available in the SIM card before using the Instrument 2 Insert GSM sim card in the SIM slot make sure the SIM is of standard size i e 15 X 25 mm Ensure SIM s corner cut is facing the charger slot Refer Pg 6 for inserting 3 Plug the charging cable to device and check if network signal is displayed in the Instrume...

Page 4: ...s is strictly recommended for avoiding any damage to battery 2 Charge only if the battery shows 1 blinking bar or if the Instrument is not switching ON RFID Care 1 Do not expose RFIDs in higher temperature than 50 Deg C 2 Do not bend the RFID tags Basic Troubleshooting 1 Sensor not responding Blow air gently in both the sensors placed at the top of Instrument and check if values are changing 2 Net...

Page 5: ...Sagar Sharma Technical Head 9989190588 sagar instrukart com within 6 hours 3 L3 Chetan Sachdeva Managing Partner 9394030848 chetan instrukart com within 12 hours Return Address of Instrument In case of any repair Re calibration after 12 months INSTRUKART HOLDINGS Plot no 18 Road no 1 A Czech colony Near Reliance Fresh Sanath Nagar Hyderabad 500018 Phone 040 40262020 7331110506 Note Please mention ...

Page 6: ...comprehensive Instruction Manual video please follow https www youtube com watch v L1JfFXBZV2g CO2 Sensor Temp Humidity Sensor Power Slider Charging In SIM Slot Enter Up Right Exit REC SEND USB Out Antenna Insert this way ...

Reviews: