Accu-Scope EXC-100 Series, Manual
The Accu-Scope EXC-100 Series offers high-quality microscopes with advanced features for professional use. Enhance your microscopy experience with our user-friendly manual, available for free download at manualshive.com. Learn more about your microscope and maximize its capabilities with this comprehensive guide.
Share
Download


Reviews:
No comments
Related manuals for EXC-100 Series

U-UVF248A
Brand: Olympus Pages: 20

CMP-USBMICRO10
Brand: König Electronic Pages: 30

SZM Series
Brand: OPTIKA MICROSCOPES Pages: 36

MI-BGU-LED IX50
Brand: MshOt Pages: 8

Digital Viewer DA-70351
Brand: Digitus Pages: 22

Eclipse TE200
Brand: Nikon Pages: 54

SE300 Series
Brand: AmScope Pages: 19

150 Series
Brand: AmScope Pages: 17

B270
Brand: AmScope Pages: 20

TDK11
Brand: Discovery Telecom Pages: 4

FHD PRESTIGE
Brand: tagarno Pages: 26

Axiolab Pol
Brand: Zeiss Pages: 116

Axiocam MR
Brand: Zeiss Pages: 68

BIMC-12A
Brand: JC LAB Pages: 79
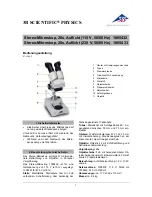
1005432
Brand: 3B SCIENTIFIC PHYSICS Pages: 12

MM-200 MicroMax LED
Brand: Carson Pages: 1

EASYGET
Brand: µ-Dimension Pages: 30

S7001B
Brand: Fisher Science Education Pages: 40


