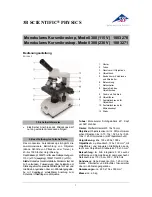
background image

Microscope

Instruction Manual

Summary of Contents for S7001B

Page 1: ...Microscope Instruction Manual...

Page 2: ...nses The image produced by the compound microscope is upside down and reversed Compounds are used for viewing standard 1 by 3 1mm thick transparent specimen slides with cover slips Prepared specimen s...

Page 3: ...C Instructions 21 Model S71003D S71003E S71003F S71003G S71003H and S71003J Instructions 22 General Instructions for Stereo Microscopes 23 25 Model S71004 and S71004A Instructions 26 Model S71005 S710...

Page 4: ...Disc located below stage with holes of various apertures designed to help achieve optimum resolution of the objective lens Larger apertures used for higher magnifications and smaller apertures used f...

Page 5: ...st to the object being viewed forms first image of the specimen OIL IMMERSION LENS High power 100x objective lens which requires a medium of immersion oil between the lens and the slide RESOLVING POWE...

Page 6: ...cleaning will be submitted for cleaning III MECHANICAL MAINTENANCE A Rack Stop compound microscopes only Rack stop screw has been pre adjusted at the factory and should not require re adjustment Howev...

Page 7: ...and replace locking screw C Replacing Incandescent Lamps on Middle High School Models S71001 and S71001A a Make sure that the illuminator field lens housing and lamp are cool before attempting to remo...

Page 8: ...3B S71003C S71003D S71003E S71003F S71003G S71003H S71003J S71012 and S71012A a Carefully lay instrument on its side taking care to avoid damage to specimen slide holder located on top of mechanical s...

Page 9: ...l it slips into position d Replace stage plate and secure with locking setscrew M Replacing the Incidental Top Illuminator Halogen Bulb on Digital Stereo Model S71012B a Remove front lens housing from...

Page 10: ...il slot engages depress fuse cap and rotate turn to lock into fuse holder S Recharging Batteries on Cordless Models a Must use the supplied Automatic Switching Recharger when charging batteries b It i...

Page 11: ...Locate battery compartment cover on bottom of illuminator Carefully remove the two screws securing battery cover to bottom of illuminator Slide cover back to expose batteries d Remove all 3 batteries...

Page 12: ...Incorrect bulb voltage or lamp base used Replace with specified lamp Light flickers Lamp not properly inserted into socket Loose connection at AC outlet Electrical short Properly insert lamp Have qual...

Page 13: ...slide dirty Spots on field of view Eyepiece or condenser lens dirty No immersion oil used on 100X objective lens Bubbles air in immersion oils Adjust disc diaphragm or iris diaphragm Adjust light int...

Page 14: ...entered over lens in center condenser lens located in middle of stage B Mechanical Stage Models Swing movable finger on holder outward place specimen slide cover slip facing up on top of slide against...

Page 15: ...ything when looking through the microscope A slight adjustment of focus and diaphragm openings will be needed to sharpen the image when changing objective magnification A Models supplied with 100x oil...

Page 16: ...hat you will want adequate ambient light in order to illuminate your opaque specimen from the top If the specimen is small and falls through the aperture at center of stage place a small piece of pape...

Page 17: ...ble on model S71000D Battery replacement for models S71000D See Replacing Batteries located on page 10 U MODEL S71000E and S71000F These two models have a special inclined eyepiece tube so that it is...

Page 18: ...1D Replacing batteries see page 10 T Fuse replacement on models S71001 and S71000A See Replacing Fuses located on page 10 R MODEL S71001E S71001F AND S71001G Dual viewing head permits simultaneous vie...

Page 19: ...ated on page 10 T S71002A AND S71002B STUDENT MODEL These models feature coarse and fine focusing mechanisms full sized DIN 4X 10X and 40X objectives widefield 10X eyepiece and a 0 65 condenser with i...

Page 20: ...Fuse replacement on models S71002C and S71002E See Replacing Fuses located on pages 10 R S71002G HIGH SCHOOL AND COLLEGE This model features a Seidentopf binocular head coaxial coarse and fine focusin...

Page 21: ...e To operate this series of microscopes see General Instructions for use of a Compound Microscope located on pages 14 and 15 Lamp replacement For Halogen lamp replacement see page 8 H Fuse replacement...

Page 22: ...of objective lenses After properly focusing instrument adjust ocular tube diopters to compensate for the difference between left and right eyes Lamp replacement For Halogen lamp replacement see page 8...

Page 23: ...ion Select illumination that meets the requirements of specimen and turn ON illuminator A There are three rocker type light controls located on microscope base a MAIN Turns power ON and OFF b I Turns...

Page 24: ...e for this difference and assure that you will see one corrected image when looking through microscope a Observe that the knurled diopter ring on the left eyepiece tube can be rotated to move the eyep...

Page 25: ...knob to the lowest magnification by aligning the number 1 located on the objective turret for model S71010 or by aligning the number 1 located on zoom control knobs to the index dot on the viewing hea...

Page 26: ...bottom lamp located on page 9 L Fuse replacement See Replacing Fuses located on pages 10 R MODEL S71004A Features an adjustable post mounted viewing head with inclined eyepiece tubes for ease in viewi...

Page 27: ...harge batteries prior to using this instrument See Recharging Batteries page 10 Q To use and focus this microscope see General Instructions for Stereo Microscopes located on pages 23 25 Models S71005...

Page 28: ...age 9 K Transmitted bottom lamp replacement See Replacing the transmitted bottom lamp located on page 9 L Fuse replacement See Replacing Fuses located on page 10 R MODELS 71007 and S71007A Features in...

Page 29: ...Fuses located on page 10 R MODEL S71008A Fixed arm with inclined viewing head Illuminated by a variable halogen incidental top and a fluorescent transmitted bottom lighting system Change magnificatio...

Page 30: ...located on page 9 O Fuse replacement See Replacing Fuses located on page 10 R MODEL S71010 Fixed arm with inclined viewing head Illuminated by a variable halogen incidental top and a fluorescent trans...

Page 31: ...tic Images software allowing the user to view capture label manipulate and measure images In order to achieve optimum results it is important that you carefully read the instructions for software loca...

Page 32: ...outlet and converter automatically switches to proper output voltage Refer to Quick Start Guide located on your CD for installation of the software and operation of the camera The three position slid...

Page 33: ...matically switches to proper output voltage Refer to Quick Start Guide located on your CD for Installation of the software and operation of the camera The three position sliding rod located on the sid...

Page 34: ...plug into 12VDC switching power converter then insert plug on other end of converter into power jack on back of microscope base Plug AC cord into either a 120v or 240v outlet and converter automatical...

Page 35: ...ble magnification from10X to 40X Illumination Insert power plug into 12VDC switching power converter then insert plug on other end of converter into power jack on back of microscope base Plug AC cord...

Page 36: ...cluded with microscope Instructions on connecting to your wireless enabled laptop or desktop are covered in the Wifi Camera Operation section of this manual MODEL S71014 This WiFi digital microscope t...

Page 37: ...images on iOS or Android devices with the free MotiConnect App or through IP address using web browser and the camera s on board software You must charge batteries prior to using this instrument See...

Page 38: ...warranty b Once the connection has been established you can begin using the WiFi camera through the MotiConnect App automatic or through your web browser using the following IP address http 192 168 1...

Page 39: ...nician s discretion Other than set forth above Fisher Science Education hereby disclaims all warranties expressed or implied of fitness for a particular purpose Defective products covered by the warra...

Page 40: ...tomer service call 1 800 955 1177 To fax an order use 1 800 955 0740 To order online www fisheredu com 2013 Thermo Fisher Scientific Inc All rights reserved Trademarks used are owned as indicated at w...

Reviews: