


HD-F01-TX
User Manual
1
Fiber Optic Extender User Manual
Model: HD-F01-TX
1.
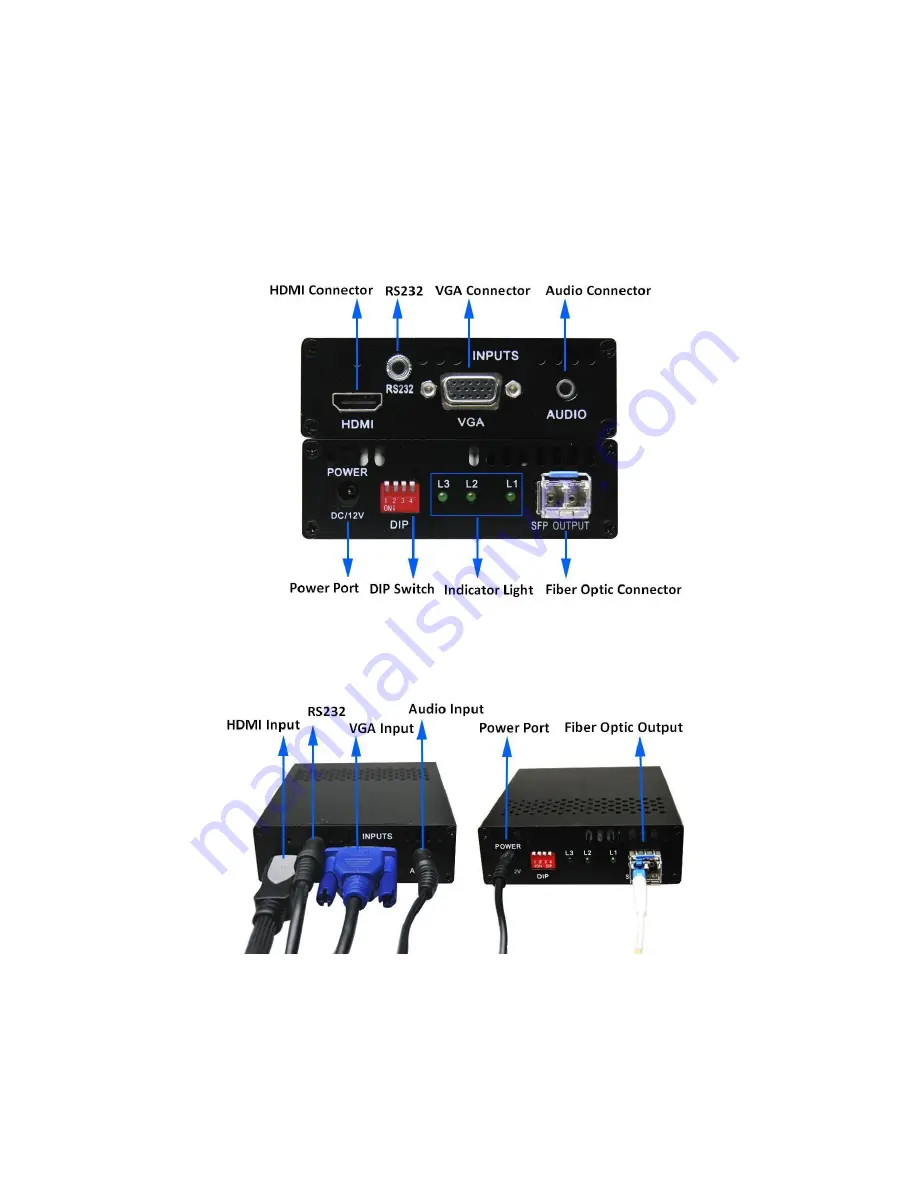
I/O Connectors
Figure 1 HD-F01-TX Fiber Optic Transmitter I/O Connectors
2.
Connection Introduction
Figure 2 HD-F01-TX Fiber Optic Transmitter Connection
Note:
Please connect one single-mode optical fiber to the left
port
in the
fiber optic connector.


