


CV-F01-TX User Manual
1
Fiber Optic Extender User Manual
Model: CV-F01-TX
1.
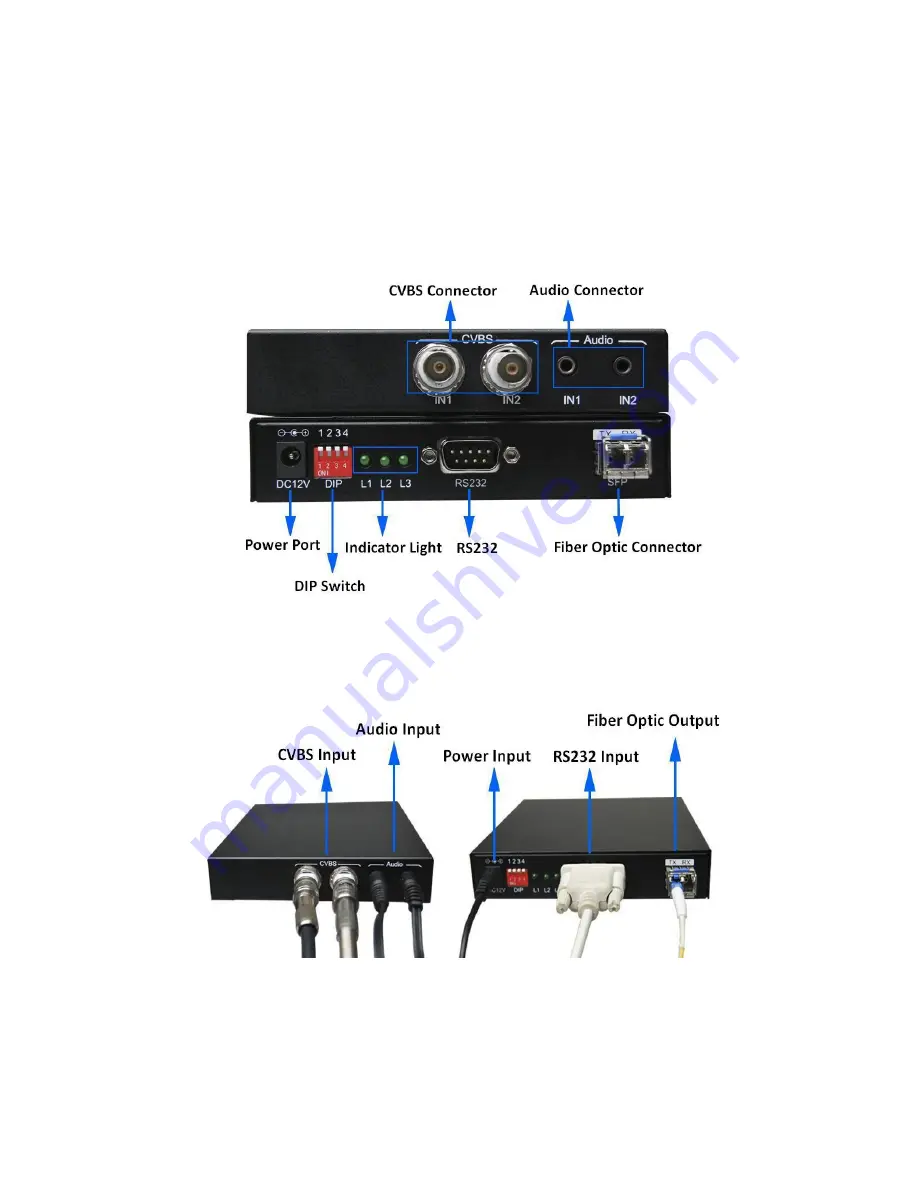
I/O Connectors
Figure 1 CV-F01-TX Fiber Optic Transmitter I/O Connectors
2.
Connection introduction
Figure 2 CV-F01-TX Fiber Optic Transmitter Connection
Note: Please connect one single-mode optical fiber to the
TX
port in the fiber optic connector.
3.
DIP Switch
Dial up is “OFF”, the corresponding number is “1”; dial down is “ON”, the corresponding
number is “0”.
The
DIP switch operating instructions as shown in Table 1. And the DIP switch


