3D Histech Pannoramic SCAN 150, User Manual
The 3D Histech Pannoramic SCAN 150 is a cutting-edge digital slide scanner designed for high-resolution histopathology imaging. Enhance your understanding of this advanced technology with the comprehensive User Manual, available for free download on our website manualshive.com. Maximize your product experience with detailed instructions and troubleshooting guidance.
Share
Download


Reviews:
No comments
Related manuals for Pannoramic SCAN 150

S8X1103
Brand: Pandigital Pages: 2

Nexscan F 4100
Brand: HEIDELBERG Pages: 124

Ovi-Scan
Brand: BCF Technology Pages: 28

EinScan Pro 2X
Brand: Shining 3D Pages: 137

Slim
Brand: SAEVO Pages: 68

FISC3650BK
Brand: nedis Pages: 3

Z-6172
Brand: Zebex Pages: 8

Xerox DocuMate 4790
Brand: Xerox Pages: 201

Portable Capture Station
Brand: Intel Pages: 16

SE2L-H05LPC
Brand: IDEC Pages: 152

MultiScanner i700 OneStep
Brand: Zircon Pages: 4

Hamster
Brand: Unitech Pages: 56

IMAGE FORMULA DR-2010C
Brand: Canon Pages: 82

CanoScan LIDE 70
Brand: Canon Pages: 4
Series
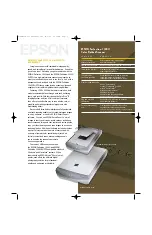
Perfection 1240U Series
Brand: Epson Pages: 2

Series
Perfection 1240U Series
Brand: Epson Pages: 57
Series
Perfection 1240U Series
Brand: Epson Pages: 166

imageFORMULA DR-G1100 Production Document...
Brand: Canon Pages: 35


