background image

- 1 - 


3 Rivers DSL Self-Install Guide  


For SmartRG SR501 Modem


Welcome 

Before you install your DSL filters and  modem, be sure that you have been contacted by 3 Rivers Communications 
(by a telephone call or postcard) that your High Speed Internet has been provisioned.  


Installing the DSL Filters 

Why do I need a DSL filter?  

DSL filters block the DSL signal from reaching your telephone, fax, or answering machine. Except for your DSL 
modem, every telephone, or device sharing the phone line that has DSL requires a filter.  If it has been 
determined that filters are needed, they will be included in the box.  If none are included, please go directly to 
page 3, installing the DSL Modem. 
 

What will happen if filters aren’t properly installed?  

If DSL filters are missing or not working properly you will experience reduced DSL speeds as well as static or 
hissing on your phone line. You may also experience problems with DSL connectivity.  
 

Before you install filters: 

Do not install a DSL filter on the line to your DSL modem. Do not install filters on empty phone jacks. If your install 
requires more than five filters contact 3 Rivers, as this will reduce the quality of your DSL service.   
 

Some common devices that need DSL filters: 


Regular and Cordless phones, Satellite TV receivers, Caller ID units, Answering machines, Fax machines 


Security systems that use the phone line (check with your security company to determine if this is 
necessary) 


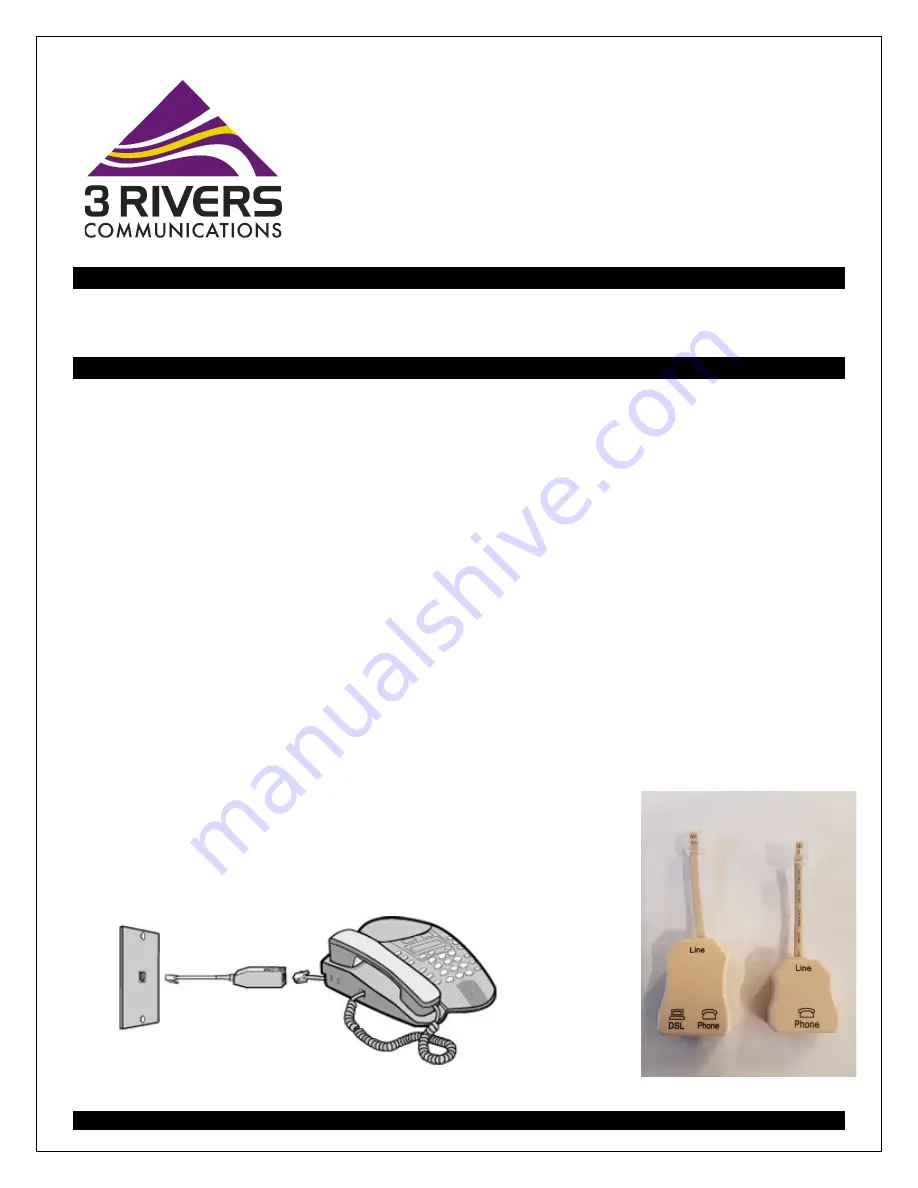
To install the DSL filters:


1.


Disconnect the phone (or device) cord from the wall jack.


 Insert the 

phone cord into the DSL filter. 

2.


Insert the DSL filter into the wall jack. 

3.


Repeat Steps 1 through 3 for each device needing a DSL filter. 


Summary of Contents for SmartRG SR501

Page 1: ...If DSL filters are missing or not working properly you will experience reduced DSL speeds as well as static or hissing on your phone line You may also experience problems with DSL connectivity Before you install filters Do not install a DSL filter on the line to your DSL modem Do not install filters on empty phone jacks If your install requires more than five filters contact 3 Rivers as this will ...

Page 2: ...ocking lever relock it after mounting Splitter Filters A Splitter Filter splits one jack into two so you can use your telephone and your DSL modem with a single phone jack Find the phone jack that is closest to the computer This is where you will install your Splitter Filter To Install the DSL Splitter Filter 1 Disconnect the phone cord from the phone jack 2 Plug the splitter filter into the phone...

Page 3: ...supply into the Power jack in the back of the router 2 Plug the power supply into an electrical outlet 3 Always use the power adapter that comes with the modem 4 Connect one end of the phone cord to the DSL jack in the back of the modem 5 Connect the other end of the phone cord directly into a phone jack or the DSL side of the splitter filter Make sure you do not connect the modem to Phone side of...

Page 4: ... Use the provided tabletop stand or wall mount bracket to secure the GigaCenter 3 Connect the white Ethernet cable from your broadband service or DSL modem to the white GigaCenter WAN port 4 Install the GigaCenter power adapter cord with the Calix label on it and then push the ON OFF button on the GigaCenter to turn it on 5 Wait for the Broadband and Service LEDs to come on or begin blinking they ...

Page 5: ...efault SSID and Security key They are unique to your GigaCenter 2 In this Example The SSID is CXNK001870CD and the WPA security key is 84f1414608b2cb13 3 Use the information SSID and Security key from your GigaCenter to connect your wireless device 4 On a Windows computer click on the wireless symbol on the lower right corner 5 Navigate to your wireless SSID and enter your WPA security key ...

Page 6: ...e Optional Settings Connect to the GigaCenter and access the EWI Embedded Web Interface 1 Confirm the GigaCenter has completed its initial boot up about 5 7 minutes 2 Connect an Ethernet cable between Ethernet port 1 on the back of the GigaCenter and your network connected PC Ethernet port 3 From your browser enter the IP address 192 168 1 1 4 Locate the default settings label on the GigaCenter or...

Page 7: ...ID to your naming convention 5 Click Apply 6 Repeat steps for the your other Wireless 2 4 or 5G Network Change Wireless Security 1 From the Wireless tab choose Security for either the 2 4G or 5G Network 2 From the drop down list choose the SSID to configure security settings 3 From the drop down list choose the Security type WPA WPA2 Personal is most secure 4 From the drop down list choose the Enc...

Page 8: ...few seconds and push the ON OFF button to turn it back on Once the power is returned give it some time as it will take about 5 to 7 minutes to fully boot up With a reboot any custom settings you have will return once the GigaCenter is completely booted up Reset With the GigaCenter plugged in and powered on use a straightened paperclip to press and hold the Reset button for approx 20 seconds the po...

Page 9: ...l Support 1 888 783 7354 Affix one of the two default settings label shipped inside the GigaCenter carton here for future reference Contact 3 Rivers Communications 202 5th St South P O Box 429 Fairfield MT 59436 1 406 467 2535 1 888 796 4567 e mail 3rt 3rivers net ...

Reviews: