


3
Getting Started
Step 3:
Power on the Gateway by pushing the power
button. Wait for the 2.4Ghz and 5Ghz LED
lights to start flashing.
At the back of the Zyxel device you will find the Wi-Fi network name
(SSID) and the Wi-Fi password (Wireless Key). Please ensure that you
have disconnected any other networks including your mobile data if
you are using a cell phone.
Step 1:
Connect the WAN port of the gateway
using the Ethernet cable included in the
package contents to the Fibre Network
Operator’s Optical Network Terminal (ONT).
Step 2:
Connect the Power Adapter to the gate way’s
power jack and AC power outlet.
Step 4:
Connect your laptop via an Ethernet/LAN
cable to one of the 4 available Ethernet ports.
If you do not have an additional Ethernet/Lan cable to connect to
your PC, you can also connect wirelessly using a laptop or cell phone.
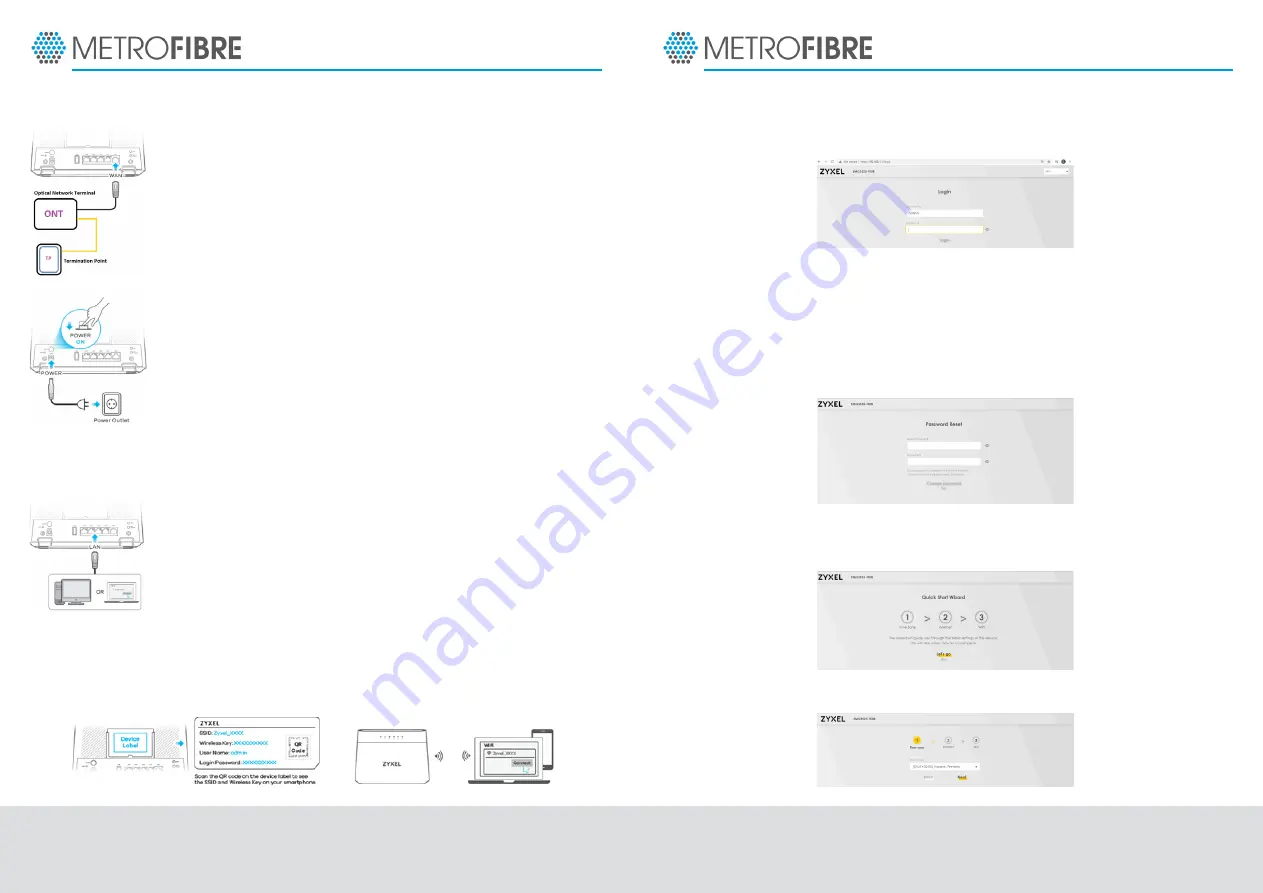
Step 5:
Open your Laptop/ PC’s web browser and enter the following IP
address: 192.168.1.1 and press enter. The Gateway’s login page will be
displayed.
Step 6:
Enter admin as the Username and the Login Password as
printed on the sticker on the rear of the device. Click on login.
Step 7:
It is recommended to change the device’s login password to a
new secure password of your choice. Click on Change Password or
alternatively click on Skip to keep the default credentials.
Step 8:
The Quick Start Wizard will guide you during the device setup.
The Wizard can be skipped to keep the default settings. Click on Let’s go.
Step 9:
Confirm the correct time zone and click Next.
4


