

POWER
RESET
ETHERNET
LAN
ETHERNET
WAN
DSL2
DSL1
USB
1
2
3
4
LAN
PHONE
RESET
1
2
3
4
POWER
(12VDC, 1.5A)
POWER
RESET
ETHERNET
LAN
ETHERNET
WAN
DSL2
DSL1
USB
1
2
3
4
DATA JACK
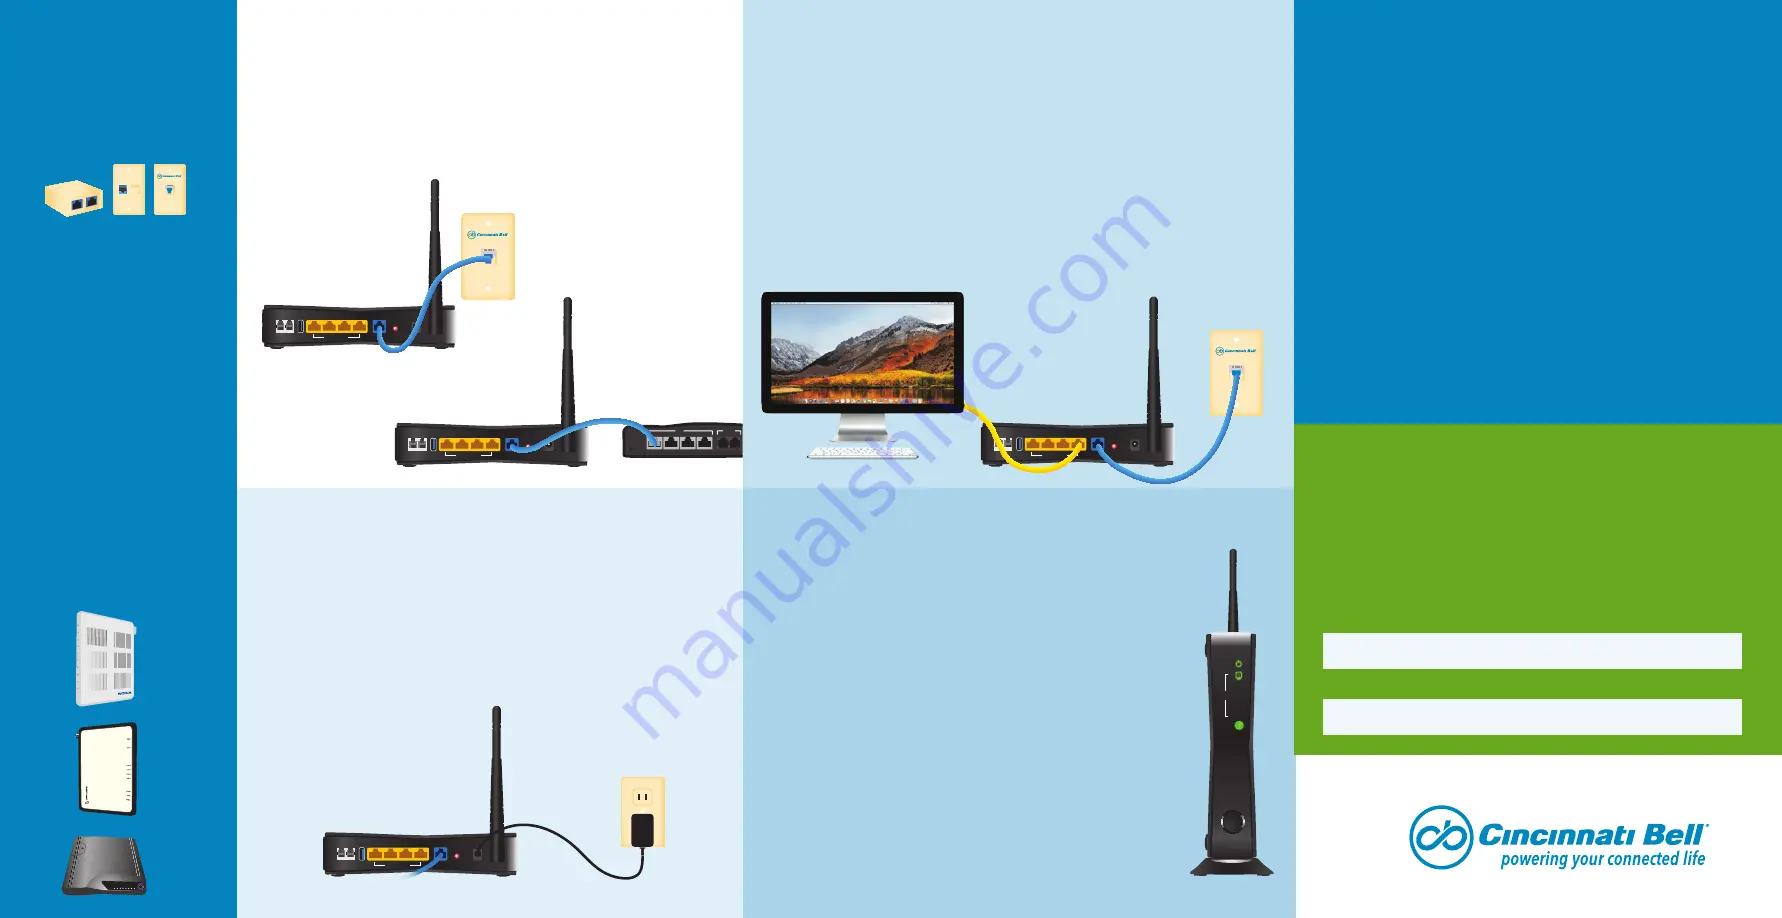
Connect the Gateway
Once you’ve located the data jack or ONT, you are ready to connect
the equipment. Start by plugging one end of the provided Ethernet
cable into the blue WAN port on your gateway. Plug the other end into
the data jack, or into port 1 on the ONT. Make sure the ONT is plugged
in and powered on.
Power It Up
Now it’s time to power up the equipment. Plug
the power adapter into a nearby wall outlet and
connect it to the power port of your gateway.
Verify the Connections
Once power is connected, the indicator lights on the front of
the gateway will begin to blink.
The power light will blink while the gateway initializes. When
it’s complete, the light will become steady green.
The Ethernet LAN indicator light will blink if you’ve hardwired
a computer to the gateway. It will light up green when they
are connected.
The Ethernet WAN light will then begin to blink while the
gateway syncs up with the Fioptics Internet Network. When
the light turns green it means you have a good connection.
When the Internet indicator light turns green, you are
connected to the Internet and can begin surfing the web.
Connect your Computer
If you have a computer that will be hard-wired to the Internet, connect
it next. Just attach another Ethernet cable between the Ethernet port
of your computer and any of the yellow, Ethernet LAN ports of the
gateway.
If you only have wireless devices, we’ll discuss connecting those to
Wi-Fi a little bit later.
1
2
4
3
Connect to Wi-Fi
Your gateway also comes with built-in Wi-Fi, so you can connect your
mobile devices to Fioptics Internet, wirelessly.
The WLAN/WPS indicator on the front of the gateway will light up
when it’s ready for wireless connections.
To connect your devices to Wi-Fi, you will need to locate your SSID
Network Name and Wi-Fi Password (WPA-PSK). These will be found
on the label attached to your gateway.
Go to the Wi-Fi Settings on your mobile device and select the SSID
Network Name that matches the one on the label. When prompted,
enter the Wi-Fi Password (WPA-PSK).
You are now connected to the Fastest Internet in town
*
with Fioptics
from Cincinnati Bell.
Additional Support
If you need additional assistance, visit cincinnatibell.com/selfinstall
to view a how-to video. You can also visit the help center of our
website (cincinnatibell.com/help-center), stop by one of our retail
stores, or give us a call at 513-565-9890.
Gateway to data jack
Gateway to ONT
POWER
RESET
ETHERNET
LAN
ETHERNET
WAN
DSL2
DSL1
USB
1
2
3
4
POWER
RESET
ETHERNET
LAN
ETHERNET
WAN
DSL2
DSL1
USB
1
2
3
4
DATA JACK
Write down your SSID Network Name and Wi-Fi Password (WPA-
PSK) here for handy future reference:
SSID Network Name
Wi-Fi Password
Locate the
Fioptics
Wiring
Before you get started, locate
the Fioptics wiring inside your
home. If your home has a data
jack, it should have an orange
or blue Ethernet port, or it may
be labeled. It is usually centrally
located and may be near the
TV, or in the home office.
If you don’t have a data jack,
then you’ll connect directly
to an “ONT” which should be
similar to one of these pictured
below. It’s usually in the garage
or basement, and is mounted
to a wall where the Fioptics
wiring enters your home.
Calix
Nokia
Alcatel-Lucent
PO
WER
CPU
WAN
PHONE
LAN
4
LAN
3
LAN
2
LAN
1
LAN
PHONE
RESET
1
2
3
4
POWER
(12VDC, 1.5A)
PWR
BTRY
FAIL
DATA
4
DATA
3
DATA
2
DATA
1
NTWK
MGMT
POTS
1
2
3
4
2.4G
5G
DATA JACK
WLAN
WPS
POWER
ETHERNET
LAN
ETHERNET
WAN
DSL1
DSL1
USB
HPNA
INTERNET
1


