AC
120V AC Magnetic Low
Voltage Dimmer Switch
120V AC
Power
Positive (+)
Negative (-)
Positive (+)
Negative (-)
or
Knockout Holes
12”
12”
12”
12”
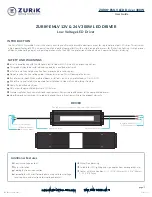
Always pre-test your LED setup prior to permanent installation. This will ensure all components work correctly. Be sure to check the wattage pull
of the LED strip you’ve purchased so the driver isn’t overloaded (Max. 270W). Turn off the main AC breaker for the line you’ll be using before install-
ing your EMLV driver. If you experience any issues at all with your test set up, please be sure to contact us at After Sales Support.
Connect the AC line ground (G) to the green wire from the Power Input
Wire. Do the same with the AC neutral wire to the white wire on the
driver and the AC live wire to the black wire. you can secure these
connections with a terminal block.
When using a 3-pole dimmer as a single pole make sure to cap the
additional line and connect the rest of the wiring as recommended by
the dimmer instructions. Find our list of compatible dimmers below.
Look at your LED strips carefully and identify the positive (+) and
negative (-) channels.
Connect the driver’s Output Power negative (-) wire to the - channel on
the LED strip. Connect the positive (+) wire to the + channel.
INSTALLATION
It can be mounted in any orientation, the chosen location must be able
to support the weight of the power supply with 12” of clearance for
proper ventilation. Never mount it next to objects radiating heat.
Remove wiring knockouts as needed and install 3/8” romex connectors
or bushings to reduce strain on wires. One set of knockout holes is
reserved for input voltage while the second set is reserved for output
voltage.
3.
4.
5.
6.1.
Connect Power Wires
Using A Dimmer
Identify The Channels On The Strip
Connect Outbound LED Wires (12VDC)
1.
2.
Mounting The Junction Box (optional)
Using The Knockout Holes (optional)
V.2021.10.13
support@FlexfireLEDs.com
925-273-9080 opt 1
ZRK-EMLV2-300W-XXDC-J
4
page
User Guide
•
ZURIK
®
EMLV LED Driver 300W


