


Appendix
ZOOM HD8/HD16
187
COMP/LIMITER module
ISOLATOR module
Parameter description
3BAND EQ R module
MOD/DELAY module
Parameter description
LINE algorithm
Type
Parameter
Compressor
For an explanation of types and parameters, see DUAL MIC algorithm.
Limiter
Type
Parameter
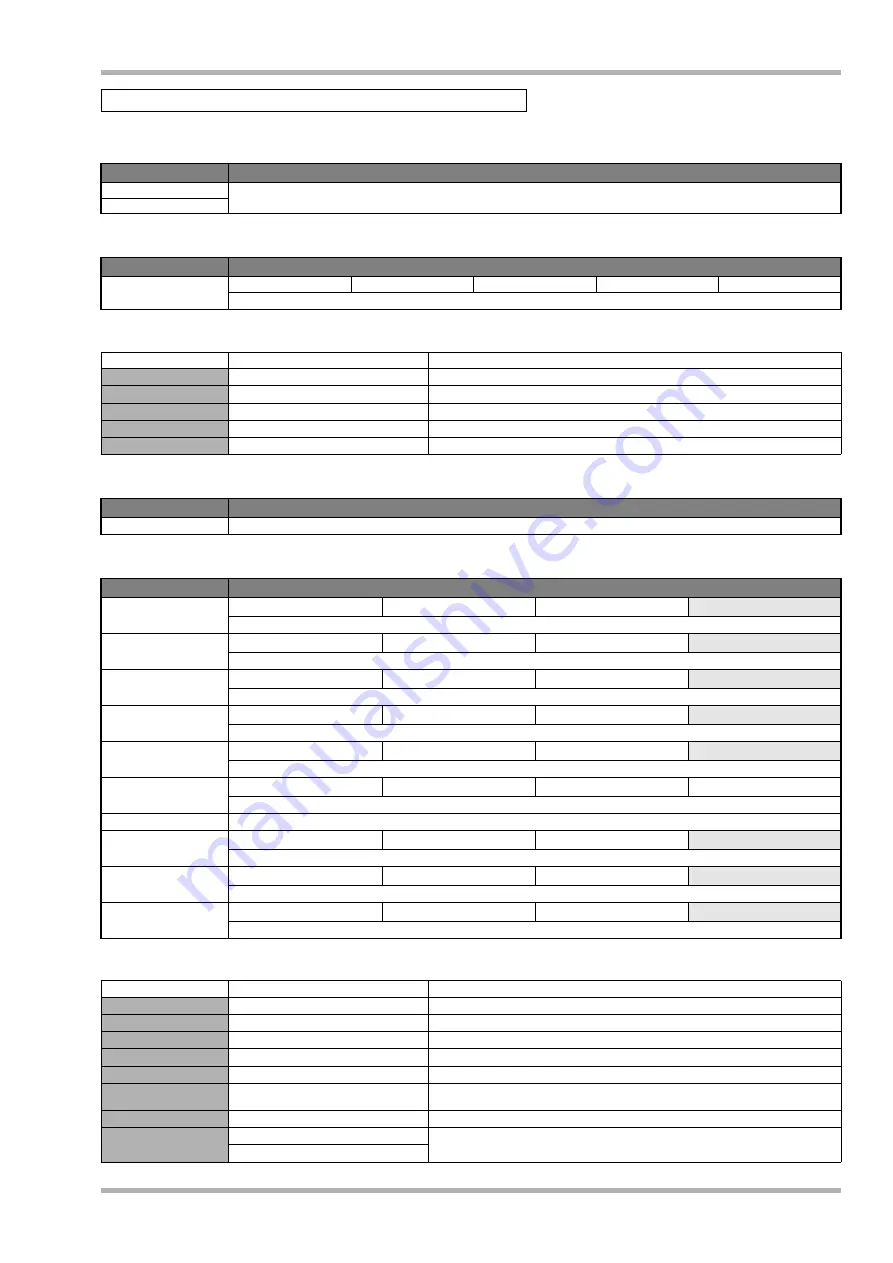
Isolator
Xover Lo
Xover Hi
Mix High
Mix Mid
Mix Low
Divides the signal into three frequency bands and allows individual adjustment of mixing ratio for each band.
Parameter name
Setting range
Description
Xover Lo
50Hz – 16kHz
Adjusts low-to-mid crossover frequency.
Xover Hi
50Hz – 16kHz
Adjusts mid-to-high crossover frequency.
Mix High
Off, -24 – 6
Adjusts high range mixing level.
Mix Mid
Off, -24 – 6
Adjusts mid range mixing level.
Mix Low
Off, -24 – 6
Adjusts low range mixing level.
Type
Parameter
3BAND EQ
For an explanation of types and parameters, see CLEAN, DISTORTION, ACO/BASS SIM algorithms.
Type
Parameter
Chorus
Depth
Rate
Mix
Mixes a variable pitch-shifted component to original sound, resulting in full-bodied resonating tone.
Flanger
Depth
Rate
Resonance
Produces a resonating and strongly undulating sound.
Phaser
Rate
Color
LFO Shift
Produces a swooshing sound.
Tremolo
Depth
Rate
Clip
Periodically varies the volume level.
Auto Pan
Width
Rate
Clip
Shifts the panning position of the sound between left and right.
Pitch
Shift
Tone
Fine
Balance
This effect shifts the pitch up or down.
Ring Modulator
For an explanation of types and parameters, see CLEAN, DISTORTION, ACO/BASS SIM algorithms.
Delay
Time
Feedback
Mix
Delay effect with max. setting 2000 ms.
Echo
Time
Feedback
Mix
Warm delay effect with max. setting 2000 ms.
Doubling
Time
Tone
Mix
Doubling effect which creates body by adding a short delay.
Parameter name
Setting range
Description
Depth
0 – 100
Adjusts modulation depth.
Resonance
-10 – 10
Adjusts resonance intensity. Negative values result in reversed phase of effect sound.
Color
4Stage, 8Stage, Invert4, Invert8
Selects sound type.
LFO Shift
0 – 180
Adjusts left/right phase shift.
Width
0 – 10
Adjusts auto pan width.
Rate
1 – 50
e
(P180 Table1)
Adjusts modulation rate. Using rhythm tempo as reference, setting in note units is also
possible.
Clip
0 – 10
Adds emphasis by clipping modulation waveform.
Time
Delay, Echo: 1 – 2000ms
e
Adjusts delay time.
Doubling: 1 – 100ms


