3
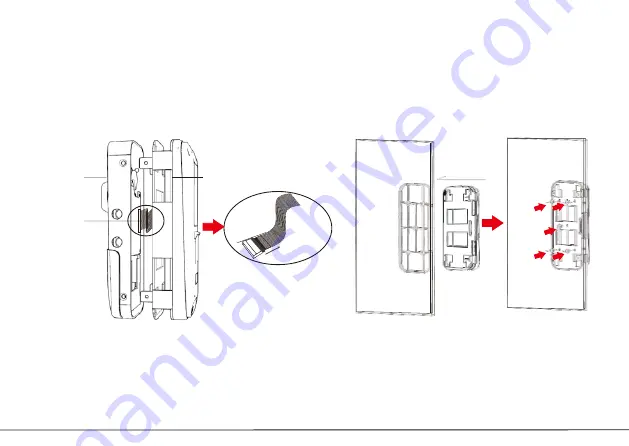
3. Detach
the cable
4. Install the outdoor unit and
tighten the screws
rear panel
cable
the front panel
Pull out the buckle
Page 1: ...Installation Guide Version 1 0 GL300 ...
Page 2: ...1 Part A Part B Pack list Screws Sticky board ...
Page 3: ...indoor 2 Installation 1 Peel the sticker off the mounting plate and stick it at the appropriate height 2 Remove screws from GL300 Part A ...
Page 4: ...3 3 Detach the cable 4 Install the outdoor unit and tighten the screws rear panel cable the front panel Pull out the buckle ...
Page 5: ...4 5 Secure Part A with the screws 6 When installing Part B make sure that it is at the same height as Part A Part B Part A insert the cable Note Please be careful while connecting the cable ...
Page 6: ...7 Unfasten and remove screws from Part B 8 Install Part B outdoor unit on the glass door and fix it with the screws Part B 5 ...
Page 7: ...6 9 Install indoor unit on the glass door and secure with the screws 10 Install four batteries and fix the cover reset button ...
Page 8: ...7 How to change door open direction remove the screws rotate the mounting bracket and indoor unit 180 reinstall the screws ...
Page 9: ...4 www zkteco com Copyright 2018 ZKTeco Inc ZKTeco Logo is a registered trademark of ZKTeco or a related company All other product and company names mentioned are used for identification purposes only and may be the trademarks of their respective owners All specifications are subject to change without notice All rights reserved ...