background image

CameraMate Hi-Speed Digital Media Reader/Writer 


11

Removing a Card on a Macintosh 


Before you remove a digital media card, be sure the read/write operations are 
complete.  Removing a card during read/write access causes lost or corrupted 
data.  

1. 

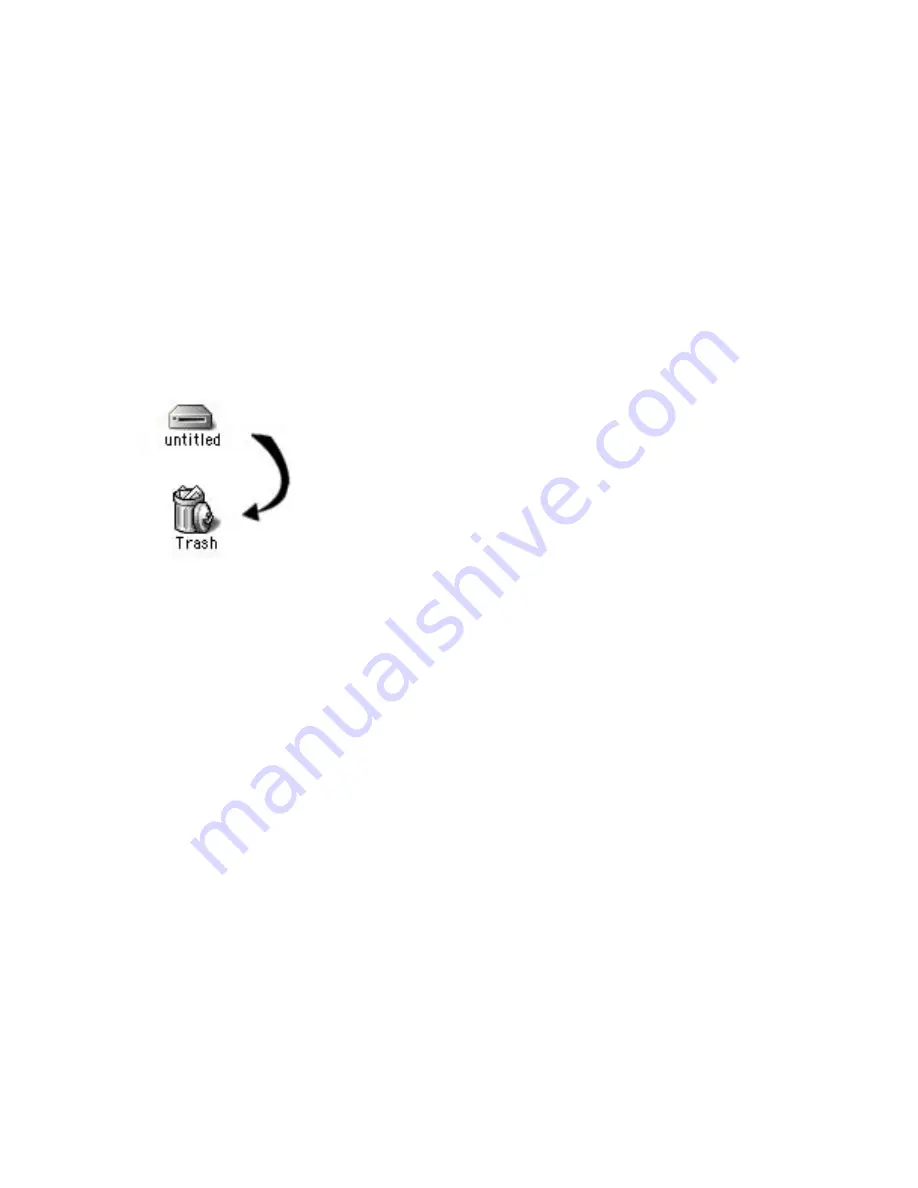
To remove a card, drag the card icon and drop it onto the trash icon.  

Note:

 The icons below and their desktop locations differ slightly for Mac OS X 

and higher. 


The card icon disappears from the desktop. A dialog box will appear letting you 
know that it is safe to remove the device.  

Note: 

The dialog box below does not appear in Mac 0S X and higher.  


2. 

Click 

OK

 in the dialog box, then grasp the end of the card with your thumb 

and index fingers, and remove it from the slot.  

Caution:

 Do not remove a mounted card without first dragging the card icon to 

the trash. Improper removal can corrupt the data stored on your card. If removed 
improperly, a warning message may state that there is a problem with the media 
and prompt you to check the disk for data loss.  

Summary of Contents for CameraMate

Page 1: ... Reader Writer 1 Hi Speed 10 in 1 Digital Media Reader Writer User s Guide Copyright Zio Corporation All rights reserved Trademarks are used for informational purposes and remain the property of their owners CameraMate www ziocorp com ...

Page 2: ... 4 Software Overview 4 Hardware Installation on a PC 5 Hardware Installation on a Macintosh 6 Digital Media Card Compatibility 7 Inserting a Digital Media Card 7 Accessing a Card on a PC 9 Removing a Card on a PC 9 Accessing a Card on a Macintosh 10 Removing a Card on a Macintosh 11 Frequently Asked Questions 12 Technical Support 13 ...

Page 3: ...ws 98 SE 2000 Me or XP 64MB RAM minimum 128MB recommended 1 MB free disk space Macintosh Requirements G3 processor or faster iMac iBook PowerBook PowerMac G3 and G4 USB Port Mac OS 9 x or higher 64MB RAM minimum 128MB recommended PC Requirements for CameraMate ProPix Software Suite 500MHz or faster processor 50MB free disk space Windows 98 SE 2000 Me or XP 64MB RAM minimum 128MB recommended PC mus...

Page 4: ... ProPix Software Suite consist of three different software applications ProPix Sound ProPix OnTV and ProPix Share With ProPix OnTV you can take digital pictures and turn them into digital photo albums on a CD that can play in your DVD player Simply select and arrange your photos on the timeline and burn a CD ProPix OnTV not only creates a slide show that you can watch on your TV but also a secure ...

Page 5: ... Connecting to a Computer s USB Port Connect the USB connector on the Reader Writer to the USB port on your computer You can connect the reader directly into the PC or use the optional extension cable as shown in the picture below Note Be sure the cable is properly aligned before do not force the connection Connecting to a USB Hub 1 Connect the USB hub purchased separately to your computer s USB p...

Page 6: ... Macintosh USB Port Connect the USB connector on the Reader Writer to the USB port on your Macintosh You can connect the reader directly into the computer or use the optional extension cable as shown in the picture below Note Be sure the cable is properly aligned and do not force the connection USB Cable Connecting to a USB Hub 1 Connect the USB hub purchased separately to your Macintosh USB port ...

Page 7: ...dia Note Secure mode of Sony MagicGate is not supported Inserting Digital Media If you plan on writing to or deleting from your Digital Media Card make sure the card is not locked To insert a Digital Media Card follow these steps The CameraMate 10 in 1 reader has 4 slots for media The Bottom row is for xD Picture Card SmartMedia Secure Digital and MultiMediaCard To insert an xD Picture Card be sur...

Page 8: ...connector are facing the reader and the label is facing up To Insert Memory Stick be sure the label is facing up and he notched corner is on the Left Caution Be careful not to insert the media card in the wrong direction If it is forced in the reader writer or the media card may be damaged or data on the card may be lost or corrupted If the computer does not recognize the media or if it does not f...

Page 9: ... on the card Digital cameras usually create one or more folders on a digital media card which contains your digital images To display a digital image open the folder s then double click on the icon s representing the digital image s you want to view Note If a card is not inserted when you double click a Removable Disk icon a message appears that says Device not ready or Please insert a disk If you...

Page 10: ... on the desktop within a few seconds You can access a mounted card just like a floppy or other type of removable disk Double click the icon to open its respective file window Double clicking on the media card The images stored on the card can be copied opened edited and deleted Note The desktop below differs slightly for Mac OS X but the procedure for accessing a card is the same IMPORTANT If you ...

Page 11: ...igher The card icon disappears from the desktop A dialog box will appear letting you know that it is safe to remove the device Note The dialog box below does not appear in Mac 0S X and higher 2 Click OK in the dialog box then grasp the end of the card with your thumb and index fingers and remove it from the slot Caution Do not remove a mounted card without first dragging the card icon to the trash...

Page 12: ...the Hi Speed Digital Media Reader Writer is connected to my computer s USB port but nothing happens when I insert my digital media card PC If you are running Windows XP and you insert a digital media card a dialog box asks what you want to do with the files on the Removable Disk You can select from several options This is a default feature of Windows XP When using Windows 98 SE Me or 2000 you must...

Page 13: ...computer For information regarding drag and drop as well as copy and paste please refer to your Windows Help file or Help and Support in Windows XP You can find the Windows Help file and Help and Support under the Start button located in the lower left corner of your desktop After you open Windows Help click on the Index tab to display the contents of Windows Help Then scroll down to and double cl...

Reviews: