L
N
N
C
S
Zigbee In-Wall Switch
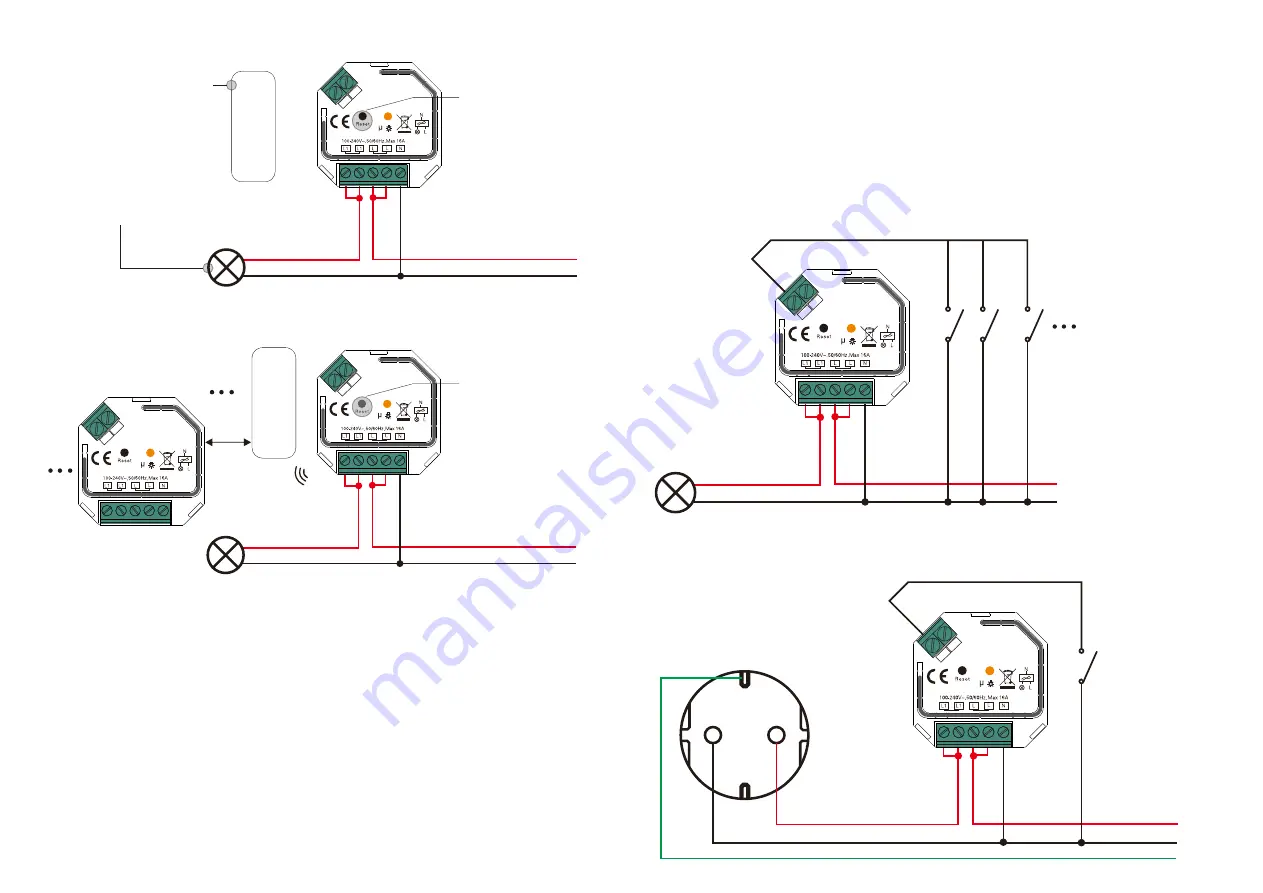
11. Setup a Zigbee Network & Add Other Devices to the Network (No Coordinator Required)
Step 1
: Short press “Reset.”
button 4 times (Or reset
power of the device 4 times)
to enable the device to setup
a zigbee network (connected
light flashes twice) to
discover and add other
devices, 180 seconds
timeout, repeat this step.
Zigbee
Remote
Step 2
: Set another device or remote or touch panel into network pairing mode and pair to the network, refer to
their manuals
.
Step 3
: Pair more devices and remotes to the network as you would like, refer to their manuals.
Step 4
: Bind the added devices and remotes through Touchlink so that the devices can be controlled by the
remotes, refer to their manuals.
< 10cm
TouchLink
10. Delete Learning to a Zigbee Green Power Switch
Step 1
: Short press “Reset.”
button 3 times (Or reset
power of the device 3 times)
to start delete Learning to GP
switch mode (connected light
flashes slowly), 180 seconds
timeout, repeat this step.
Zigbee
Green Power
Switch
Step 2:
Set the paired green
power switch into Learning
mode, please refer to its manual
.
Step 3
: Connected light will
flash 4 times to indicate
successful deleting.
Note: 1) Each added device can link and be controlled by max. 30 added remotes.
2) Each added remote can link and control max. 30 added devices.
12. OTA
The device supports firmware updating through OTA, and will acquire new firmware from zigbee controller or
hub every 10 minutes automatically.
Wiring Diagram
Notes for the diagrams:
L
- terminal for live lead
N
- terminal for neutral lead
L1
- output terminals of the device (controlling connected light source)
S
- terminal for external switch
NC
- No Connection
L
N
1) With Light Load
N
C
S
Zigbee In-Wall Switch
L
N
2) Connect With Socket
N
C
S
Zigbee In-Wall Switch
GND
N
C
S
Zigbee In-Wall Switch
L
N
N
C
S
Zigbee In-Wall Switch


