


28
GB
Before starting the
equipment
Before you connect the equipment to the
mains supply make sure that the data on
the rating plate are identical to the mains
data.
Always pull the power plug before making
adjustments to the equipment.
•
Get to know your machine. Familiarise
yourself with its application and limita-
tions, as well as the specific potential
hazards.
•
Make sure that the switch is OFF before
inserting the plug into the socket.
•
Make sure that the machine is assem-
bled completely and properly.
•
Check the machine before use for dam-
aged parts and determine whether these
parts work properly and perform its in-
tended function; in case of doubt, the
part is to be replaced.
•
Check the alignment of all moving parts,
broken or mounting parts, and other con-
ditions that could impair proper operation.
Any damaged part should be repaired or
replaced by a qualified technician.
•
Do not use the machine if a switch can-
not be switched on and off correctly.
Caution!
Before beginning the operation,
check the installation site for concealed
electrical cables, gas and water pipes us-
ing a pipe locator..
Operation
•
Use only proper equipment.
•
Make all machine adjustments only with
the machine switched off.
•
Never leave the machine unattended
while it is running.
•
When switching off, leave the machine
only after it comes to a complete stand-
still.
•
Turn the machine off before you unplug
it.
•
Always unplug the mains cord. Never pull
out the plug from the wall outlet by hold-
ing the cable.
•
Perform maintenance and cleaning of the
device regularly.
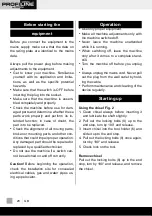
Starting up
Using the chisel Fig. 2
1. Clean chisel always before inserting it
and lubricate the shaft slightly.
2. Pull out the locking bolts (8) up to the
end stop, turn by 180° and release.
3. Insert chisel into the tool holder (6) and
slide it up to the end stop.
4. Pull out the locking bolts (8) once again,
turn by 180° and release.
5. Check lock on the tool.
Remove chisel
Pull out the locking bolts (8) up to the end
stop, turn by 180° and release, and remove
the chisel.


