


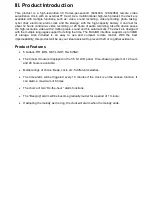


V. Operation Instructions
Capturing Media
Before setting up the device to capture any media, please first read “
Turning on the unit for the first time
”.
1. Ensure you have the MicroSD memory card inserted in the unit all the way in. The Rotational Cover
(4) should be able to close all the way.
2. Ensure the USB cable is not connected to the device.
3. Turn the internal “On-Off” switch to the “On” position (8B).
4. Point the remote towards the IR Receiver(7) by at least a foot away, and hit the power button ( ) on
the remote (10). Give it a few seconds, a solid blue light will come on next to the IR Receiver (2). This
means the device is on “stand-by” mode.
From the “stand-by” mode (solid blue light);
Recording video and sound:
Press the Video button ( ).
The blue light will slowly blink 3 times,
then go off. Video is now being recorded. Press the Video button again to stop recording and set the
device back to stand-by mode (solid blue light).
Recording sound only:
Press the Microphone button ( ) to record sound only. The blue light will
slowly blink 3 times, then go off. Sound is now being recorded. Press the Sound button again to stop
recording and set the device back to stand-by mode (solid blue light).
Taking pictures:
Press the Photo button ( ) to take a picture. The blue light will go off, and then on
again a few seconds later back into stand-by mode (solid blue light).
Recording on Motion Detection:
Press the Motion-Detection button ( ) to place the device on
motion detection stand-by. The blue light will keep flashing quickly until motion is detected. When the
first motion in front of the device is detected, the blue light will slowly blink 3 times, than go off. Video
is now being recorded. Video records for a minimum of 3 minutes following initial motion. After 3
minutes of initial motion, video will stop being recorded, and the device will go back to motion
detection stand-by (flashing blue light). Press the Motion-Detection again to remove it from motion
detection stand-by mode. The device will go back into stand-by (solid blue light).
Recording While Charging
The zClock-1000 can also record video to the memory card while connected to the charger. This
function is useful for long periods of recording where the recording time can outlast the battery charge.
Simply use the included A/C wall charger and make sure the memory card has plenty of space.