A: Want camera working when in reversing only
1. Red power cable connect to reversing switch
2. Black to Ground , meet metal
3. Ignore the blue wire or connect this blue wire
same to the reversing switch as the red wire .
B: Want camera working once start the car
1. Red power cable connect to ACC or Battery to
get continues power
2. Black to Ground , meet metal
3. Ignore the blue wire
Installation Guide
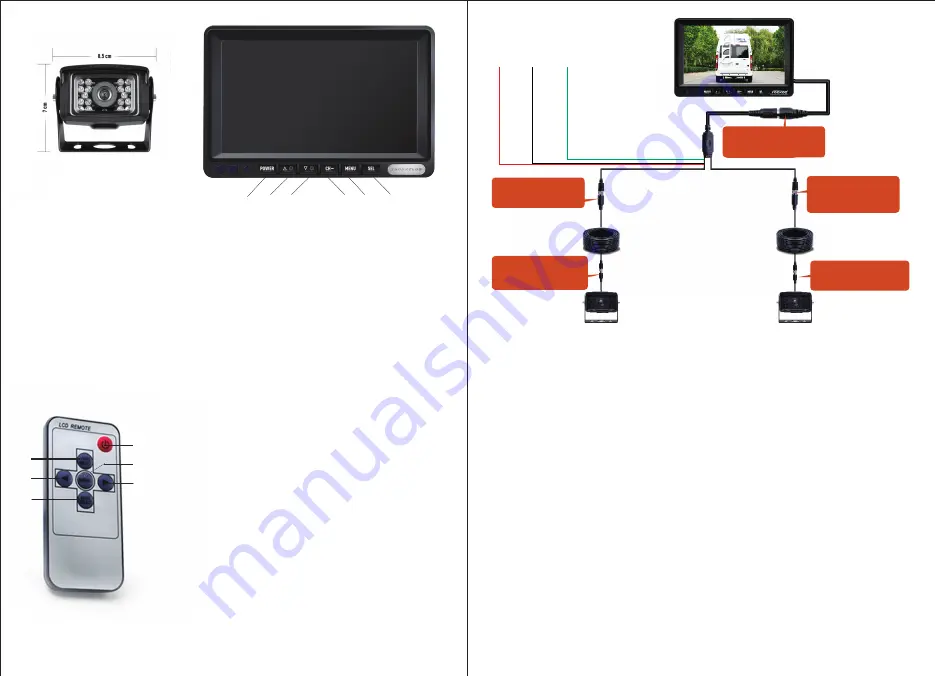
Remote Controller
1. Standby: Press Power On and Off
2. Video Switch: Press to Change from V1 To V2
3. Function Down: Press To Reduce When In
Menu Setting
4. Menu: Press to Go in Setting Page
5. Mode Swich: Press to Choose Different Zoom
16:9 or 4:3
6. Function Up: Press To Increase When In Menu
Setting
1
2
3
4
5
6
1
1.Power
:
Press Power On and Off.
2.Function Up
:
Press To Increase When In Menu Setting.
3.Function Down
:
Press To Reduce When In Menu Setting.
4.Video Switch:Press to Change From V1 To V2.
5.Menu
:
Press to Go In Function Setting Page.
6.Picture Rotation
:
Press to Make”Upside Down or Normal“
Monitor and Camera
2
3
4
5
6
CH2
(AHD2 Signal)
CH1
(AHD1 Signal)
Red
for
12-32V
P
ower
Black
for
G
round
Trigger
Line
①
② ③
Green
Black
Red
Use Video Cable to
Connect the Camera
Use Video Cable to
Connect the Second
Camera
CH2 Camera is
Displayed by Default
Power Cable Connect
To the Screen
Press "CH-" to Switch
to the CH1 Camera
* If you connect the camera to CH1 but you don't see the picture (no signal), press "CH-" to switch
the camera. (Because the system displays the CH2 camera by default.)
* The system will remember your settings and no need to set it again next time you use. But the
settings of each camera are not universal. (when you connect two cameras)


