background image

PAGE 6

INTRODUCTION

Precautions

When shipping the DVD player, always use the 
original shipping carton and packing materials.
For maximum protection, repack the unit as it was
originally packed at the factory.

Do not use volatile liquids, such as insect spray, near
the DVD player. Do not leave rubber or plastic 
products in contact with the DVD player for a long
time. They will leave marks on the finish.

The top and rear panels of the DVD player may
become warm after a long period of use. This is 
normal and not a malfunction.

When the DVD player is not in use, be sure to
remove the disc and turn off the power.

If you do not use the DVD player for a long period, the
unit may not function properly in the future. Turn on
and use the DVD player occasionally.

When you place this DVD player near a TV, radio, or
VCR, the playback picture may become poor and the
sound may be distorted. In this case, move the DVD
player away from the TV, radio, or VCR.

Use a soft, dry cloth for cleaning.

For stubborn dirt, soak the cloth in a weak detergent
solution, wring well and wipe. Use a dry cloth to wipe
it dry. Do not use any type of solvent, such as thinner
and benzine, as they may damage the surface of the
DVD player.

If you use a chemical saturated cloth to clean the
unit, follow that product’s instructions.

Warning: Cleaning and adjustment of lenses
and/or other components of playback mechanism
should be performed by a qualified service 
technician.

The DVD player is a high technology, precision device. If
the optical pick-up lens and disc drive parts are dirty or
worn down, the picture quality becomes poor. To obtain
a clear picture, we recommend regular inspection and
maintenance (cleaning or parts replacement) every
1,000 hours of use depending on the operating 
environment. For details, contact your nearest dealer.

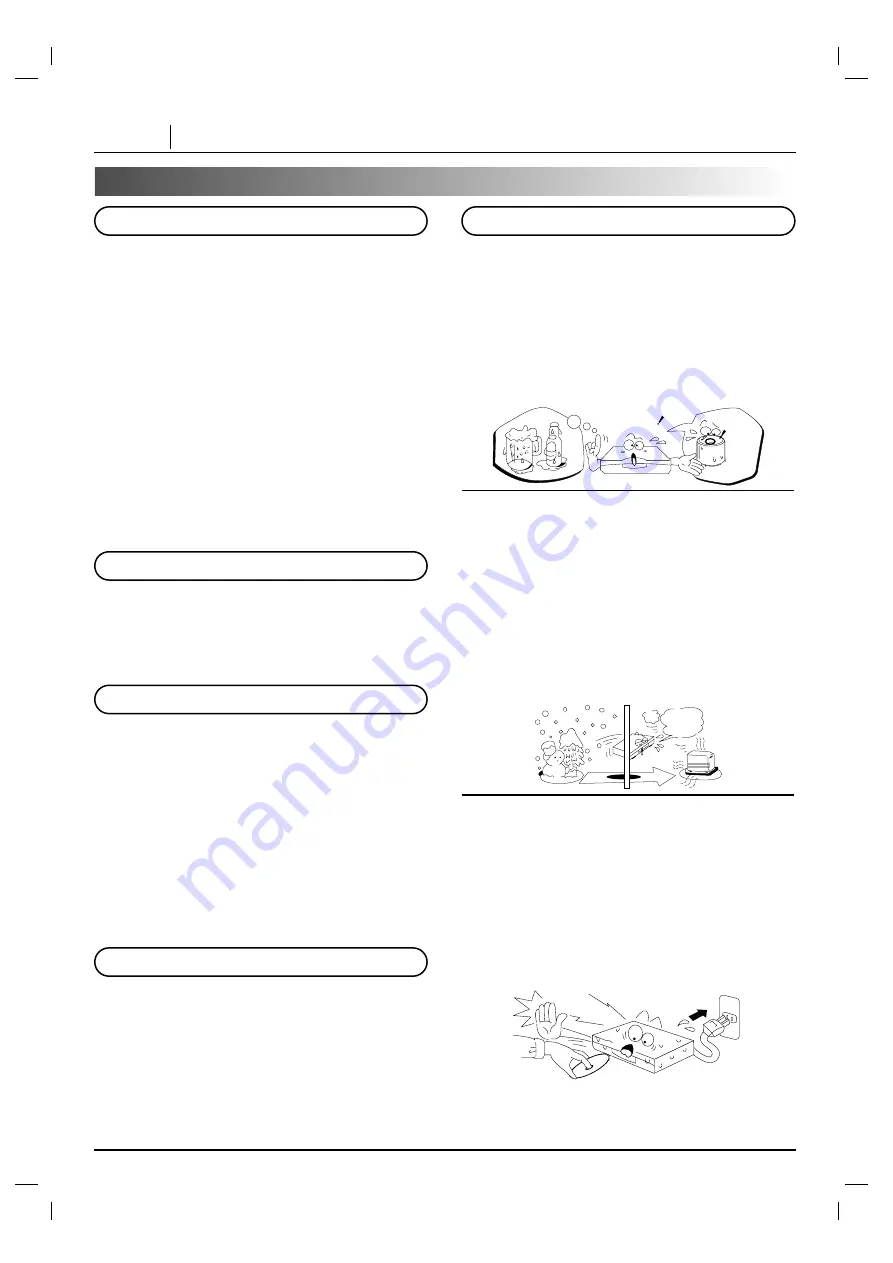
Moisture condensation damages the DVD player.
Please read the following carefully.

Moisture condensation occurs, for example, when
you pour a cold drink into a glass on a warm day.
Drops of water form on the outside of the glass. In
the same way, moisture may condense on the opti-
cal pick-up lens inside this unit, one of the most cru-
cial internal parts of the DVD player.

Moisture condensation occurs during the following
cases.

When you bring the DVD player directly from a cold
place to a warm place.

When you use the DVD player in a room where you
just turned on the heater, or a place where the cold
wind from the air conditioner directly hits the unit.

In summer, when you use the DVD player in a hot
and humid place just after you move the unit from
an air conditioned room.

When you use the DVD player in a humid place.

Do not use the DVD player when moisture con-
densation may occur.
If you use the DVD player in such a situation, it may
damage discs and internal parts. Remove the disc,
connect the power cord of the DVD player to the wall
outlet, turn on the DVD player and leave it “ON” for
two or three hours. After two or three hours, the
DVD player will have warmed up and evaporated
any moisture. Keep the DVD player connected to
the wall outlet and moisture condensation will sel-
dom occur.

Notes on handling

Notes on Locating

Notes on Cleaning

To Obtain a Clear Picture

Notes on  Moisture Condensation

Ex

ampl

es of moistu

re

con

densation

Optical

pick-up lens

It’s too

warm!

Wait!

Summary of Contents for DVD2201

Page 1: ...machine number DVD2201 E N J O Y T H E V I E W o p e r a t i n g g u i d e w a r r a n t y...

Page 2: ...a residential installation This equipment generates uses and can radiate radio frequency energy and if not installed and used in accordance with the instructions may cause harmful interference to rad...

Page 3: ...20 Operation Using GUI Menu Icons General Information about GUI menu icons 21 Detailed description of each GUI menu icon 22 Advanced Operation Using a title menu 23 Using a DVD menu 23 Memorizing Sett...

Page 4: ...product and to protect it from overheating These openings must not be blocked or covered The openings should never be blocked by placing the product on a bed sofa rug or other similar surface This pr...

Page 5: ...y cause hearing damage 20 Laser Beam Do not look into the opening of the disc tray or venti lation opening of the product to see the source of the laser beam It may cause sight damage 21 Disc Do not u...

Page 6: ...irty or worn down the picture quality becomes poor To obtain a clear picture we recommend regular inspection and maintenance cleaning or parts replacement every 1 000 hours of use depending on the ope...

Page 7: ...t cloth Always keep the disc clean If you cannot wipe off the dust with a soft cloth wipe the disc lightly with a slightly moistened soft cloth and finish with a dry cloth Do not use any type of solve...

Page 8: ...TOP button Disc tray POWER button PAUSE STEP button SELECT ENTER button Display window Remote sensor MENU button ARROW buttons TITLE CD PROG RANDOM ALL A B CHP TRK DVD MP3 DVD indicator CD indicator R...

Page 9: ...Pr Pb COMPONENT VIDEO OUT COAXIAL DIGITAL OUT AUDIO OUT1 AUDIO OUT2 L R S VIDEO COMPONENT Y S VIDEO OUT jack AUDIO OUT 1 L R jacks AUDIO OUT 2 L R jacks COMPONENT VIDEO OUT jacks VIDEO OUT jack POWER...

Page 10: ...tton A B button Directional arrow buttons up down left right for use in highlighting a selection on a GUI menu screen TITLE and MENU screen Press and hold button for about two seconds for search funct...

Page 11: ...liquid from the battery compartment then insert new batteries The batteries should last about one year with normal use This section shows you how to use the remote control Point the remote control at...

Page 12: ...s from the wall outlet before making any connections Connect the DVD player to your TV directly If you connect the DVD player to a VCR the playback picture will be distorted because DVD video discs ar...

Page 13: ...e the DVD player near a tuner or radio the radio broadcast sound might be distorted In this case move the DVD player away from the tuner and radio The output sound of the DVD player has a wide dynamic...

Page 14: ...olby Digital decoder or Dolby Digital processor Refer to the owner s manual of your audio equipment as well Before you connect the DVD player to other equipment be sure to turn off the power and unplu...

Page 15: ...s DVD player to an AV decoder that has the Dolby Digital decoding function High volume sound may damage your hearing as well as the speakers Refer to Selecting Digital Audio Output on page 39 Dolby Pr...

Page 16: ...is DVD player to a receiver equipped with a digital audio input and speaker system right and left front speakers Introducing DTS Digital SurroundTM the finest technology ever invented to transform exi...

Page 17: ...ps and returns to the menu screen When a menu screen appears on the TV screen In case of interactive DVDs with control a menu screen appears on the TV screen Perform step 5 on page 18 to start play 1...

Page 18: ...unction Keep your fingers well clear of the disc tray as it is closing Be especially careful with children s fingers around the closing disc tray as there is a risk of personal injury When appears on...

Page 19: ...g still playback Each time you press PAUSE STEP the picture advances one frame To resume normal playback press PLAY Skipping forward Press SKIP during playback A chapter DVD or a track CD is skipped e...

Page 20: ...isplay skip zoom slow skip play stop marker audio subtitle angle random program menu title setup return repeat a b clear search open close power pause step 1 2 3 4 5 6 0 7 8 9 select enter To Scan at...

Page 21: ...indicated by a yellow frame on its GUI menu icons Press F F G G to select the desired setting When numbers are displayed e g title number the numeric buttons can also be used for setting instead of F...

Page 22: ...SURROUND and to change the setting To show the current track number and to jump to the desired track number To show the elapsed time Display only To show the current audio STEREO LEFT RIGHT and to sel...

Page 23: ...The selected item is now executed 2 display zoom slow stop menu title setup return repeat a b pause step select enter 2 2 1 Using a DVD menu 1 2 display skip zoom slow skip play stop menu title setup...

Page 24: ...econds playback will start from the beginning of the title automatically Press F F G G to select Yes and press SELECT ENTER The memorized settings are automatically recalled Notes This unit stores in...

Page 25: ...ty language appears Notes Changing subtitle language 2 1 OFF 1 2 marker audio subtitle angle random program search open close power 1 2 3 1 ENG Changing audio soundtrack language It is possible to cha...

Page 26: ...TV surround sound and other surround effects when using this 3D surround effect For best 3D Surround effect using only two speakers it is recommended that the two speakers be positioned approximately...

Page 27: ...ogram play To return to normal play Press REPEAT several times until OFF is displayed Repeating sections between two specific points A B repeat Press A B during play at the point where repeat play is...

Page 28: ...ker Press SEARCH during playback Press D D E E F F G G to select the marker to be recalled cleared Press PLAY or SELECT ENTER to recall a marker Or press CLEAR to clear a marker Play resumes from the...

Page 29: ...re on the screen to either 4 times X4 or 16 times X16 its normal size Note This function only works with karaoke DVD and with audio CD discs Random does not work with DVD movies You can playback title...

Page 30: ...s in the programmed sequence If you press PROGRAM to exit the screen the selected tracks are not memorized After playback of all tracks programmed Play is stopped Clearing the program To clear the pro...

Page 31: ...AT button three times the repeat play will be cancelled REPEAT symbol The directory and file name is only displayed in English If there is an impossible code to display it will be displayed underlined...

Page 32: ...ear search open close power pause step 1 2 3 4 5 6 0 7 8 9 select enter 4 3 2 4 4 2 1 Program MP3 1 MP3 Clear All TRACK_1 TRACK_2 TRACK_3 TRACK_4 TRACK_5 TRACK_6 TRACK_7 TRACK_8 3 Program MP3 1 MP3 Cl...

Page 33: ...nu Language see page 38 Digital Audio Output see page 39 Others DRC Vocal see page 40 Press G G and then D D E E to select the desired setting and press SELECT ENTER Some items require additional step...

Page 34: ...e language selected is not available on the disc the original language designated by each disc will be selected This is to select the audio soundtrack language subtitle language and the language used...

Page 35: ...ating level described as above If you change the level and enter a password playback of all DVDs with ratings higher than your selection will be blocked unless the correct password is entered again Fo...

Page 36: ...password is entered To change clear memorized password At the SETUP screen press E E to select Password and press G G Input your password and press SELECT ENTER To change or clear your password press...

Page 37: ...ands appear at top and bottom of screen 4 3 Panscan Select when a conventional TV set is connected The video material formatted in the Pan Scan style is played back in that style the left and right ed...

Page 38: ...g Password TV Aspect Menu Language Progressive Digital Audio Output 5 1 Speaker Setup Others Disc Audio English Spanish French Disc Subtitle Disc Menu Rating Password TV Aspect Menu Language Progressi...

Page 39: ...nly or MD recorder or DAT deck 2 1 Disc Subtitle Disc Menu Rating Password TV Aspect Menu Language Progressive Digital Audio Output 5 1 Speaker Setup Others Disc Audio DOLBY DIGITAL PCM Stream PCM PCM...

Page 40: ...differ depending on the DVD disc When playing karaoke connect appropriate audio equipment such as an amplifier to the DVD video player 2 1 The DRC and Vocal settings can be changed Disc Subtitle Disc...

Page 41: ...577 Cambodian 7578 Kannada 7579 Korean 7583 Kashmiri 7585 Kurdish 7589 Kirghiz 7665 Latin Code Language 7678 Lingala 7679 Laothian 7684 Lithuanian 7686 Latvian Lettish 7771 Malagasy 7773 Maori 7775 Ma...

Page 42: ...n the DVD disc does not correspond to the Region number of this DVD player this DVD player cannot play that disc The Region number of this DVD player is 1 You may not be able to play back some DVD vid...

Page 43: ...yer There is an obstacle in the path of the remote control and the DVD player The batteries in the remote control are exhausted Correction Plug the power cord into the wall outlet securely Insert a di...

Page 44: ...IAJ Harmonic distortion audio 0 008 Wow and flutter Below measurable level less than 0 001 W PEAK EIAJ Operating conditions Temperature 41 F to 95 F Operation status Horizontal Video output 1 0 V p p...

Page 45: ...cessive rewinding Prolong the life of your video equipment with our rewinder ONLY 14 99 PLUS 6 95 SHIPPING HANDLING VHS TAPE REWINDER ZEN 901 Broken or lost remote Need a second remote or more functio...

Page 46: ...NOTES PAGE 46 NOTES...

Page 47: ...NOTES NOTES PAGE 47...

Page 48: ...your DVD Player and how to adjust the customer controls Carry In Service The video product must be taken to a U S or Canadian Zenith authorized service center for warranty service and must be picked...

Reviews: