41
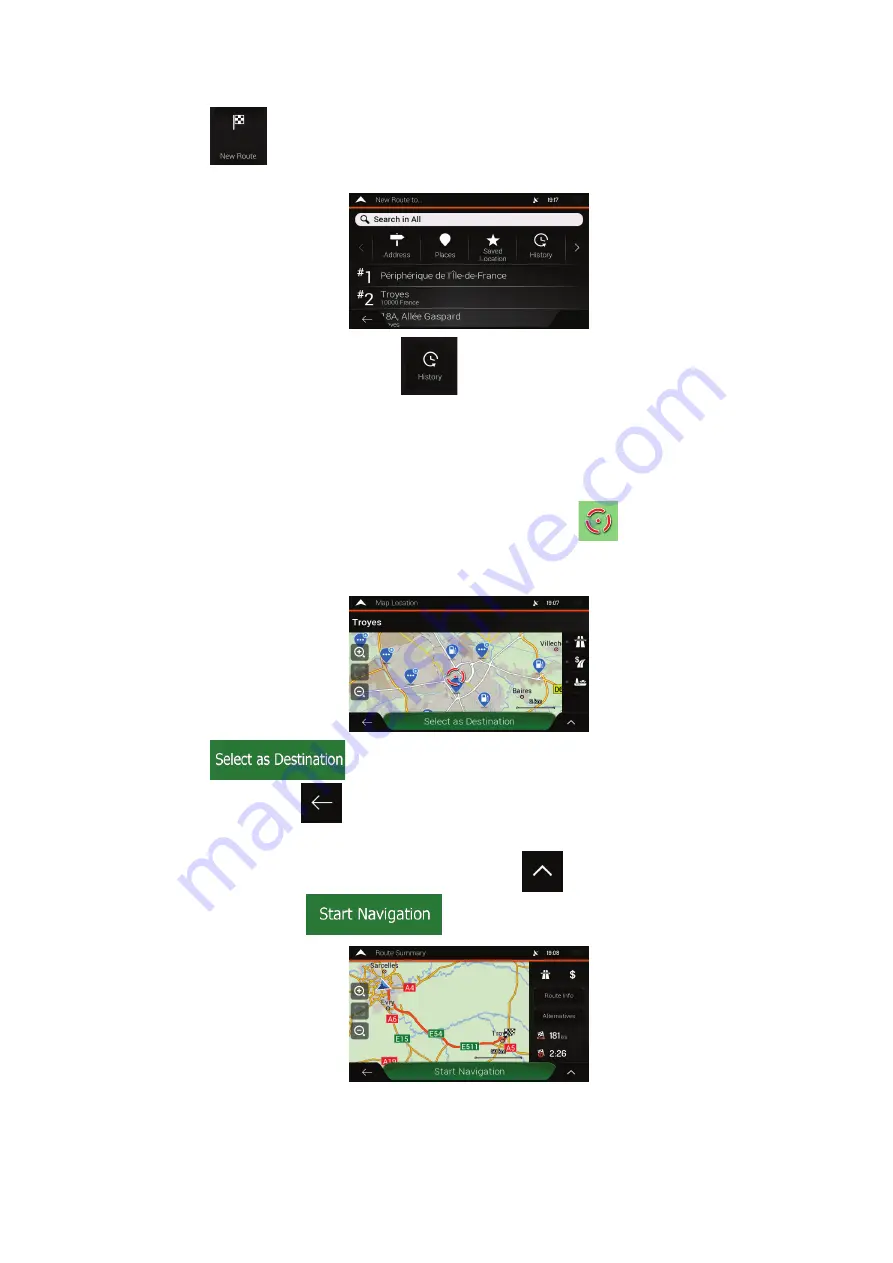
2. Tap
. Two of the Smart History Items are displayed in the New Route to...
screen for easy access. You can select one of them as your destination.
3. To open all the history items, tap
. The list of recent destinations appears. The
list begins with the three most likely destinations that are selected based on your
previous routes (Smart History). The rest of the destinations are ordered by the time
they were last selected. If necessary, scroll the list to see earlier destinations.
4. Select a destination from the list.
5. A full screen map appears with the selected point in the middle. If necessary, tap the
map somewhere else to modify the destination. The cursor (
) appears at the new
location.
6. Check the settings for road types and change them if necessary.
7. Tap
to confirm the destination. You can also select a nearby point
on the map or tap
to select a different destination.
8. The route is calculated and the map appears showing the entire route, where you can
check route information and route alternatives. Tap
to modify the route
parameters, or tap
to start your journey.


