

Carl Zeiss Ltd
[email protected]
01223 401450
Version 8.1
Page 234
G-30-1673-
en
Trouble Shooting
If the foot pedal has difficulties connecting, either use the cable provided to connect to the microscope directly, or in the Main Menu click on tab 2
and then system settings and click on the Pairing Icon.
The following may have been altered if you are having problems manoeuvring your microscope:
Blank screen. The
I
button may have been touched in error next to the on/off switch.
To return to a surgeon’s default setting, press the reset button situated above the overhead display.
To preserve the lamp life turn off the microscope by moving it upwards until it beeps. To turn on again just lower it slightly and it will turn on again.
Shut-down |
Turn off the microscope by the main power switch as before.
Version 8.1
Page 218
G-30-1673-
en
Version 8.1
Page 227
G-30-1673-
en
Version 8.1
G-30-1673-
en Page
203
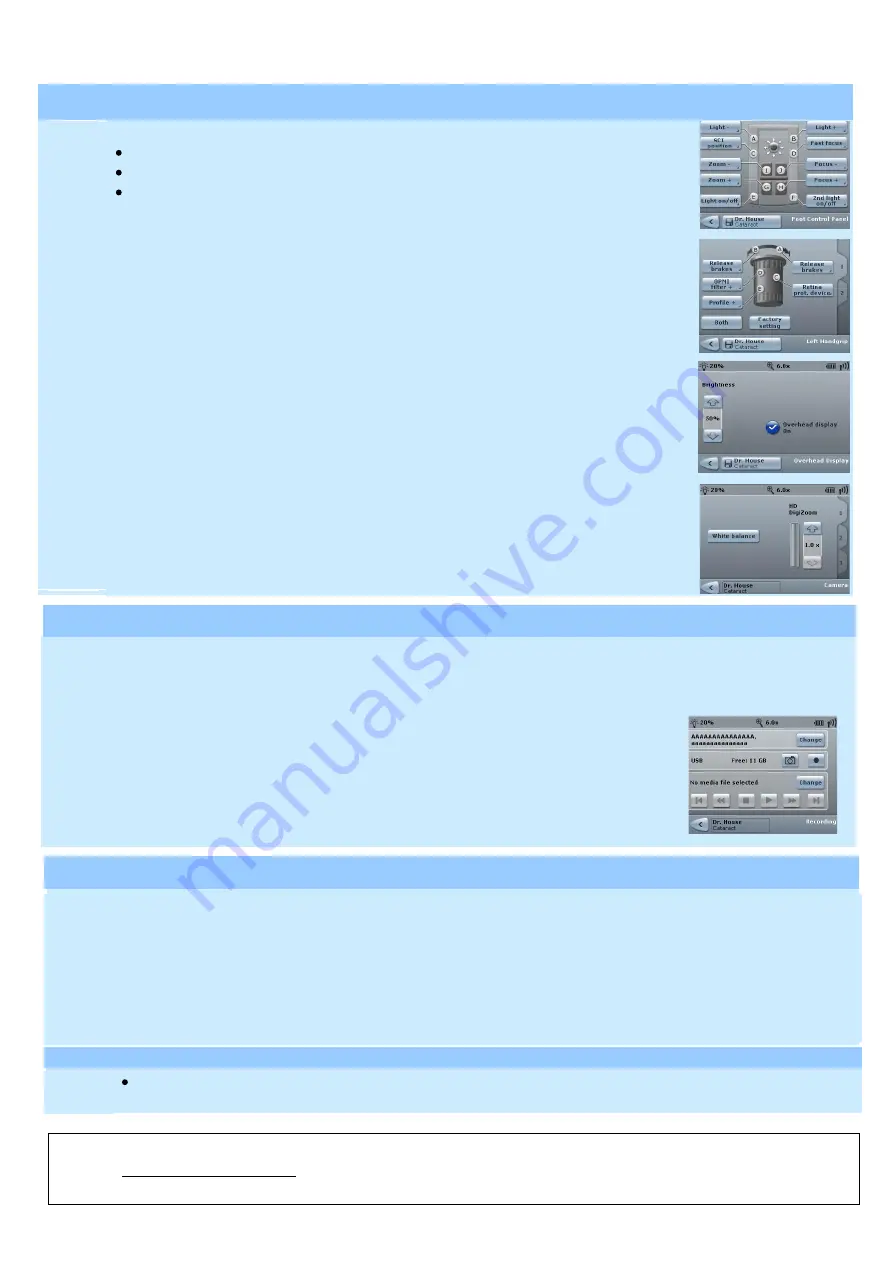
Foot Control Panel
In the Main Menu, open the Additional Settings, then select Foot Control Panel
Each button on the panel can then be clicked on and assigned a specific function.
Once the foot control panel has been optimized to the surgeon’s preferences, click the save icon at the bottom.
Hand Grip
In the Main Menu, open the Additional Settings, then select Handgrip
Each button on the panel can then be clicked on and assigned a specific function.
Once the handgrip has been optimized to the surgeon’s preferences, click the save icon at the bottom.
Overhead Display
In the Main Menu, open the Additional Settings, then select Overhead Display
Switch on Overhead Display and adjust brightness by using up and down arrows on left hand side.
Click Save Icon at the bottom
Camera Settings
In the Main Menu, click on the Camera Icon, then click on White Balance.
This creates a prompt for you to hold a plain white paper under the microscope to perform the white balance.
Tabs 2 and 3 of the camera page allow customization of brightness and colour values.
Configure (optional)
In the Main Menu, select tab 2 and click on System Settings. Then click on the Recording Icon. On this tab the image format can be changed
to JPG or Tiff. On tab 2 storage of recordings can be selected to USB or Network. Click save icon on the bottom after any changes made.
Recording
In order to record images or videos, click on the Recording Icon in the Main Menu.
Then click on the Change button on the top right corner to input patient details.
Lastly select image or video icon.
Video can then be controlled with the icons at the bottom.
Video Recording
Version
8.1 Page
214 G-
30-1673-
en


