03/06
9
•
Select the appropriate filters and activate the
channels.
•
Click the
Excitation
button to select the laser
lines and set the attenuation values
(transmission in %) in the displayed window.
For the configuration of the beam path, please
refer to the application-specific configurations
depending on the used dyes and markers and the
existing instrument configuration.
•
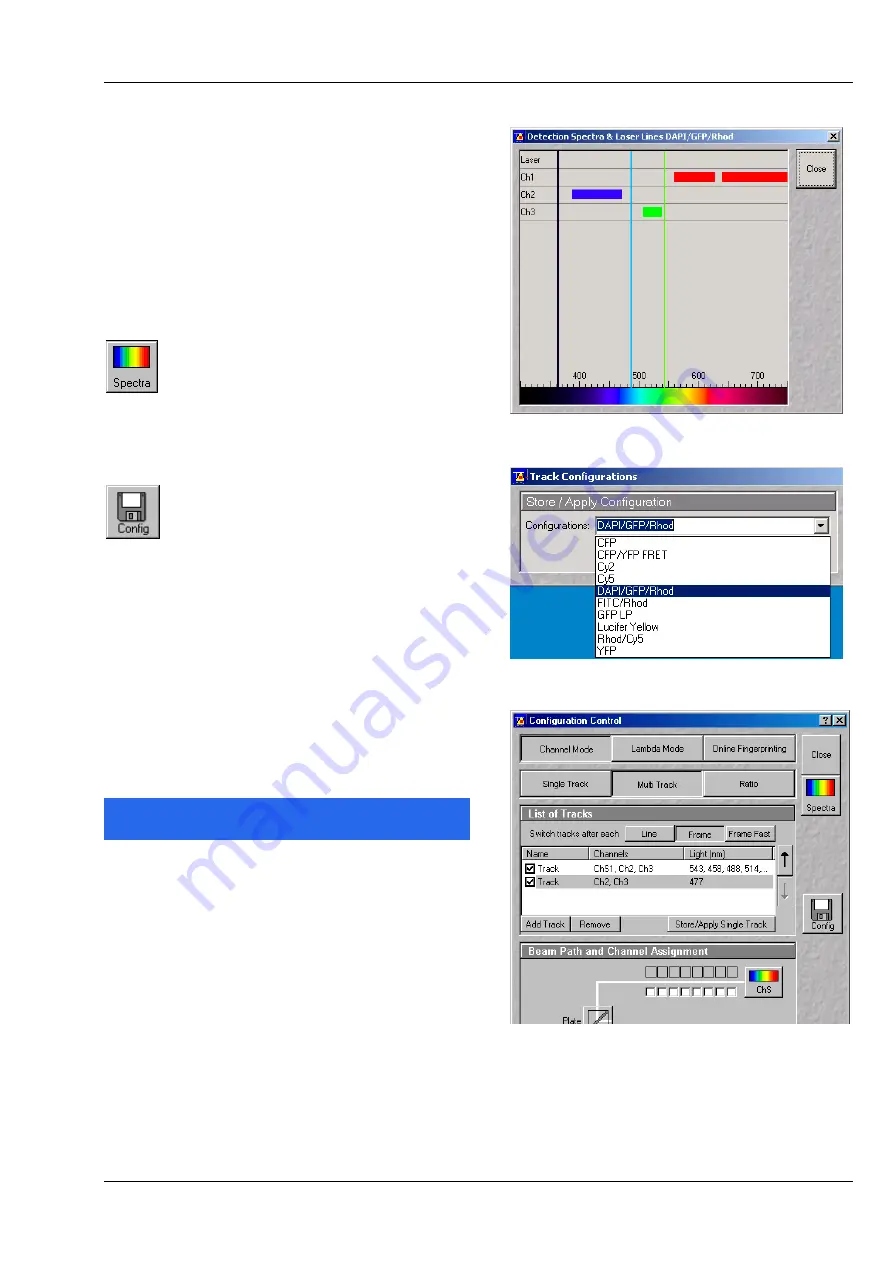
Clicking on the
Spectr
button
opens the
Detection Spectra &
Laser Lines …
window (Fig. 13) to
display the activated laser lines for
excitation (colored vertical lines) and
channels (colored horizontal bars).
•
Clicking on the
Config
button
opens the
Track Configurations
window (Fig. 14) to load, store or
delete track configurations.
•
For storing a new track configuration enter a
desired name in the first line of the
Configurations
list box and click an
Store
.
•
For loading an existing configuration select it in
the list box and click on
Apply
.
•
For deleting an existing configuration select it in
the list box and click on
Delete
.
Setting for multi track configuration in
Channel Mode
The
Multi Track
function permit several tracks to
be defined as one configuration (
Channel Mode
Configuration
) for the scan procedure, to be
stored under any name, reloaded or deleted.
The maximum of four tracks with up to 8 channels
can be defined simultaneously and then scanned
one after the other. Each track is a separate unit
and can be configured independently of the other
tracks with regard to channels, Acousto-Optical
Tunable Filters (AOTF), emission filters and dichroic
beam splitters.
•
Select
Channel Mode
if necessary (Fig. 15).
Fig. 13
Detection Spectra & Laser Lines …
window
Fig. 14
Track Configurations window
Fig. 15
Configuration Control window for
Multi Track


