OPERATION
Colibri 7
Controlling the Colibri 7 solid-state light source
ZEISS
02/2017
423052-7344-001
29
4.2.3.2
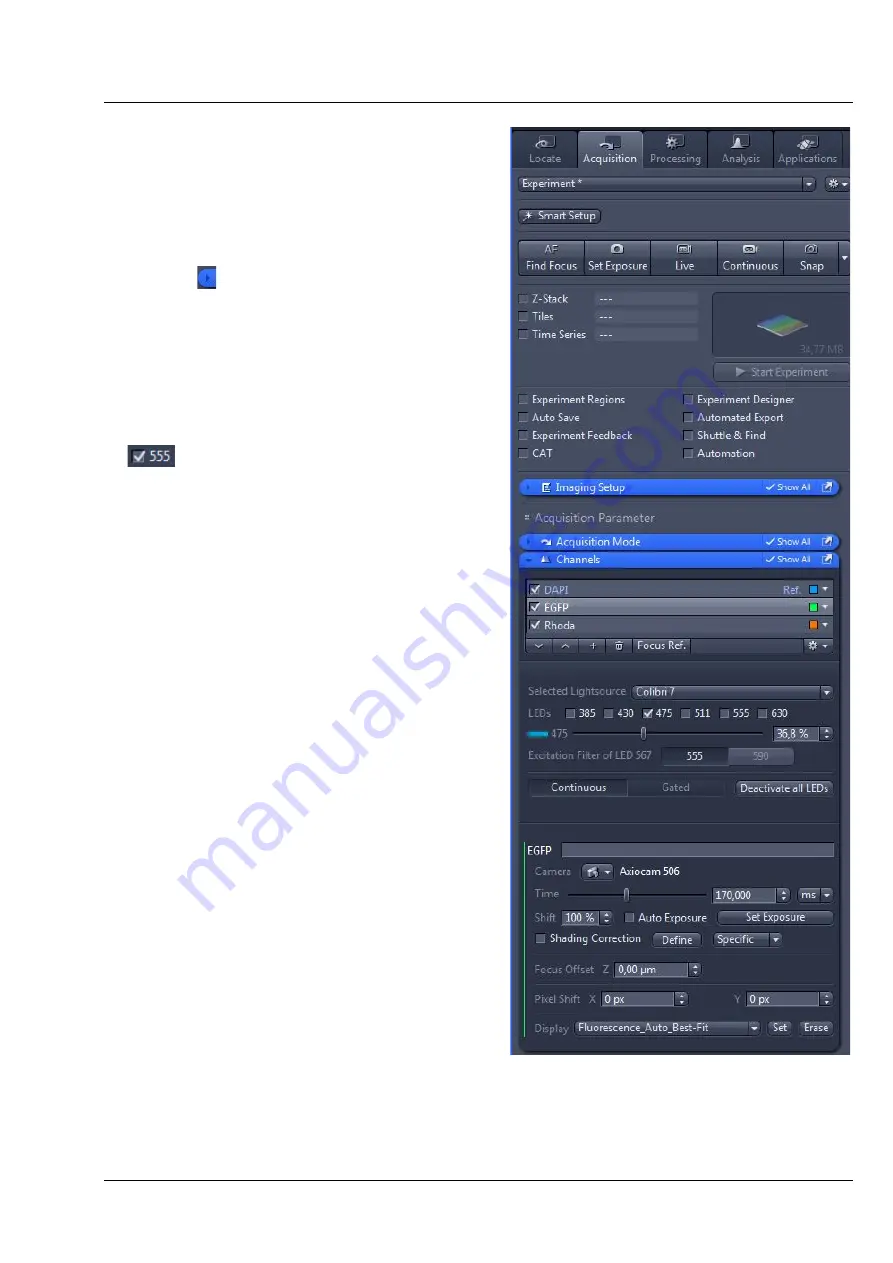
Control of Colibri 7 with the
"Channels" tool in the
"Acquisition" tab
•
Click on the
Acquisition
tab in the software
(see Fig. 19).
•
Open the
Channels
tool by clicking on the
expander .
•
Set the channels manually or via Smart Setup.
Alternatively, you can load a saved experiment.
•
If required, activate the
Show All
option.
•
If required, select Colibri 7 as light source in
Selected Lightsource
.
•
Switch the LEDs on or off by activating /
deactivating the respective checkbox, e.g.
.
•
Adjust the brightness for the selected wave
length using the sliders, entry fields or arrow
buttons.
•
Activate the excitation filter for LED 567 by
clicking on the
555
or
590
button at
Excitation
filter for LED 567
.
•
Select all LEDs simultaneously by clicking on
Deactivate all LEDs
or
Activate all LEDs
.
•
Click on
Continuous
or
Gated
to select the
desired mode for image acquisition.
Image acquisition in "Continuous" mode in
the "Acquisition" tab
Continuous
is the default setting for Colibri 7 in
the ZEN control software.
The camera and Colibri 7 are automatically
controlled via software commands. Manual
switching on or off is not necessary.
Image acquisition during the experiment: The LEDs
are shuttered between exposures via software
commands.
•
Select the required LEDs by clicking the
corresponding checkbox and set the desired
brightness.
•
Use the
Live
,
Continuous
or
Snap
buttons to
acquire images.
Fig. 19
Colibri 7 control via "Channels" tool


