Page 4 of 8
www.zeevee.com
v.08062013
Factory default settings in the product allow ZvPro Series modulators to broadcast up to two HD sources on RF channels
2 and 3 for reception at connected HDTVs.
1. Connect the power supply and apply AC power.
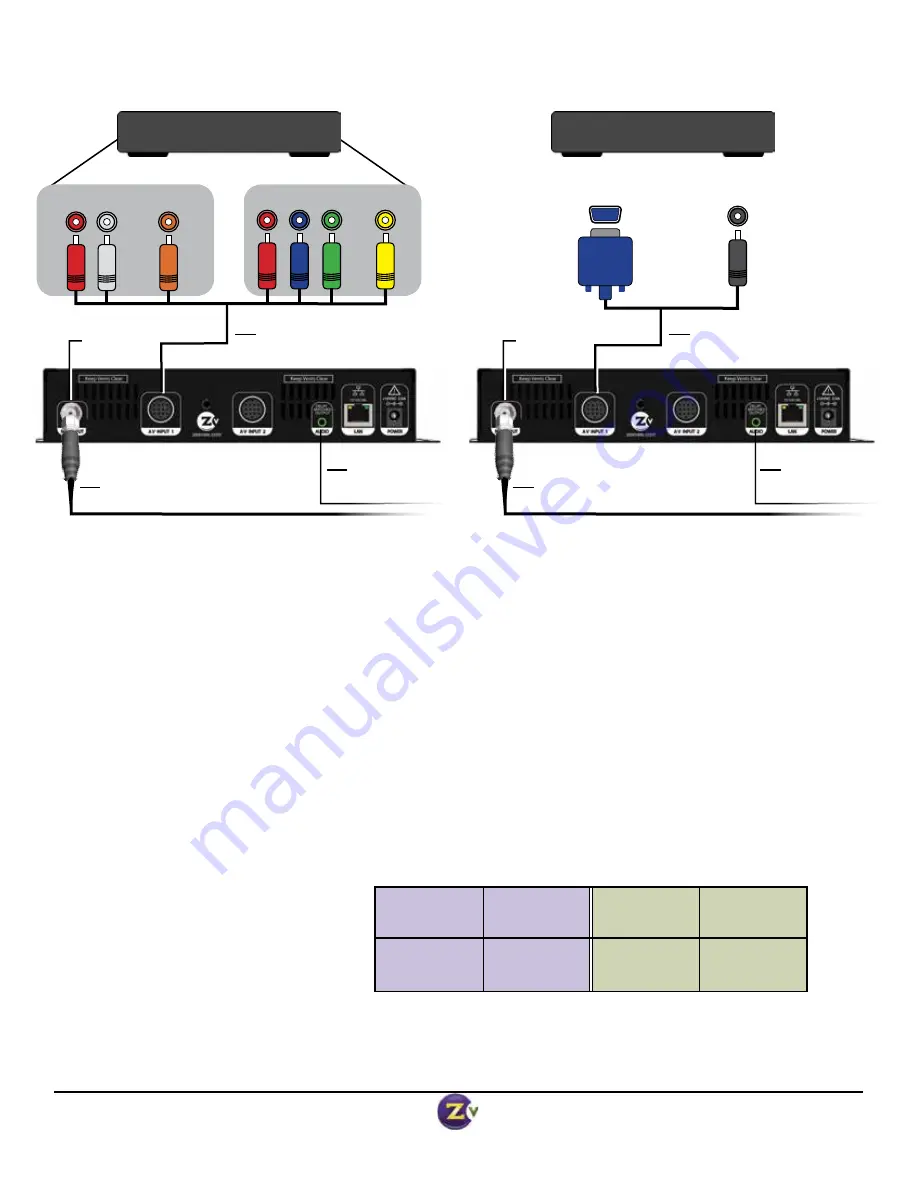
2. Using the Hydra
™
DIN connector cable*, connect the Component (Red/Green/Blue) Video connectors on the AV Cable
to the corresponding Video Outputs on your video source. Use the Composite (Yellow) connector for closed captioning.
Connect either the Digital (Orange) or Analog (Red/White) Audio connectors on the AV Cable to the Audio Outputs on
your video source. Connect the DIN to the AV Input on the ZVPro.
OR
Using the VGA DIN connector cable*, connect the VGA connector to the corresponding VGA Output on your video
source. Use the Analog Audio connector with the corresponding Audio Out port on the Video Source. Connect the
DIN to the AV Input port on the ZvPro.
3. Connect the RF Output of the ZvPro to your
RF network.
Default output power of the ZvPro is +25dBmV; it can
be increased to +45dBmV using the Maestro configuration interface.
4. Set the RF input on the TV to Cable Mode (not Air or Antenna).
5. Tune HDTVs to cable channels:
NOTE: Many TVs require a full
channel scan to find the channels.
6. Optional: Go to Advanced
Configuration in Maestro to set
up Delay Matched Audio.
*Note: Hydra Audio/Video and VGA cables are soldseparately and can be purchased from your distributor.
ZvPro
RF A
RF Channel
2
ZvPro
RF B
RF Channel
3
AV Input 1
HDTV
Channel
2.1
AV Input 2
HDTV
Channel
3.1
Basic Installation
Video Source
RF Output
Hydra Audio /
Video Cable
*
Audio Out
Composite
Video Out
Component
OR
f
or Close
d
Cap
tioning
Coax cable connects
to coax network
Connecting Component Video Source
Analog Audio cable
out to audio system
Analog
Digital
Video Source
RF Output
VGA DIN Cable
*
Coax cable connects
to coax network
Connecting VGA Video Source
Analog Audio cable
out to audio system
VGA
Video Out
Analog
Audio Out


