Installation
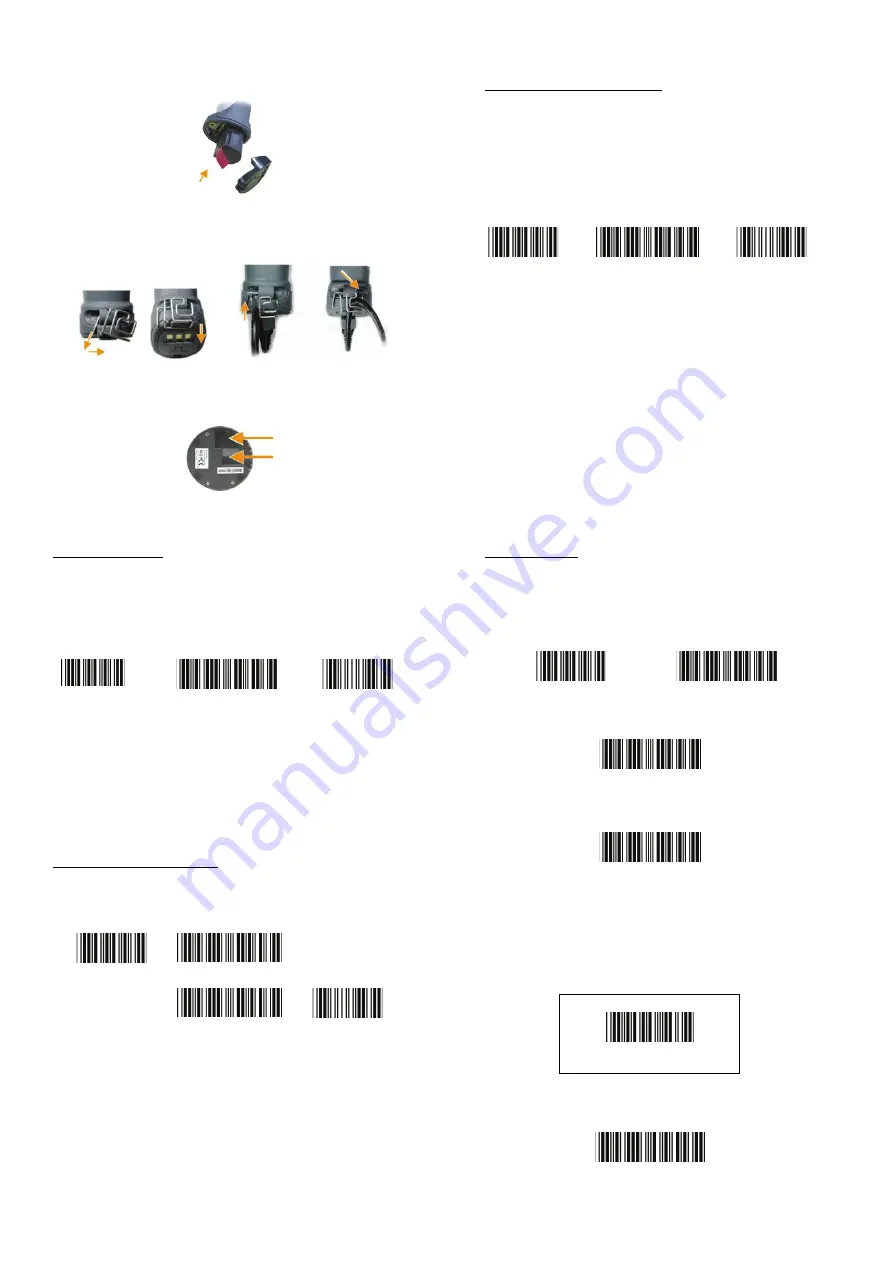
Battery
:
Unscrew
the
cap
to
install
battery.
Cable
clip
:
Attach
clip
by
pushing
and
turning
as
illustrated;
use
the
clasp
to
hold
the
cable.
Cradle
:
Connect
Mini
USB
cable
and
communication
cable
to
the
cradle
as
illustrated,
Pairing
the
Device
Cradle
Host
Mode
SPP
Client
Mode
(PC
as
Host)
In
this
mode,
the
scanner
is
discoverable
from
a
remote
device
and
it
can
request
the
scanner
for
connection.
There
are
several
ways
to
connect
the
wireless
scanner
to
your
PC.
Please
check
the
corresponding
guides
for
more
details
on
how
to
configure
your
host
device’s
wireless
connections.
1.
Turn
on
the
host
computer
and
activate
its
wireless
connection.
2.
Power
on
the
scanner
and
program
it
with
“SPP
Client
mode”
label.
Start
Scanner
SPP
Client
enable
End
3.
In
the
host
computer,
execute
the
discovering
procedure
and
find
the
scanner.
4.
Scanner
should
be
on
the
list
of
discoverable
devices.
The
default
name
of
the
scanner
is
“ZBBT”.
Select
“ZBBT”
and
click
“Next”.
5.
Select
“Let
me
choose
my
own
passkey”
and
enter
the
pin
code.
The
default
pin
code
is
“12345678”
(must
be
at
least
4
digits
and
not
more
than
8
numeric
digits).
6.
Click
“Next”
to
connect
the
scanner
to
the
host.
A
short
beep
should
be
heard
upon
connection.
SPP
Host
Mode
(Scanner
as
Host)
1.
Connect
the
cradle
and
the
computer
using
the
cables.
Please
make
sure
the
cradle
LED
is
flashing
blue
indicating
it’s
not
linked
to
any
scanner.
2.
Power
on
the
scanner
and
scan
the
following
barcodes:
Start
Of
Configuration,
Cradle
Host
mode
enable,
and
End
Of
Configuration
to
enable
Cradle
Host
mode.
Start
Cradle
Host
Mode
Communication
cable
Mini
USB
B
to
USB
power
End
3.
Scan
the
pairing
barcode
attached
at
the
bottom
of
the
cradle
to
begin
pairing.
3
short
beeps
will
be
heard.
4.
The
LED
indicator
on
the
scanner
will
flash
blue
rapidly
indicating
search
mode
in
progress.
LED
on
the
cradle
will
become
steady
blue
when
the
pairing
is
successful.
5.
To
set
the
host
interface
for
the
cradle,
scan
the
corresponding
barcode
label
found
in
the
System
Settings
in
the
User’s
Manual.
BT
HID/Smart
Phone
Mode
1.
Power
on
the
scanner
and
program
it
with
“BT
HID
Mode.”
To
connect
to
a
smart
phone
(ie.
iPhone,
Android),
the
Smart
phone
mode
must
also
be
enabled.
Start
BT
HID
mode
(default)
Smart
phone
mode
End
2.
Enable
wireless
discovery
on
your
smart
phone.
(see
your
phone’s
user’s
manual
for
instructions)
3.
The
scanner
should
be
on
the
list
of
discoverable
devices.
The
default
name
of
the
scanner
is
“ZBBT”.
Select
“ZBBT”
from
the
list
and
a
pin
code
will
appear
on
your
smart
phone.
4.
To
input
the
pin
code,
use
the
scanner
to
scan
the
barcodes
in
the
ASCII
table
found
in
the
previous
section.
For
example:
if
the
pin
code
is
“0111”,
scan
“0”,
“1”,
“1”,
“1”
from
the
ASCII
barcode
labels.
5.
Scan
the
Enter
barcode
in
the
ASCII
table
to
confirm.
6.
A
short
beep
should
be
heard
upon
connection.
In
this
mode,
the
scanner
initiates
the
connection
to
the
remote
device.
1.
Power
on
of
the
remote
device
and
have
its
address
ready
in
hand
and
make
it
discoverable.
2.
Program
the
scanner
with
the
“SPP
Host
enable”
barcode.
Start
Scanner
SPP Host
enable
3.
Scan
“Set
wireless
address”
to
set
the
address.
Set
wireless
address
(SPP
Host
only)
4.
Scan
“Set
wireless
address”
to
set
the
address.
Set
wireless
address
(SPP
Host
only)
5.
Use
the
ASCII
table
in
previous
section
to
input
the
12
digit
wireless
address.
For
example:
if
the
address
is
“011B1345600”,
scan
“0”,
“0”,
“1”,
“1”,
“B”,
“1”,
“3”,
“4”,
“5”,
“6”,
“0”,
“0”
from
ASCII
barcode
labels.
Or
scan
the
address
label
if
available.
6.
Scan
“Confirm
Setting”
to
store
the
address.
Confirm
Setting
(for
address
and
pin
code
setting
required)
7.
Setup
and
input
the
pin
code
if
necessary.
Scan
“Required
Pair
with
client
(SPP
Host)”
to
begin
pairing.
Required
Pair
with
client
(SPP
Host)


