


ZMCBR-H65
11
4.5.7 System Info
Main Menu-> Settings-> System Info
In this menu, you can get the information about the STB, such as Model ID, Hardware
& Software version, Load version and Date. When you need service from the dealer
you need to submit this information in order to get the correct and fast after sales
service.
4.6 Expansion
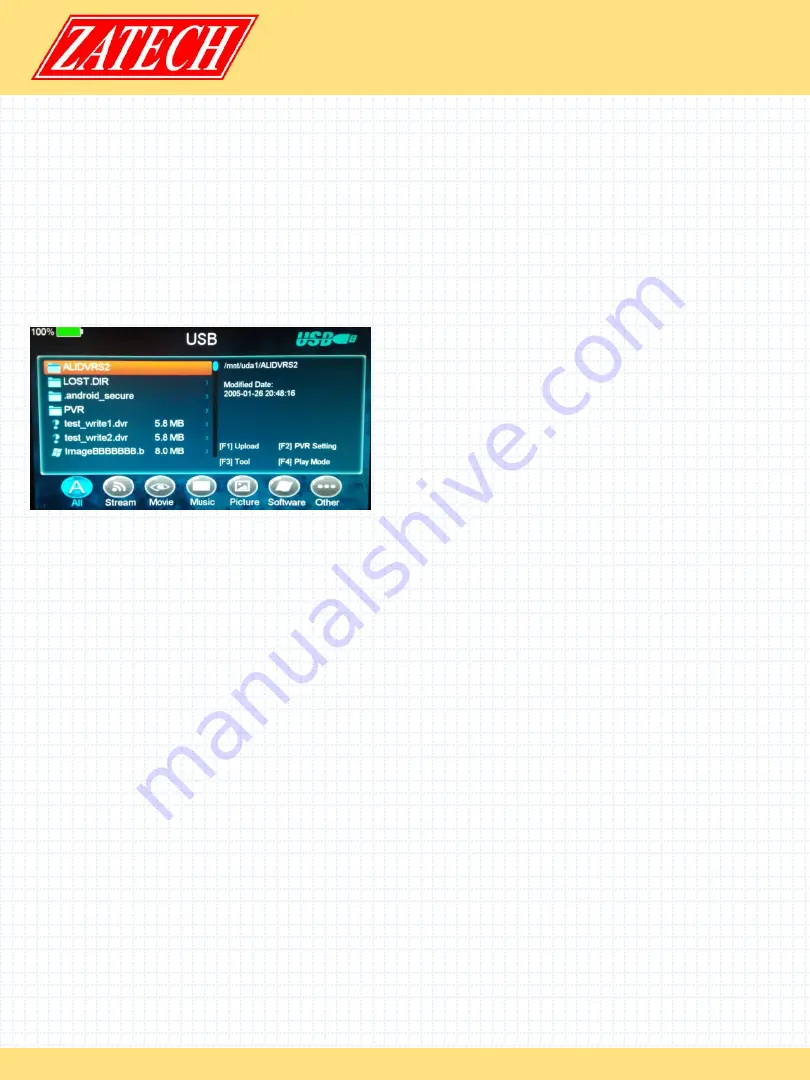
4.6.1 USB
Main Menu->
Expansion -> USB
In this menu, you can press the
t/u
key to
select the category that you like to play.
The media files are partitioned into all,
Stream, Movie, Music, Picture, Software and
other.
1. Upload
You can upload software or database.
2. PVR Setting
Ø
Record Partition
Select the Partition where save your record or other result of your operation.
Ø
Record Mode
Set the Record Mode Channel or Transponder.
Ø
Record Type
Set the Record Type TS or PS.
ØRecord Time
Set the Record Default Time off, 30, 60, 90, 120 minute or input number directly.
ØTimeshift Buffer Size (MB)
Set the Timeshift Buffer Size off, 100, 200, 400, 800, 1600, 3200, 6400MB.
Ø
Timeshift Need Save
Set the Timeshift if need to Save.
ØPlay Start Pos
When playing the PVR file, set the Play Start Pos whether head of the file or last pos
(Stop play by manual last time) of the file.
3. Tool
You can do various operations when using USB HDD or USB disk. In this menu, you can
Rename, Delete, Move, Copy, Create Folder, Sort and Format Disk.
files.


