C :
:
A ;%%4LLLL<-
%
+-%&#
+-%&#
A -E88F
84-EF8-
>.
8 -
>@ . -
A -%-
-+ +
/"..)"&%."
&
'
(
*
,
.
/
0
1
&3
&&
&'
&(
&*
&,
&.
&/
+
8 E8F8
! +
%
%
%
$=
#
:
!
#=
K
K
"
5
! 7
8
8 -
8 -
8 -
8 -=
8 -
8 -
8 -
8 -
8 -=
8 -
8 -
8 -
8 -
8 -
8 -
8 -
8 - 7
5 -
- -
- -
-;
<
0%*9&&&#
!
!
!
(!(
(!(
&))"#+&
1B)%+() "
&B
;&<
'8 -
;
<;'<
2"#%
2"#%
34
Massage Chair
Operating instructions
C :
:
A ;%%4LLLL<-
%
+-%&#
+-%&#
A -E88F
84-EF8-
>.
8 -
>@ . -
A -%-
-+ +
/"..)"&%."
&
'
(
*
,
.
/
0
1
&3
&&
&'
&(
&*
&,
&.
&/
+
8 E8F8
! +
%
%
%
$=
#
:
!
#=
K
K
"
5
! 7
8
8 -
8 -
8 -
8 -=
8 -
8 -
8 -
8 -
8 -=
8 -
8 -
8 -
8 -
8 -
8 -
8 -
8 - 7
5 -
- -
- -
-;
<
0%*9&&&#
!
!
!
(!(
(!(
&))"#+&
1B)%+() "
&B
;&<
'8 -
;
<;'<
2"#%
2"#%
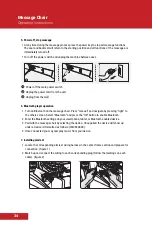
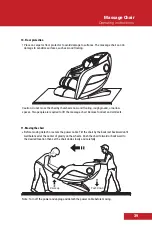
5. Power off, stop massage
At any time during the massage process press the power key to stop all massage functions.
The seat and backrest will return to the starting position and all functions of the massage are
immediately turned off.
Turn off the power switch and unplug the machine between uses.
6. Bluetooth player operation
1. Turn on Bluetooth on the massage chair. Press “manual” and navigate by pressing “right” to
the others screen. Select “Bluetooth” and press the “OK” button to enable Bluetooth.
2. Enter the Bluetooth settings on your smartphone, tablet, or Bluetooth enabled device.
3. Pair with the massage chair by selecting the device. Once paired the device will show up
under a device id formatted as follows: (IMCM-XXXX).
4. Once connected you may now play music from your device.
7. Installing armrest
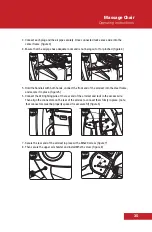
1. Locate the corresponding armrest wiring harness in the center frame section and prepare for
connection. (figure 1)
2. Match up and connect the wiring to each corresponding plug (follow the markings on each
cable). (figure 2).
Power off the main power switch
Unplug the power cord from the unit
Unplug from the wall

