background image

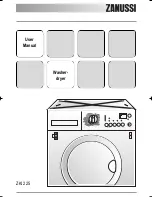
User

Manual

Washer-

dryer

95°

95° 60°

60°

60°

60°

40°

40°

30°

30°

40°

40°

30°

30°

40°

40°

40°

40°

40°

40°

30°

30°

30°

30°

30°

30°

60°

60°

40°

40°

eco

eco

Anti-kr

Anti-kreuk

euk

40°

40°

W

Wol

ol

Spor

Sportt

intensief

intensief

40°

40°

Handw

Handwas

as

Handw

Handwas

as

Gor

Gordijnen

dijnen

Inw

Inwek

eken

en

Spoelen

Spoelen

PPompen

ompen

Centr

Centrifuger

ifugeren

en

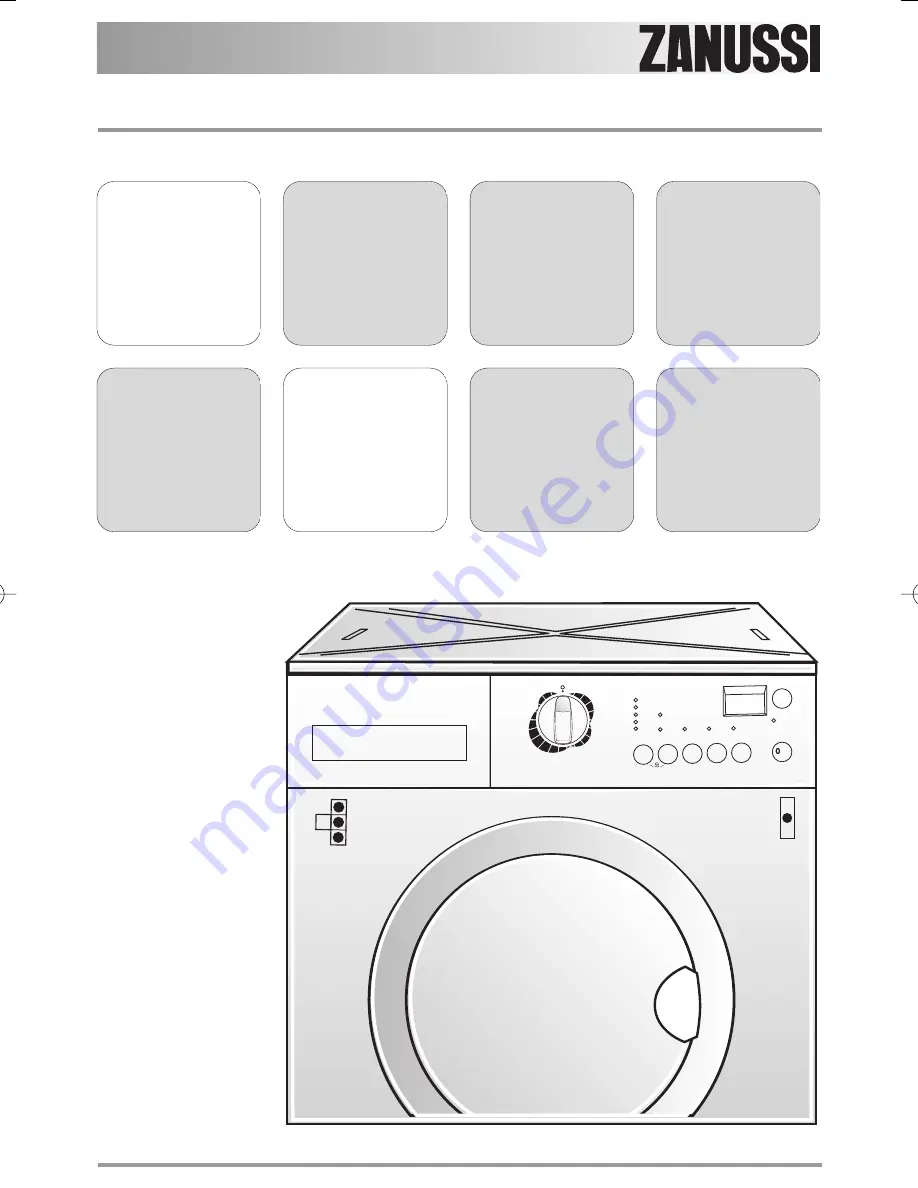
ZKI 225

132956230.qxd  26/01/2009  8.32  Pagina  1

Summary of Contents for ZKI 225

Page 1: ...40 40 40 40 40 30 30 30 30 30 30 60 60 40 40 eco eco Anti kr Anti kreuk euk 40 40 W Wol ol Spor Sport t intensief intensief 40 40 Handw Handwas as Handw Handwas as Gor Gordijnen dijnen Inw Inwek eken en Spoelen Spoelen P Pompen ompen Centr Centrifuger ifugeren en ZKI 225 ...

Page 2: ...ironmental concerns 31 Thank you for selecting our appliance We wish you lots of enjoyment with your new appliance and we hope that you will consider our brand again when purchasing household appliances Please read this user manual carefully and keep it throughout the product life cycle as a reference document The user manual should be passed on to any future owner of the appliance The following s...

Page 3: ...en the tub and the inner drum Do not use your washer dryer to wash articles with whalebones material without hems or torn material Always unplug the appliance and turn off the water supply after use clean and maintenance Under no circumstances should you attempt to repair the machine yourself Repairs carried out by inexperienced persons may cause injury or serious malfunctioning Contact your local...

Page 4: ...n washed in water or require airing Plastic detergent dispensers should not remain in the drum during the drying cycle as the plastic used is not designed to withstand the heat If you wish to wash through to dry you should use the conventional detergent dispenser drawer Never pull the power supply cable to remove the plug from the socket always take hold of the plug itself Never use the washer dry...

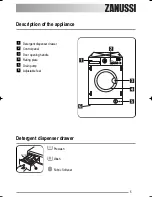
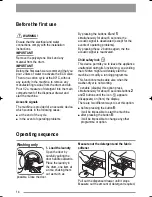
Page 5: ...5 Description of the appliance Detergent dispenser drawer Prewash Wash Fabric Softener Detergent dispenser drawer Control panel Door opening handle Rating plate Drain pump Adjustable feet 6 5 4 3 2 1 ...

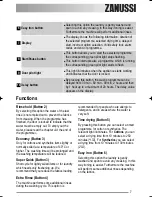
Page 6: ...sing this button you can select only one of the following options ECONOMY or SUPER QUICK The relevant light will light up Extra Rinse button By pressing this button the machine performs some additional rinses The corresponding pilot light illuminates 1 2 Drying Time button By pressing this button you can select a timed drying programme for cotton or synthetics the relevant phase light illuminates ...

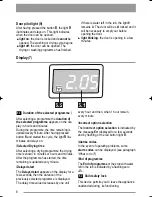
Page 7: ...from creasing When the programme has finished the door is locked to indicate that the water must be empty out To empty out the water please read the chapter At the end of the programme Economy Button 3 Only for cottons and synthetics items lightly or normally soiled at a temperature of 40 C or higher The washing time will be prolonged and the washing temperature will be reduced Super Quick Button ...

Page 8: ...ct option selection is indicated by the message Err displayed for a few seconds and by flashing of the red button light 8 Alarme codes In the event of operating problems some alarm codes can be displayed see paragraph What to do if End of programme The End of programme or the stop with water left in the tub is indicated by a flashing zero 0 Child safety lock This device permits you to leave the ap...

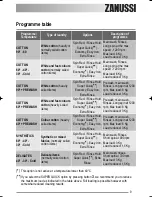
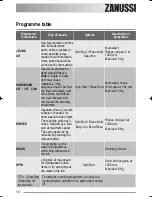
Page 9: ...e Hold Super Quick Economy Easy Iron Extra Rinse Main wash Rinses Long spin at the max speed 1200 rpm Max load 6 Kg Load reduced 3 Kg COTTON 60 PREWASH White and fast colours cotton heavily soiled items Spin Red Rinse Hold Super Quick Economy Easy Iron Extra Rinse Prewash main wash Rinses Long spin at 1200 rpm Max load 6 Kg Load reduced 3 Kg COTTON 40 PREWASH Colour cotton heavily soiled items Spi...

Page 10: ...nse Hold Easy Iron Extra Rinse Rinses long spin at 1200 rpm Max load 6 Kg DRAIN For emptying out the water in programmes which stop with water in the tub Draining of water SPIN Long spin at max speed for handwashed cotton items or for emptying out the water in the tub Drain and long spin at 1200 rpm Max load 6 Kg O Cancelling Switching off the machine To interrupt a running programme to cancel an ...

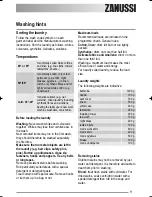
Page 11: ...te fabrics and woollens drum no more than one third full Washing a maximum load makes the most efficient use of water and energy For heavily soiled laundry reduce the load size Laundry weights The following weights are indicative Removing stains Stubborn stains may not be removed by just water and detergent It is therefore advisable to treat them prior to washing Blood treat fresh stains with cold...

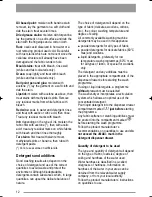
Page 12: ...iodegradable detergents contain substances which in large quantities can upset the delicate balance of nature The choice of detergent will depend on the type of fabric delicates woollens cottons etc the colour washing temperature and degree of soiling All commonly available washing machine detergents may be used in this appliance powder detergents for all types of fabric powder detergents for deli...

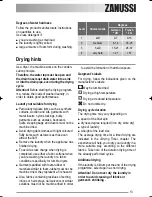
Page 13: ...less detergent if you are washing a small load the laundry is lightly soiled large amounts of foam form during washing As a dryer the machine works on the conden sation principle Therefore the water tap must be open and the drain hose must drain water into a sink or into the drain pipe even during the drying cycle Attention Before starting the drying program me reduce the loads of washed laundry i...

Page 14: ...ressing these 2 buttons again the the acoustic signal is reactivated Child safety lock This device permits you to leave the appliance unattended during its functionning so avoiding that children might accidentally start the machine or modify a running programme This function remains able also when the washer dryer is not working To enable disable this option press simultaneously for about 6 second...

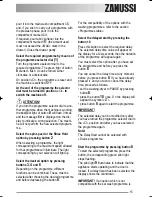
Page 15: ...e different functions can be combined These must be selected after choosing the desired programme and before depressing the button 8 For the compatibility of the options with the washing programmes refer to the section Programmes table Select the delayed start by pressing the button 10 Press this button to select the required delay The selected delay time value will appear on the display for a few...

Page 16: ...ened Pay attention to the water level and temperature After this procedure it will be necessary to set the programme and the options again and then to depress button 8 At the end of the programme The machine stops automatically Some acoustic signals sound and on the display will appear a flashing 0 The light of button 8 and the light 9 go off The door can be opened If at the end of a programme the...

Page 17: ...t it press any key or turn the programme selector dial to any programme position except O The door can be opened in a few minutes 6 Turn the selector dial to the O position to switch the machine off Remove the laundry Autodrying For NON STOP programmes the recommended load size is 3 kg for cotton and 2 kg for synthetics Note It is possible also to dry up to 4 kg of cotton items see the drying time...

Page 18: ...tc 4 kg 3 kg 1 5 kg 4 kg 1200 1200 1200 1200 1200 1200 170 190 110 120 75 85 140 160 90 100 60 70 Time Drying table Note The different type of cottons towelling sheets shirts and so on or eventual laundry rolling up during spinning phase may cause a not uniform dryness So in the exceptional case that at the end of the cycle the laundry remains slightly wet we suggest you to stretch the items rolle...

Page 19: ...nly and then dry thoroughly Cleaning the dispenser drawer The washing powder and additive dispenser drawer should be cleaned regularly To aid cleaning the top part of the additive compartment should be removed Remove the drawer by pressing the catch downwards and by pulling it out Flush it out under a tap to remove any traces of accumulated powder Cleaning the drawer recess Having removed the draw...

Page 20: ...le brush Tighten up the inlet hose The dangers of freezing If the machine is exposed to temperatures below 0 C certain precautions should be taken Turn off the water tap Unscrew the inlet hose Place the end of the emergency emptying hose and that of the inlet hose in a bowl placed on the floor and let water drain out Screw the water inlet hose back on and reposition the emergency emptying hose aft...

Page 21: ...0 Open the water tap The inlet hose is squashed or kinked E10 Check the inlet hose connection The filter in the inlet hose is blocked E10 Clean the water inlet hose filter The door is not properly closed E40 Close the door firmly What to do if IMPORTANT Certain problems are due to lack of simple maintenance or oversights which can be solved easily without calling out an engineer Before contacting ...

Page 22: ... another one Check whether there are any leaks from one of the inlet hose fittings It is not always easy to see this as the water runs down the hose check to see if it is damp Check the water inlet hose connection The inlet or the drain hose is damaged Replace it with a new one The cap on the emergency emptying hose has not been replaced after cleaning the pump Refit the cap on the emergency empty...

Page 23: ...aundry is not evenly distributed in the drum The laundry is redistributed by reverse rotation of the drum This may happen several times before the unbalance disappears and normal spinning can resume If after 10 minutes the laundry is still not evenly distributed in the drum the machine will not spin In this case redistribute the load manually and select the spin programme Redistribute the laundry ...

Page 24: ...200 rpm Electrical connection Voltage Overall power Fuse Information on the electrical connection is given on the rating plate on the inner edge of the appliance door The machine does not dry or does not dry properly The drying time has not been selected Select the drying time The water tap is not turned on E10 Open the water tap The drain filter is clogged E20 Clean the drain filter The machine i...

Page 25: ...onsumption data shown on this chart is to be considered purely indicative as it may vary depending on the quantity and type of laundry on the inlet water temperature and on the ambient temperature It refers to the highest temperature for each wash programme The Cotton 60 the option Economy selected with a load of 6 kg is the reference programme for the data entered in the energy label in complianc...

Page 26: ...oms where the temperature can drop below 0 The water inlet hose and the drain hose must not be kinked Please ensure that when the appliance is installed it is easily accessible for the engineer C C E D in the event of a breakdown Carefully level by screwing the adjustable feet in or out Never place cardboard wood or similar materials under the machine to compensate for any unevenness in the floor ...

Page 27: ...0 40 Eco Silk 40 50 40 Mini 30 Hand Wash Cold 30 Drain Spin Wool Cottons Synthetics Easy Iron 40 Start Pause Wash Door End Extra Rinse Options Spin 1000 900 700 Prewash Intensive Super Quick 3h 6h 9h U piece supplied The drain hose may be extended to a maximum of 4 metres An additional drain hose and joining piece is available from your local Service Force Centre The joining piece must have an int...

Page 28: ...ctrical connection is given on the rating plate on the inner edge of the appliance door The appliance is supplied with a 13amp plug fitted In the event of having to change the fuse in the plug supplied a 13amp ASTA approved BS1363 A fuse must be used Should the plug need to be replaced for any reason proceed as described below The wires in the mains lead are coloured in accordance with the followi...

Page 29: ...14 depth 16 22 B C 22 1 5 595 598 416 C 4 1 2 3 6 1 2 3 5 7 8 B 820 min 600 min 600 596 416 176 5 818 541 195 490 160 120 90 8 515 165 A 600 The distance B from upper edge of the door to the centre of the hole depends on the adja cent furniture s dimensions The required dimensions are given in the pic ture C The hinges will be fixed to the door by means of screws for wood 2 Fig B supplied with the...

Page 30: ...ing holes see Fig G Position the base into the recess with its front edge as far forward as the adjoining plinth line will allow 600 605 mm 50 mm Front edge Top view 95 mm 490 mm G 600 605 mm Front view 5 mm Hardwood strip Additional pieces of timber should run from front to back 100 mm 40 mm F The reason for placing the base in this posi tion is to allow a small strip of beading to be fitted in f...

Page 31: ...negative consequences for the environment and human health which could otherwise be caused by inappropriate waste handling of this product For more detailed information about recycling of this product please contact your local city office your household waste disposal service or the shop where you purchased the product Ecological hints To save water energy and to help protect the environment we re...

Page 32: ...www electrolux com Subject to change without notice 132 956 230 00 092009 www zanussi electrolux co uk ...

Reviews: