background image

Disconnect the mains plug from the mains

socket.

• Make sure the appliance is cold. There is the

risk that the glass panels can break.

• Replace immediately the door glass panels

when they are damaged. Contact the

Authorised Service Centre.

• Be careful when you remove the door from the

appliance. The door is heavy!

• Fat and food remaining in the appliance can

cause fire.

• Clean regularly the appliance to prevent the

deterioration of the surface material.

• Make sure the cavity and the door are wiped dry

after each use. Steam produced during the

operation of the appliance condensates on

cavity walls and can cause corrosion. To

decrease the condensation operate the

appliance for 10 minutes before cooking.

• Clean the appliance with a moist soft cloth. Use

only neutral detergents. Do not use abrasive

products, abrasive cleaning pads, solvents or

metal objects.

• If you use an oven spray, follow the safety

instructions on the packaging.

• Do not clean the catalytic enamel (if applicable)

with any kind of detergent.

INTERNAL LIGHTING

WARNING! Risk of electric shock.

• The type of light bulb or halogen lamp used for

this appliance is for household appliances only.

Do not use it for house lighting.

• Before replacing the lamp, disconnect the

appliance from the power supply.

• Use only lamps with the same specifications.

SERVICE
• To repair the appliance contact the Authorised

Service Centre.

• Use original spare parts only.

DISPOSAL

WARNING! Risk of injury or

suffocation.

• Disconnect the appliance from the mains

supply.

• Cut off the mains electrical cable close to the

appliance and dispose of it.

• Remove the door catch to prevent children or

pets from becoming trapped in the appliance.

INSTALLATION

WARNING! Refer to Safety chapters.

TECHNICAL DATA

Dimensions

Height

894 - 912 mm

Width

600 mm

Depth

600 mm

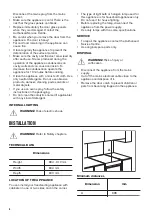
LOCATION OF THE APPLIANCE
You can install your freestanding appliance with

cabinets on one or two sides and in the corner.

A

Minimum distances

Dimension

mm

A

685

6

Summary of Contents for ZCV69360WA

Page 1: ...GETTING STARTED EASY User Manual ZCV69360WA ZCV69360BA ZCV69360XA EN User Manual Cooker ...

Page 2: ... physical sensory or mental capabilities or lack of experience and knowledge if they have been given supervision or instruction concerning the use of the appliance in a safe way and understand the hazards involved Children between 3 and 8 years of age and persons with very extensive and complex disabilities shall be kept away from the appliance unless continuously supervised Children of less than ...

Page 3: ...h off the appliance and then cover flame e g with a lid or a fire blanket CAUTION The cooking process has to be supervised A short term cooking process has to be supervised continuously WARNING Danger of fire Do not store items on the cooking surfaces Do not use a steam cleaner to clean the appliance Do not use harsh abrasive cleaners or sharp metal scrapers to clean the glass door or the glass of...

Page 4: ... guards can cause accidents SAFETY INSTRUCTIONS INSTALLATION WARNING Only a qualified person must install this appliance Remove all the packaging Do not install or use a damaged appliance Follow the installation instructions supplied with the appliance Always take care when moving the appliance as it is heavy Always use safety gloves and enclosed footwear Do not pull the appliance by the handle Th...

Page 5: ... surface or as a storage surface WARNING Risk of fire and explosion Fats and oil when heated can release flammable vapours Keep flames or heated objects away from fats and oils when you cook with them The vapours that very hot oil releases can cause spontaneous combustion Used oil that can contain food remnants can cause fire at a lower temperature than oil used for the first time Do not put flamm...

Page 6: ... spray follow the safety instructions on the packaging Do not clean the catalytic enamel if applicable with any kind of detergent INTERNAL LIGHTING WARNING Risk of electric shock The type of light bulb or halogen lamp used for this appliance is for household appliances only Do not use it for house lighting Before replacing the lamp disconnect the appliance from the power supply Use only lamps with...

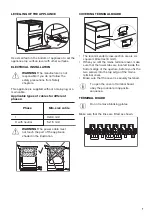
Page 7: ...tral 5x1 5 mm WARNING The power cable must not touch the part of the appliance shaded in the illustration COVERING TERMINAL BOARD The recommended cross section area is six square millimetres 6 mm When you refit the mains terminal cover make sure that the lower tabs are located inside the bottom edge of the aperture before you fix the two screws into the top edge of the mains terminal cover Make su...

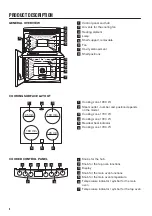
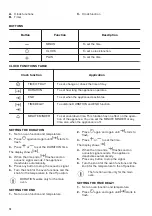
Page 8: ...45 mm 180 mm 1 3 4 5 6 2 1 Cooking zone 1200 W 2 Steam outlet number and position depends on the model 3 Cooking zone 1700 W 4 Cooking zone 1200 W 5 Residual heat indicator 6 Cooking zone 1700 W COOKER CONTROL PANEL 6 7 1 2 5 4 3 1 1 Knobs for the hob 2 Knob for the top oven functions 3 Display 4 Knob for the main oven functions 5 Knob for the main oven temperature 6 Temperature indicator symbol f...

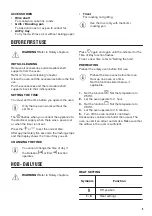
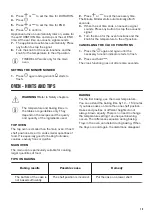
Page 9: ...the timer is not set Press the or to set the correct time After approximately five seconds the flashing stops and the display shows the time of day you set CHANGING THE TIME You cannot change the time of day if the Duration or End function operates Press again and again until the indicator for the Time of Day function flashes To set a new time refer to Setting the time PREHEATING Preheat the empty...

Page 10: ...m Heat set ting Application 2 Gentle simmering 3 Simmering 4 Frying browning 5 Bringing to the boil 6 Bringing to the boil quick frying deep frying HOB CARE AND CLEANING WARNING Refer to Safety chapters GENERAL INFORMATION Clean the hob after each use Always use cookware with a clean base Scratches or dark stains on the surface have no effect on how the hob operates Use a special cleaner suitable ...

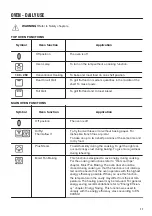
Page 11: ...shelf positions at the same time and to dry food Plus Steam To add humidity during the cooking To get the right col our and crispy crust during baking To give more juiciness during reheating Moist Fan Baking This function is designed to save energy during cooking For the cooking instructions refer to Hints and tips chapter Moist Fan Baking The oven door should be closed during cooking so that the ...

Page 12: ... the cavity embossment with tap water The maximum capacity of the cavity embossment is 250 ml Fill the cavity embossment with water only when the oven is cold 3 Turn the knob for the function Plus Steam 4 Turn the knob for the temperature to select a temperature 5 Put food in the appliance and close the oven door CAUTION Do not refill the cavity embossment with water during cooking or when the ove...

Page 13: ...s of meat or poultry on one shelf position 1 Put the trivet into the deep pan so that the supports of the wire shelf point up 2 Put the deep pan into the oven on the necessary shelf position You can use the trivet to grill flat dishes in large quantities and to toast 1 Put the trivet into the deep pan so that the supports of the wire shelf point down 2 Put the deep pan into the oven on the necessa...

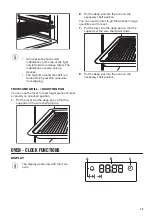
Page 14: ...flash 3 Press or to set the DURATION time The display shows 4 When the time ends flashes and an acoustic signal sounds The appliance deactivates automatically 5 Press any button to stop the acoustic signal 6 Turn the knob for the oven functions and the knob for the temperature to the off position DURATION works only for the main oven SETTING THE END 1 Set an oven function and temperature 2 Press a...

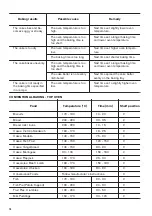
Page 15: ...old The clock function goes out after some seconds OVEN HINTS AND TIPS WARNING Refer to Safety chapters The temperature and baking times in the tables are guidelines only They depend on the recipes and the quality and quantity of the ingredients used TOP OVEN The top oven is smaller than the main oven It has 3 shelf positions Use it to cook smaller quantities of food It is especially good for baki...

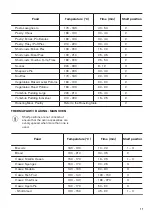
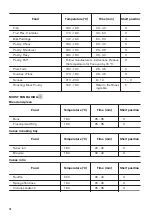
Page 16: ...istributed Next time spread the cake batter evenly on the baking tray The cake is not ready in the baking time specified in a recipe The oven temperature is too low Next time set a slightly higher oven temperature CONVENTIONAL BAKING TOP OVEN Food Temperature C Time min Shelf position Biscuits 170 190 10 20 2 Bread 200 220 30 35 2 Bread rolls buns 200 220 10 15 2 Cakes Victoria Sandwich 160 170 18...

Page 17: ...egetables Roast Potatos 180 190 60 90 2 Yorkshire Pudding Large 220 210 25 40 2 Yorkshire Pudding Individual 210 220 15 25 2 Roasting Meat Poultry Refer to the Roasting table 2 THERMAFLOW BAKING MAIN OVEN Shelf positions are not critical but ensure that the oven accessories are evenly spaced when more than one is used Food Temperature C Time min Shelf position Biscuits 180 190 10 20 1 3 Bread 190 ...

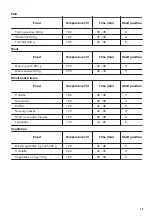
Page 18: ... 3 Plate Tarts 180 190 25 45 3 Quiches Flans 170 180 25 45 3 Scones 210 230 8 12 1 3 Roasting Meat Poultry 160 180 Refer to the Roast ing table 2 MOIST FAN BAKING Bread and pizza Food Temperature C Time min Shelf position Buns 180 25 35 3 Frozen pizza 350 g 190 25 35 3 Cakes in baking tray Food Temperature C Time min Shelf position Swiss roll 180 20 30 3 Brownie 180 30 40 3 Cakes in tin Food Tempe...

Page 19: ... 25 35 3 Meat skewers 500 g 200 30 40 3 Small baked items Food Temperature C Time min Shelf position Cookies 180 25 35 3 Macaroons 160 25 35 3 Muffins 180 25 35 3 Savoury cracker 170 20 30 3 Short crust pastry biscuits 150 25 35 3 Tartelettes 170 15 25 3 Vegetarian Food Temperature C Time min Shelf position Mixed vegetables in pouch 400 g 180 25 35 3 Omelette 200 20 30 3 Vegetables on tray 700 g 1...

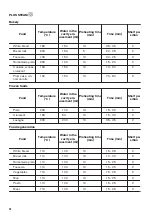
Page 20: ...en foods Food Temperature C Water in the cavity em bossment ml Preheating time min Time min Shelf po sition Pizza 200 100 10 15 20 2 Croissant 160 50 10 15 30 2 Lasagne 200 200 10 35 45 2 Food regeneration Food Temperature C Water in the cavity em bossment ml Preheating time min Time min Shelf po sition White bread 110 100 10 15 25 2 Bread rolls 110 100 10 10 20 2 Homemade pizza 110 100 10 15 25 2...

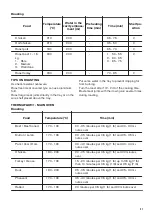
Page 21: ...1 2 2 3 of the cooking time Baste meat joints with their own juice several times during roasting THERMAFLOW MAIN OVEN Roasting Food Temperature C Time min Beef Beef boned 170 190 20 35 minutes per 0 5 kg 1 lb and 20 30 mi nutes over Mutton Lamb 170 190 20 35 minutes per 0 5 kg 1 lb and 25 35 mi nutes over Pork Veal Ham 170 190 30 40 minutes per 0 5 kg 1 lb and 30 40 mi nutes over Chicken 180 200 2...

Page 22: ...TOP OVEN Food Time min Shelf position Bacon Rashers 5 6 3 Chicken Joints 20 40 2 Chops Lamb 15 25 2 3 Chops Pork 20 25 2 3 Fish Whole Trout Makarel 10 12 2 Fillets Plaice Cod 4 6 2 Kebabs 12 18 2 3 Kidneys Lamb Pig 6 10 2 3 Sausages 20 30 3 Steaks Rare 4 6 3 Steaks Medium 6 8 3 Steaks Well Done 12 15 3 AIRFRY Bakery products Food Quantity Temperature C Time min Shelf posi tion Croissant frozen app...

Page 23: ...g Other Food Quantity Temperature C Time min Shelf posi tion Escalopes frozen approx 300 g 180 220 15 25 3 Shrimps in baking dough frozen approx 200 g 180 220 15 25 3 Calamari rings frozen approx 250 g 180 220 15 25 3 Chicken nuggets frozen approx 300 g 180 220 15 25 3 Fish fingers frozen approx 500 g 180 220 15 25 3 INFORMATION FOR TEST INSTITUTES Main oven Food Function Tempera ture C Time min A...

Page 24: ...rid 2 Fatless sponge cake 1 tin ø 26 cm on the grid Thermaflow 170 30 40 Grid 1 4 Shortbread Pastry strip Conventional Cooking 160 20 30 Tray 3 Shortbread Pastry strip Thermaflow 140 20 30 Tray 3 Shortbread Pastry strip Thermaflow 140 15 25 Tray 1 4 1 Add 150 ml of water to the cavity embossment Top oven Food Function Tempera ture C Time min Accessories Shelf posi tion Small cakes 20 small cakes p...

Page 25: ...e cavity with a soft cloth after each use Accessories Clean all accessories after each use and let them dry Use a soft cloth with warm water and a mild detergent Do not clean the accessories in a dishwasher except from AirFry tray Do not clean the non stick accessories using abrasive cleaner or sharp edged ob jects CLEANING THE AIRFRY TRAY 1 Put the AirFry tray on the baking tray 2 Pour hot water ...

Page 26: ...steam For the function Plus Steam we recommend to do the cleaning procedure at least every 5 10 cooking cycles 1 Put 250 ml of white vinegar into the cavity embossment at the bottom of the oven Use maximum 6 vinegar without any additives 2 Let the vinegar dissolve the residual limestone at the ambient temperature for 30 minutes 3 Clean the cavity with warm water and a soft cloth REMOVING THE SHELF...

Page 27: ...glass panels do the same steps in reverse Before you lower the trim attach the A trim part to the door Refer to the image REPLACING THE LAMP WARNING Risk of electric shock The lamp can be hot 1 Turn off the oven Wait until the oven is cold 2 Disconnect the oven from the mains 3 Put a cloth on the bottom of the cavity The back lamp The lamp glass cover is at the back of the cavity 1 Turn the lamp g...

Page 28: ... power cut Reset the clock Steam and condensation settle on the food and in the cavity of the oven You left the dish in the oven for too long Do not leave the dishes in the oven for longer than 15 20 minutes after the cooking process ends There is no good cooking per formance using the Plus Steam function You did not fill the cavity em bossment with water Refer to Activating the Plus Steam functio...

Page 29: ... electric hob 179 3 Wh kg EN 60350 2 Household electric cooking appliances Part 2 Hobs Methods for measuring performance HOB ENERGY SAVING You can save energy during everyday cooking if you follow below hints When you heat up water use only the amount you need If it is possible always put the lids on the cookware Before you activate the cooking zone put the cookware on it The cookware bottom shoul...

Page 30: ...or is closed properly when the oven operates Do not open the door too often during cooking Keep the door gasket clean and make sure it is well fixed in its position Use metal cookware to improve energy saving When possible do not preheat the oven before cooking Keep breaks between baking as short as possible when you prepare a few dishes at one time Cooking with fan When possible use the cooking f...

Page 31: ...Return the product to your local recycling facility or contact your municipal office 31 ...

Page 32: ...WWW ZANUSSI COM SHOP 867338808 A 082020 ...

Reviews: