background image

14

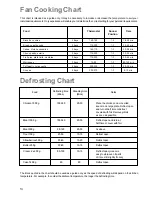
This chart is intended as a guide only. It may be necessary to increase or decrease the temperature to suit your

individual requirements. Only experience will enable you to determine the correct setting for your personal requirements.

Fan Cooking Chart

Food

Thermostat

Runner

Time

Position

Biscuits, cookies

2 trays

160-190

1-318-25 min.

Bread, yeast doughs

2 trays

170-200

1-33

5-45 min.

Cakes, Victoria sandwich

2 trays

160-170

1-320-28 min.

Choux pastry, eclairs

2 trays

170-200

1-3

30-35 min.

Fruit pies, plate tarts, crumbles

2 trays

170-200

1-350-65 min.

Meringues

2 trays

70-90

1-390-150 min.

Puff pastry, vol au vents

2 trays

200-230

1-3

20-35 min.

Scones

2 trays

200-210

1-38-12 min.

Defrosting Chart

Chicken 1000 g.

100-140

20-30

Place the chicken on an inverted

saucer on a large plate. Defrost open

and turn at half time or defrost

covered with foil. Remove giblets

as soon as possible.

Meat 1000 g.

100-140

20-30

Defrost open and turn at

half time or cover with foil

Meat 500 g.

90-120

20-30

As above

Trout 150 g.

23-35

10-15

Defrost open

Strawberries 300 g.

30-40

10-20

Defrost open

Butter 250 g.

30-40

10-15

Defrost open

Cream 2 x 200 g.

80-100

10-15

Defrost open (cream is

easy to whip even if parts

of it are still slightly frozen)

Cake 1400 g.

60

60

Defrost open

Food

Defrosting time

(Mins)

Standing time

(Mins)

Notes

The times quoted in the chart should be used as a guide only, as the speed of defrosting will depend on the kitchen

temperature. For example, the colder the ambient temperature, the longer the defrosting time.

Summary of Contents for ZCM 630

Page 1: ...INSTRUCTION BOOKLET GB Please read this instruction booklet before using the appliance MIXED FUEL COOKER ZCM 630 ...

Page 2: ...e improved by opening a window or increasing the extractor speed l Do not use this cooker if it is in contact with water Do not operate the cooker with wet hands l Ensure the control knobs are in the OFF position when not in use l Do not store flammable materials such as oven gloves tea towels etc in the drawer l When using other electrical appliances ensure the cable does not come into contact wi...

Page 3: ...ller Guide to Use the instructions The following symbols will be found in the text to guide you throughout the Instructions Safety Instructions Step by step instructions for an operation Hints and Tips Environmental information F Important Safety Information 2 Description of the Cooker 4 Control Panel 5 Using the Hob 6 Before the First Use of the Oven 7 Using the Oven 7 24 hour Clock and Timer 8 U...

Page 4: ...e Splash back A stainless steel splash back is supplied with the appliance This is meant to be fitted on the rear edge of the cooker s hob The splash back package is in the oven cavity 1 Unpack the splash back and dispose of the packaging with due regard to safety and the environment 2 Slide the two bayonets of the splash back into the relevant supports on the rear adge of the cooker s hob Shelf ...

Page 5: ...control knob auxiliary 7 Back right burner control knob semi rapid 8 Oven function control knob 9 Oven Thermostat control knob 10 24 hour clock and programmer The Oven Cavity Accessories Grill trivet Grill roasting pan Removable handles A U T O TIMER BACK LEFT FRONT LEFT FRONT RIGHT BACK RIGHT OVEN FUNCTION TEMPERATURE MAINS ON THERMOSTAT OVEN PROGRAMMER IGNITION 9 8 7 6 5 1 2 4 10 3 Grill element...

Page 6: ... mm 160 mm F If you use a saucepan which is smaller than the recommended size the flame will spread beyond the bottom of the vessel causing the handle to overheat Take care when frying food in hot oil or fat as the overheated splashes could easily ignite As soon as a liquid starts boiling turn down the flame so that it will barely keep the liquid simmering If the control knobs become difficult to ...

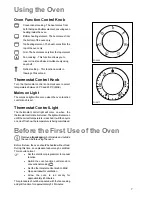
Page 7: ...Thermostat Control Light The thermostat control light will come on when the thermostatcontrolknobisturned Thelightwillremainon until the correct temperature is reached It will then cycle on and off to show the temperature is being maintained 0 FO 2542 FO 0877 1 0 0 1 5 0 2 0 0 5 0 Using the Oven Before the First Use of the Oven Remove all packaging both inside and outside the oven before using the...

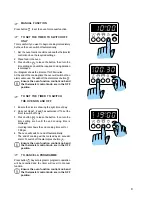
Page 8: ...lly operate the oven Before the oven can be operated the time of day must be set on the electronic timer Please note that this is a 24 hour clock For example 2pm is shown as 14 00 In case of loss of power all the settings time of day set program or program in operation will be cancelled When the power is restored the numbers on the display will flash and the timer has to be reset F TO SET THE TIME...

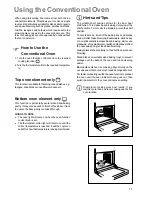
Page 9: ...the thermostat control knob are in the OFF position F TO SET THE TIMER TO SWITCH THE OVEN ON AND OFF 1 Ensure the clock is showing the right time of day 2 Carry out steps 1 2 and 3 as explained in To set the timer to switch off only 3 Press button release the button then turn the time setting knob until the end cooking time is displayed Our diagram shows the end cooking time set for 7 00 pm 4 The ...

Page 10: ...which will withstand temperaturesof250 C Baking trays oven dishes etc should not be placed directly against the grid covering the fan at the back of the oven or placed on the oven base Do not use baking trays larger than 30 cm x 35 cm 12 in x 14 in as they will restrict the circulation of heat and may affect performance Hints and Tips Storage Drawer Thestoragedrawerislocatedunderneaththeovencavity...

Page 11: ... knob is set l The thermostat control light will remain on until the correct temperature is reached It will then cycle on andofftoshowthattemperatureisbeingmaintained The middle shelf position allows for the best heat distribution To increase base browning simply lower the shelf position To increase top browning raise the shelf position The material and finish of the baking trays and dishes used w...

Page 12: ...hart Meat and Poultry Roasting Chart Meat Cooking Time Beef 20 35 mins per 1 2kg lb 20 35 mins Beef boned 25 35 mins per 1 2kg lb 25 35 mins Mutton and Lamb 25 35 mins per 1 2kg lb 25 35 mins Pork and Veal 30 40 mins per 1 2kg lb 30 40 mins Ham 30 40 mins per 1 2kg lb 30 40 mins Chicken 15 20 mins per 1 2kg lb 20 mins Turkey and Goose 15 20 mins per 1 2kg lb up to 3 5kg 7 5lb 15 mins Duck 25 35 mi...

Page 13: ... correct temperature is reached It will then cycle on and off to show that temperature is being maintained UsingtheFanOven Defrostingfunction Runner positions are not critical but make sure the shelves are evenly spread When cooking more than one dish in the fan oven place dishes centrally on the shelves rather than several dishes on one shelf When the oven is full you may need to allow slightly l...

Page 14: ...trays 200 210 1 3 8 12 min Defrosting Chart Chicken 1000 g 100 140 20 30 Place the chicken on an inverted saucer on a large plate Defrost open and turn at half time or defrost covered with foil Remove giblets as soon as possible Meat 1000 g 100 140 20 30 Defrost open and turn at half time or cover with foil Meat 500 g 90 120 20 30 As above Trout 150 g 23 35 10 15 Defrost open Strawberries 300 g 30...

Page 15: ... as fish liver and kidneys may be placed directly on the grill pan if preferred Food should be thoroughly dried before grilling to minimise splashing Brush lean meats and fish lightly with a little oil or melted butter to keep them moist during cooking Accompaniments such as tomatoes and mushrooms may be placed underneath the grid when grilling meats When toasting bread we suggest that the top run...

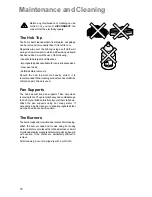
Page 16: ...become heavily soiled it is recommendedthatacleaningproductsuchasHobBrite or Bar Keepers Friend is used Pan Supports The hob has cast iron pan supports Take care when removingthem Theyarefairlyheavyandcoulddamage the hob or your kitchen furniture if you let them fall down Wash the pan supports using hot soapy water If necessary a paste cleaner or a soap impregnated steel wool pad can be used with ...

Page 17: ... Service Centre who will be pleased to advise further Oven Shelves To clean the oven shelves soak in warm soapy water and remove stubborn marks with a well wetted soap impregnated pad Rinse well and dry with a soft cloth Cleaning the Oven Oven Cavity The enamelled oven cavity is best cleaned whilst the oven is still warm Wipe the oven over with a soft cloth soaked in warm soapy water after each us...

Page 18: ... appliance is not working correctly please carry out the following checks before contacting your local Service Centre IMPORTANT If you call out an engineer to a fault listed below or to repair a fault caused by incorrect use or installation a charge will be made even if the appliance is under guarantee In the event of your appliance requiring service or if you wish to purchase spare parts please c...

Page 19: ...hose which are the subject to rental agreements Products of Zanussi manufacture which are not marketed by Zanussi European Guarantee If you should move to another country within Europe then your guarantee moves with you to your new home subject to the following qualifications The guarantee starts from the date you first purchased your product The guarantee is for the same period and to the same ex...

Page 20: ...N SALES Shetland ZE1 0PW SHETLAND Bolts Shetland Ltd 26 North Road Lerwick OWN SALES Shetland ZE1 0PE WHALSAY Leask Electrical Harisdale Symbister Whalsay OWN SALES Shetland ZE2 9AA NORTHERNIRELAND BELFAST Owenmore House M27 Kilwee Business Park Upper Dunmury Lane Belfast BT17 0HD WALES CARDIFF Guardian Industrial Estate M28 Clydesmuir Road Tremorfa Cardiff CF2 2QS CLYWD Unit 6 7 Coed Parc M14 Abe...

Page 21: ...ELD 284 Alma Road M49 Enfield London EN3 7BB GRAVESEND Unit B4 M57 Imperial Business Estate Gravesend Kent DA11 0DL HARPENDEN Unit 4 M46 Riverside Estate Coldharbour Lane Harpenden AL5 4UN LETCHWORTH 16 17 Woodside Ind Estate M50 Works Road Letchworth Herts SG6 1LA LONDON 2 4 Royal Lane M76 Yiewsley West Drayton Middlesex UB7 8DL MAIDENHEAD Reform Road M60 Maidenhead Berkshire SL6 8BY MOLESEY 10 I...

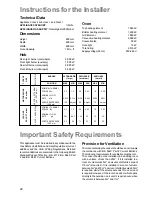
Page 22: ...0 20mbar Dimensions Height 900 mm Depth 600 mm Width 600 mm Oven Capacity 1 8 Cu ft Hob Rear right burner semi rapid 2 000 W Front right burner auxiliary 1 000 W Rear left burner semi rapid 2 000 W Front left burner ultra rapid 3 500 W Technical Data Instructions for the Installer Oven Top heating element 1 045 W Bottom heating element 1 250 W Grill Element 1 880 W Convection heating element 2 090...

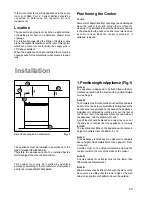
Page 23: ...ts providing that the lower edge of the wall cabinet is a minimum of 420mm above the worktop The appliance must be installed in accordance to the type X standard EN 60335 2 6 Therefore the appliance cannot be installed beside furniture higher than the cooker worktop This cooker must only be installed by qualified personnel according to the manufacturer s instructions and to the relevant British St...

Page 24: ...ement edge on back of cooker dimension A of Fig 2 Assemble upper bracket to lower bracket so that underside of bracket is dimension A 3mm 1 8 above floor level Re position cooker and check that top bracket engages into cooker back to a depth of 75mm 3 as shown in Fig 2 Should the stability bracket currently installed not allow the cooker to stand correctly ask the installer to replace it with the ...

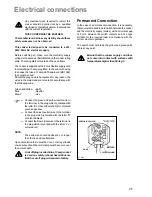
Page 25: ... in the plug which is marked with the letter E or the earth symbol or coloured green and yellow Connect the blue neutral wire to the terminal in the plug which is marked with the letter N or coloured black Connect the brown live wire to the terminal in the plug which is marked with the letter L or coloured red NOTE The earth wire should be about 2 cm longer than the live and neutral wires Upon com...

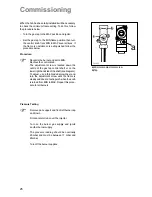
Page 26: ... screw is located down the centre of the gas tap control shaft or on the lower right hand side of the shaft see diagram To adjust use a thin bladed screwdriver and turn the adjustment screw until the flame is steady and does not extinguish when the knob is turned from MIN to MAX Repeat this proce dure for all burners Pressure Testing Remove pan support and front left burner cap and crown Fit manom...

Page 27: ...e gas rate is adjusted to suit Method Ensure that the gas taps are in the OFF position Isolate the hob from the electricity supply Remove all pan supports burner caps rings crowns and control knobs With the aid of a 7mm box spanner the burner injectors can then be unscrewed and replaced by the appropriate LPG injectors see Table page 22 TO ADJUST THE GAS RATE With the aid of a thin bladed screwdri...

Page 28: ...e Electrolux Group The world s No 1 choice The Electrolux Group is the world s largest producer of powered appliances for kitchen cleaning and outdoor use More than 55 Group products such as refrigerators cookers washing machines vacuum cleaners chain saws and lawn mowers are sold each year to a value of approx USD 14 billion in more than 150 countries around the world ...

Reviews: