


18
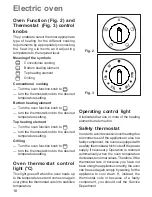
Oven Function (Fig. 2) and
Thermostat (Fig. 3) control
knobs
They enable to select the most appropriate
type of heating for the different cooking
requirements by appropriately connecting
the heating elements and adjusting
temperature to the required level.
Meaning of the symbols
Conventional cooking
Bottom heating element
Top heating element
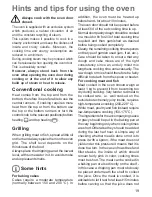
Grilling
Conventional cooking
— Turn the oven function knob to
,
— turn the thermostat knob to the desired
temperature setting.
Bottom heating element
— Turn the oven function knob to
,
— turn the thermostat knob to the desired
temperature setting.
Top heating element
— Turn the oven function knob to
,
— turn the thermostat knob to the desired
temperature setting.
Grilling
— Turn the oven function knob to
,
— turn the thermostat knob to the desired
temperature setting.
Oven thermostat control
light (°C)
This light goes off when the oven heats up
to the temperature set and comes on again
every time the thermostat cuts in to stabilize
temperature.
Electric oven
Operating control light
It indicates that one or more of the heating
elements are turned on.
Fig. 2
Fig. 3
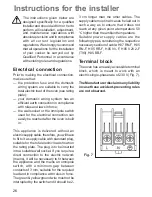
Safety thermostat
In order to avoid excessive overheating due
to incorrect use of the appliance or else to a
faulty component, the oven is equipped with
a safety thermostat which cuts off the power
supply if necessary. Operation is restored
automatically when the oven temperature
decreases to normal values. Therefore, if the
thermostat cuts in because you have not
been using the appliance correctly, the oven
can be used again simply by waiting for the
appliance to cool down. If, instead, the
thermostat cuts in because of a faulty
component, you should call the Service
Department.
0
50
MAX
100
150
200


